Watch Now This tutorial has a related video course created by the Real Python team. Watch it together with the written tutorial to deepen your understanding: Get Started With Django: Build a Portfolio App
Django is a fully featured Python web framework that you can use to build complex web applications. In this tutorial, you’ll jump in and learn Django by completing an example project. You’ll follow the steps to create a fully functioning web application and, along the way, learn what some of the most important features of the framework are and how they work together.
In this tutorial, you’ll:
- Learn about the advantages of using Django
- Investigate the architecture of a Django site
- Set up a new Django project with multiple apps
- Build models and views
- Create and connect Django templates
- Upload images into your Django site
At the end of this tutorial, you’ll have a working portfolio website to showcase your projects. If you’re curious about how the final source code looks, then you can click the link below:
Get Your Code: Click here to download the Python source code for your Django portfolio project.
Take the Quiz: Test your knowledge with our interactive “Get Started With Django: Build a Portfolio App” quiz. You’ll receive a score upon completion to help you track your learning progress:
Interactive Quiz
Get Started With Django: Build a Portfolio AppIn this quiz, you'll test your understanding of Django, a fully featured Python web framework. By working through this quiz, you'll revisit the steps to create a fully functioning web application and learn about some of Django's most important features.
Learn Django
There are endless web development frameworks out there, so why should you learn Django over any of the others? First of all, it’s written in Python, one of the most readable and beginner-friendly programming languages out there.
Note: This tutorial assumes an intermediate knowledge of the Python language. If you’re new to programming with Python, then check out the Python Basics learning path or the introductory course.
The second reason you should learn Django is the scope of its features. When building a website, you don’t need to rely on any external libraries or packages if you choose Django. This means that you don’t need to learn how to use anything else, and the syntax is seamless because you’re using only one framework.
There’s also the added benefit that Django is straightforward to update, since the core functionality is in one package. If you do find yourself needing to add extra features, there are several external libraries that you can use to enhance your site.
One of the great things about the Django framework is its in-depth documentation. It has detailed documentation on every aspect of Django and also has great examples and even a tutorial to get you started.
There’s also a fantastic community of Django developers, so if you get stuck, there’s almost always a way forward by either checking the docs or asking the community.
Django is a high-level web application framework with loads of features. It’s great for anyone new to web development due to its fantastic documentation, and it’s especially great if you’re also familiar with Python.
Understand the Structure of a Django Website
A Django website consists of a single project that’s split into separate apps. The idea is that each app handles a self-contained task that the site needs to perform. As an example, imagine an application like Instagram. There are several different tasks that it needs to perform:
- User management: Logging in and out, registering, and so on
- The image feed: Uploading, editing, and displaying images
- Private messaging: Sending messages between users and providing notifications
These are each separate pieces of functionality, so if this example were a Django site, then each piece of functionality would be a different Django app inside a single Django project.
Note: A Django project contains at least one app. But even when there are more apps in the Django project, you commonly refer to a Django project as a web app.
The Django project holds some configurations that apply to the project as a whole, such as project settings, URLs, shared templates and static files. Each application can have its own database, and it’ll have its own functions to control how it displays data to the user in HTML templates.
Each application also has its own URLs as well as its own HTML templates and static files, such as JavaScript and CSS.
Django apps are structured so that there’s a separation of logic. It supports the model-view-controller pattern, which is the architecture for most web frameworks. The basic principle is that each application includes three separate files that handle the three main pieces of logic separately:
- Model defines the data structure. This is usually the database description and often the base layer to an application.
- View displays some or all of the data to the user with HTML and CSS.
- Controller handles how the database and the view interact.
If you want to learn more about the MVC pattern, then check out Model-View-Controller (MVC) Explained – With Legos.
In Django, the architecture is slightly different. Although it’s based on the MVC pattern, Django handles the controller part itself. There’s no need to define how the database and views interact. It’s all done for you!
The pattern Django utilizes is called the model-view-template (MVT) pattern. All you need to do is add some URL configurations that the views map to, and Django handles the rest!
Note: The view and template in Django’s MVT pattern make up the view in the MVC pattern of other web frameworks.
A Django site starts off as a project, and you build it up with a number of applications that each handle separate functionality. Each app follows the model-view-template pattern.
Now that you’re familiar with the structure of a Django site, take a look at what you’re going to build!
Create the Example Portfolio Project With Django
Before you get started with any web development project, it’s a good idea to come up with a plan of what you’re going to build. In this tutorial, you’re going to build a Django project by example with the following apps:
-
Pages: This Django app will give you a first impression on how to display content to your website’s visitors. It’s a great starting point that you can enhance later to meet your own needs.
-
Projects: You can showcase previous web development projects here. You’ll build a gallery-style page with clickable links to projects that you’ve completed.
One of the great things about Django is that you don’t need to consider external Python packages because Django has so many features included. However, you’ll include Bootstrap to help you style the templates.
By building these two apps, you’ll learn the basics of Django models, view functions, templates, and the Django admin site. With knowledge of these features, you’ll be able to build loads more applications. You’ll also have the tools to learn even more and build sophisticated Django projects.
Set Up the Development Environment
Whenever you’re starting a new web development project, it’s a good idea to first set up your development environment. Create a new directory for your project to live in, and cd into it:
$ mkdir rp-portfolio
$ cd rp-portfolio
Once you’re inside the rp-portfolio/ directory, it’s a good idea to create a virtual environment to manage dependencies. Select your operating system below and use your platform-specific command to set up a virtual environment:
This command will create a venv folder in your working directory. Inside this directory, you’ll find several files, including a copy of the Python standard library. Later, when you install new dependencies, they’ll also live in this directory. Next, you need to activate the virtual environment by running the following command:
With the above commands, you create and activate a virtual environment named venv by using Python’s built-in venv module. The parenthetical (venv) in front of the prompt indicates that you’ve successfully activated the virtual environment.
Now that you’ve created and activated a virtual environment, it’s time to install Django. You can do this using pip:
(venv) $ python -m pip install Django
Once you’ve set up the virtual environment and installed Django, you can now dive into creating the application.
Start Your First Django Project
As you saw in the previous section, a Django web application is made up of a project and its constituent apps. Make sure you’re in the rp_portfolio/ directory, and that you’ve activated your virtual environment. Then run the following command to create the project:
(venv) $ django-admin startproject personal_portfolio .
Don’t forget to add the dot (.) at the end of the command above. The dot prevents Django from creating a nested project directory for your portfolio project. Otherwise, you’d end up with a personal_portfolio/ folder that contains a personal_portfolio/ subdirectory.
By running the startproject command as shown above, you’ve told Django to create one personal_portfolio/ folder in the rp-portfolio/ directory. Your directory structure should look something like this:
rp-portfolio/
│
├── personal_portfolio/
│   ├── __init__.py
│   ├── settings.py
│   ├── urls.py
│   └── wsgi.py
│
├── venv/
│
└── manage.py
Once your file structure is set up, you can now start the Django development server and check that your setup was successful. In the console, run the following command:
(venv) $ python manage.py runserver
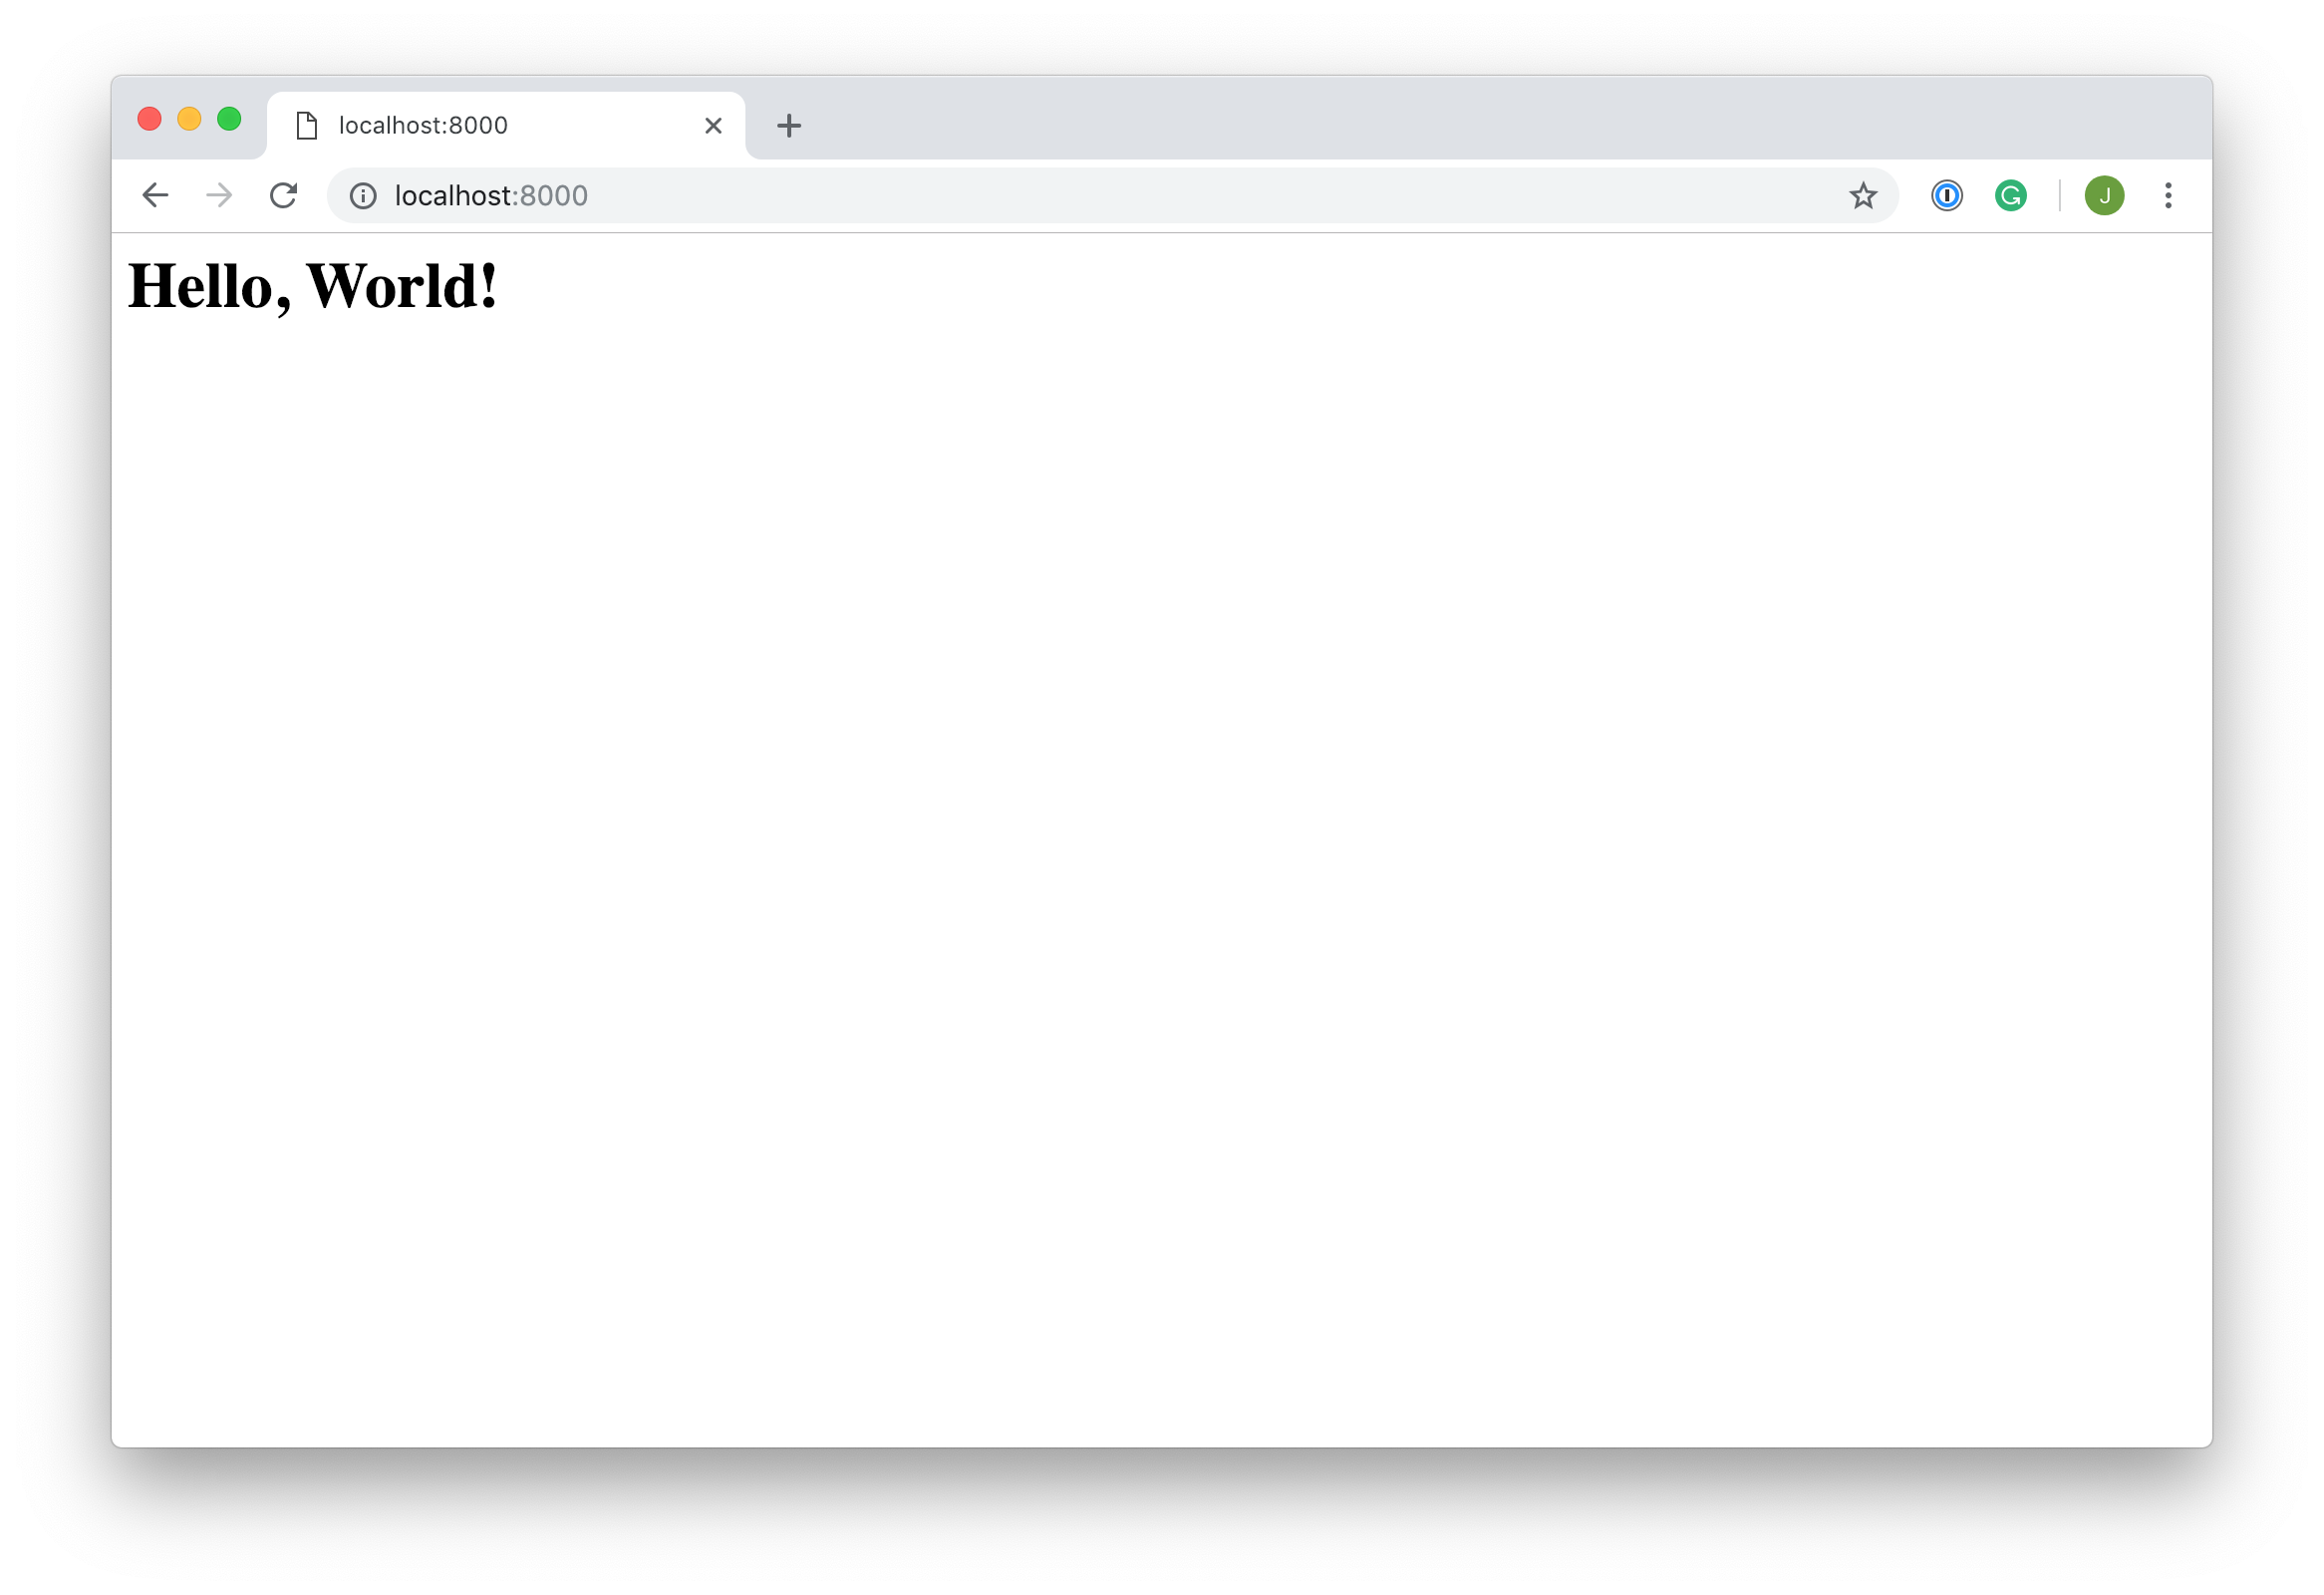
Then, in your browser, go to http://localhost:8000. You should see the following:
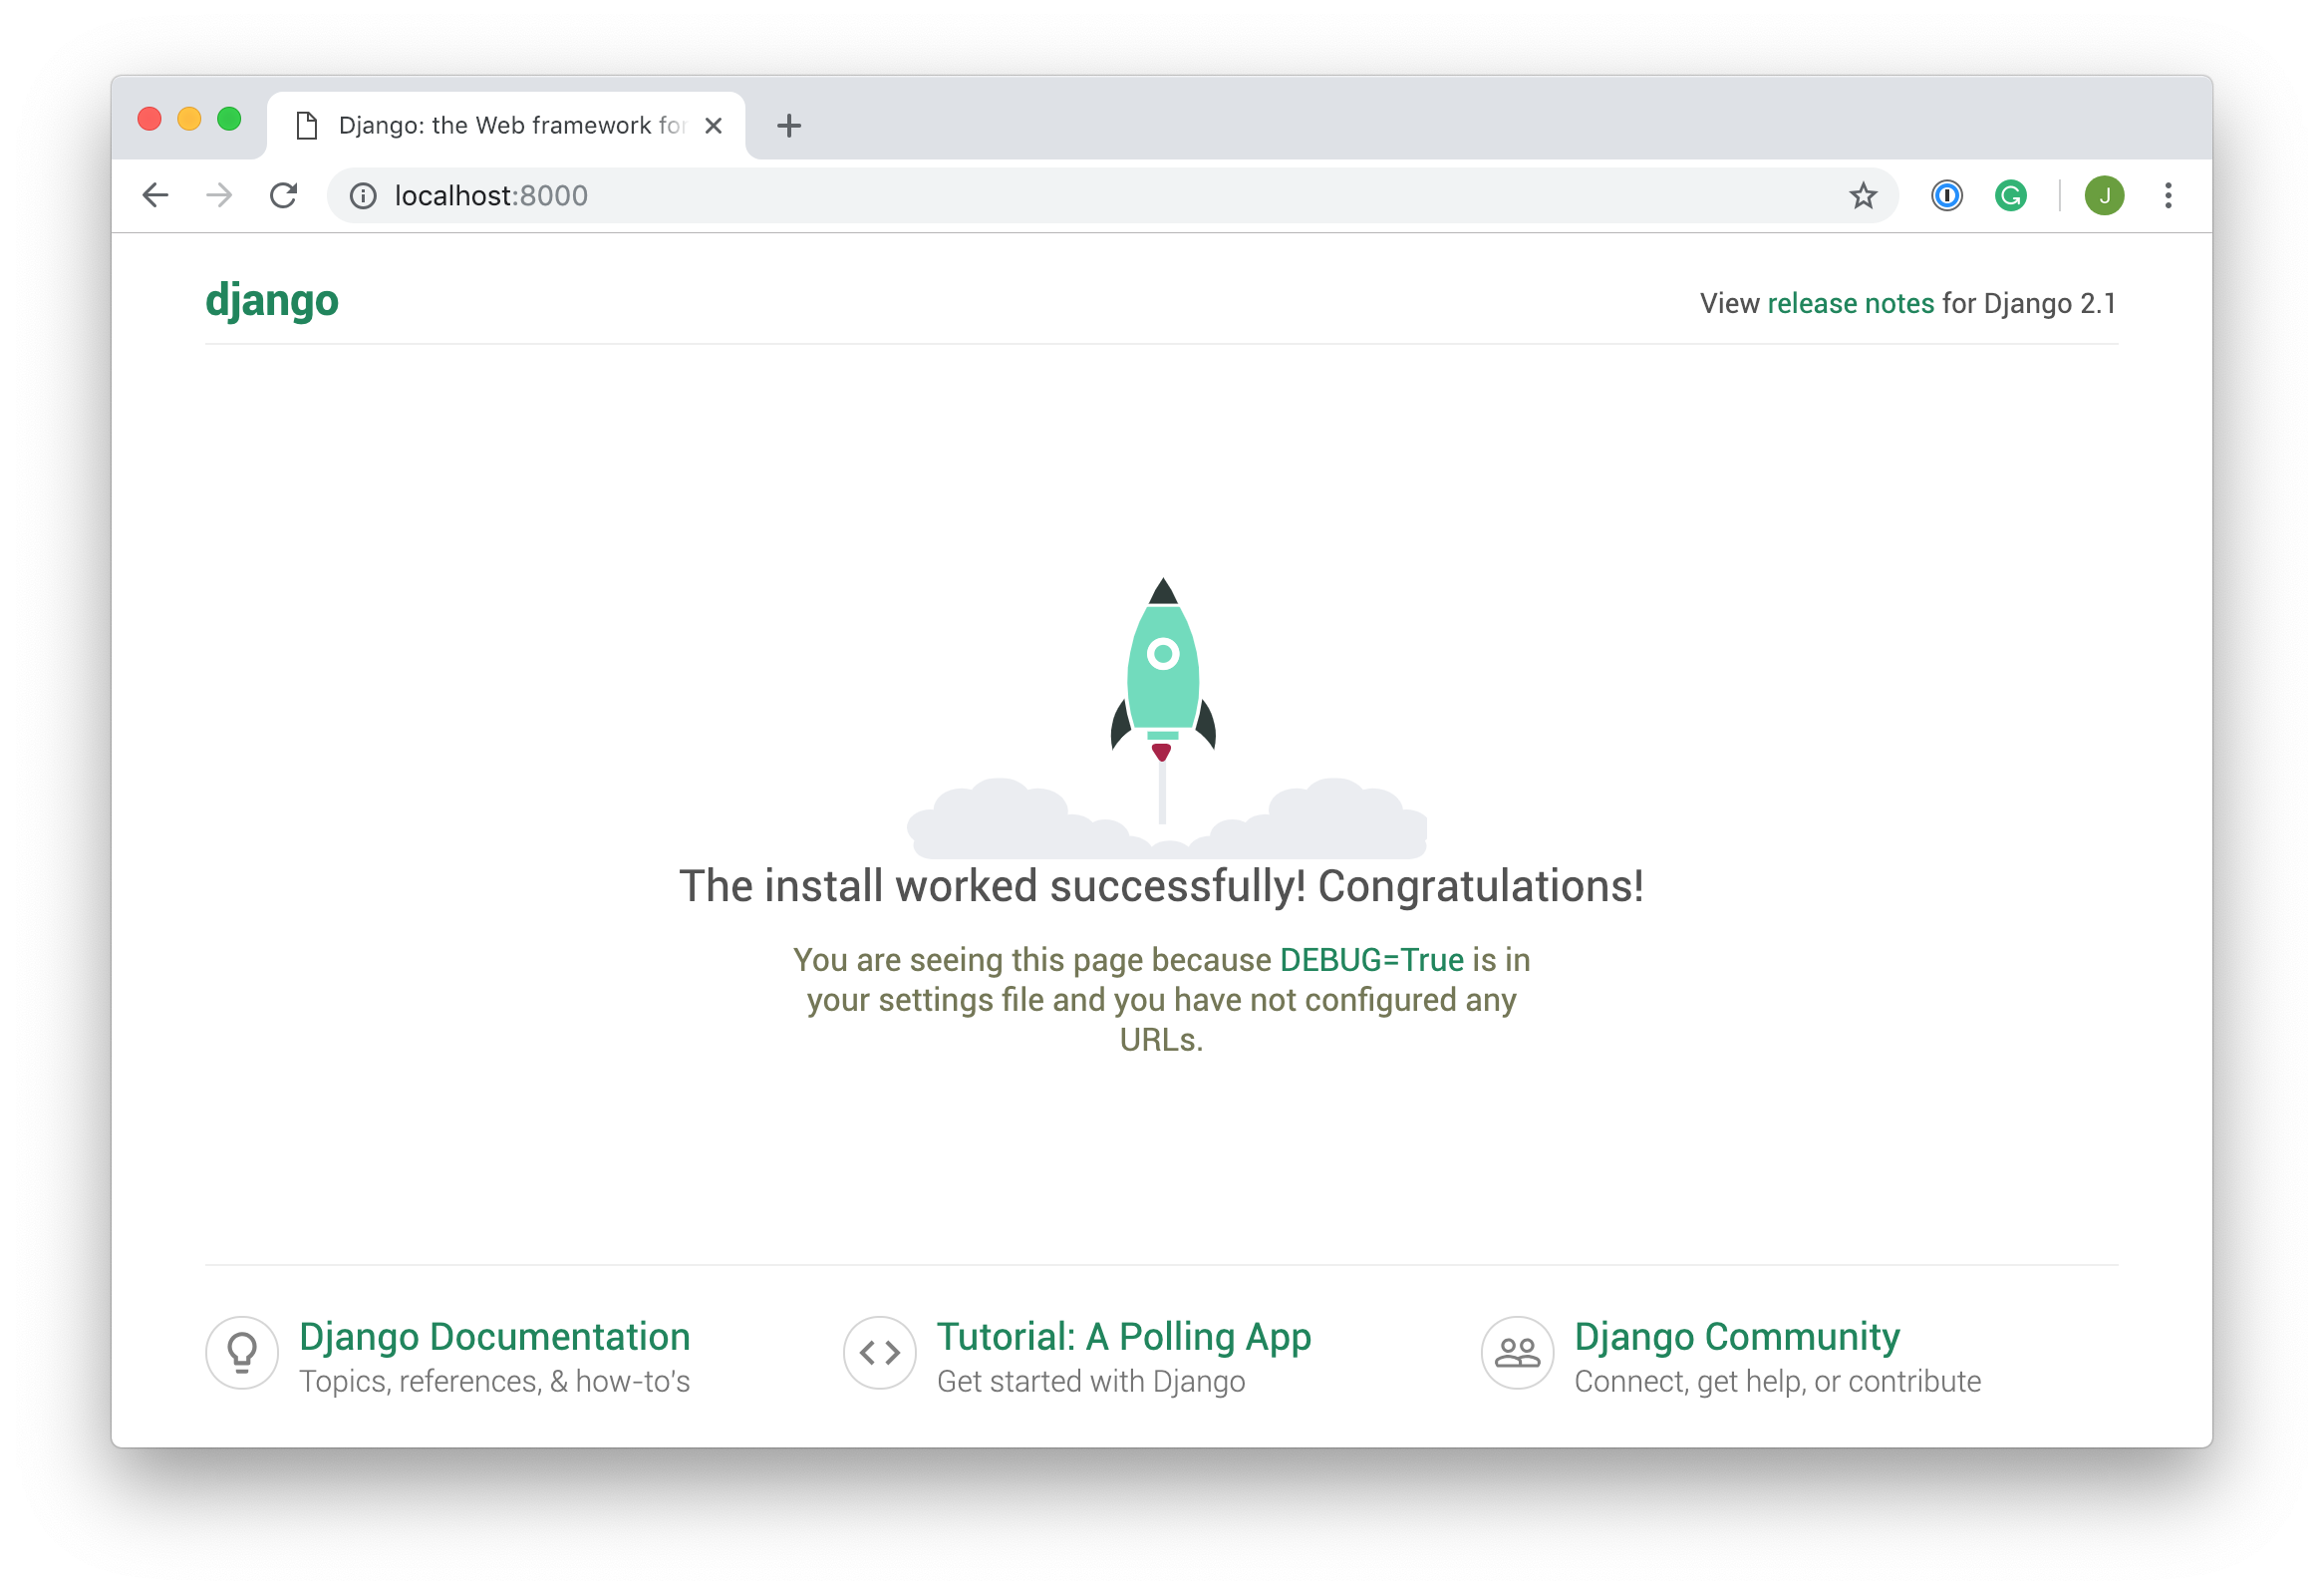
Congratulations, you’ve created a Django site! The next step is to create apps so that you can add views and functionality to your site.
Add the Pages App
For this part of the tutorial, you’ll create an app named pages, which will contain a basic welcome page for your personal portfolio site.
To create the app, run the following command:
(venv) $ python manage.py startapp pages
This will create a pages/ directory with several files:
__init__.pytells Python to treat the directory as a Python package.admin.pycontains settings for the Django admin pages.apps.pycontains settings for the application configuration.models.pycontains a series of classes that Django’s ORM converts to database tables.tests.pycontains test classes.views.pycontains functions and classes that handle what data is displayed in the HTML templates.
Once you’ve created the app, you need to install it in your project. In rp-portfolio/personal_portfolio/settings.py, add the following line of code under INSTALLED_APPS:
# personal_portfolio/settings.py

# ...

INSTALLED_APPS = [
    "pages.apps.PagesConfig",
    "django.contrib.admin",
    "django.contrib.auth",
    "django.contrib.contenttypes",
    "django.contrib.sessions",
    "django.contrib.messages",
    "django.contrib.staticfiles",
]

# ...
To include an app in your Django example project, you need to add a reference to its configuration class at the beginning of the INSTALLED_APPS list in settings.py.
By adding pages.apps.PagesConfig, you let Django know that the pages app that you just created exists. The next step is to create a view so that you can display something to a visitor.
Create a View
A view in Django is a collection of functions or classes inside the views.py file in an app’s directory. Each function or class handles the logic that the app processes each time the user visits a different URL.
Navigate to the views.py file in the pages/ directory and add the code below:
# pages/views.py

from django.shortcuts import render

def home(request):
    return render(request, "pages/home.html", {})
In this piece of code, you define a view function named home(). When you call this function, it’ll render an HTML file named home.html. That file doesn’t exist yet, but you’ll create it soon.
Note: A view function takes at least one argument, request. The request object is created whenever a page loads, and it contains metadata about the page request. You can learn more about request objects in the Django documentation on request and response objects.
Now that you’ve created the view function, you need to create the HTML template to display to the user. The render() function looks for HTML templates inside a directory called templates/ in your app directory. Since templates of different apps can have the same names, it’s also best practice to add a subdirectory with the app’s name inside the templates/ directory.
Create the template/ directory, a subdirectory named pages/, and subsequently a file named home.html inside it:
(venv) $ mkdir -p pages/templates/pages
(venv) $ touch pages/templates/pages/home.html
Once you’ve created the template folders and home.html, open the HTML file in your editor and add the following lines of code:
<!-- pages/templates/pages/home.html -->

<h1>Hello, World!</h1>
Now that you’ve created the template that your home() view function expects, you need to tell Django when to serve the view. For this, you need to create a new route to the project.
Add a Route
Next, you need to hook up an URL so that you can visit the page that you’ve just created. Your personal_portfolio/ folder contains a file named urls.py. In this file, you’ll include a URL configuration for the pages app:
# personal_portfolio/urls.py

from django.contrib import admin
from django.urls import path, include

urlpatterns = [
    path("admin/", admin.site.urls),
    path("", include("pages.urls")),
]
By adding another path() to urlpatterns, you create a new route for your Django example project.
Whenever you visit the root path of your project, the routes of the pages application will load. The pages.urls module doesn’t exist yet, so you’ll need to create it:
$ touch pages/urls.py
Inside urls.py, you need to import the path object as well as the app’s views module. Then you define a list of URL patterns that correspond to the various view functions. At the moment, you’ve only created one view function, so you only need to include one route:
# pages/urls.py

from django.urls import path
from pages import views

urlpatterns = [
    path("", views.home, name='home'),
]
You’re now all set to have a look the home page. If your Django development server isn’t running anymore, restart it with the command below:
(venv) $ python manage.py runserver
Then, visit http://localhost:8000 to check out the HTML template that you created:
Congratulations! You’ve created your first Django app and hooked it up to your project. The only problem now is that it doesn’t look very nice. In the next section, you’re going to add some styling to your project to make it prettier!
Add Bootstrap to Your App
If you don’t add any styling, then the app that you create isn’t going to look too nice. Instead of going into CSS styling with this tutorial, you’ll learn how to add an external CSS framework to your project. Using a CSS framework will allow you to improve the look of the site without too much effort.
One of the most popular CSS frameworks is Bootstrap:
Bootstrap is a free and open-source CSS framework directed at responsive, mobile-first front-end web development. It contains HTML, CSS and (optionally) JavaScript-based design templates for typography, forms, buttons, navigation, and other interface components.
Once added to a project, Bootstrap provides basic style definitions for all HTML elements. The result is a uniform appearance for prose, tables and form elements across web browsers. In addition, developers can take advantage of CSS classes defined in Bootstrap to further customize the appearance of their contents. (Source)
Before you get started with the Bootstrap styles, you’ll create a base template that you can import to each subsequent view. This template is where you’ll subsequently add the Bootstrap style imports.
Create a directory named templates/ in the rp-portfolio/ folder. Inside this new directory, create a file named base.html:
(venv) $ mkdir templates/
(venv) $ touch templates/base.html
As you saw previously, each Django project can consist of multiple apps that handle separate logic, and each app contains its own templates/ directory to store HTML templates related to the application. For templates that the whole project shares, it’s a good idea to create a templates/ directory in the root directory.
Instead of having to import Bootstrap styles into every app, you can create a template or set of templates that all the apps share. As long as Django knows to look for templates in this new shared directory, it can save a lot of repeated styles.
Inside base.html, add the following lines of code:
 1<!-- templates/base.html -->
 2
 3<!DOCTYPE html>
 4<html lang="en">
 5<head>
 6    <meta charset="utf-8">
 7    <title>{% block title %}My Personal Portfolio{% endblock title %}</title>
 8    <link
 9        href="https://cdn.jsdelivr.net/npm/bootstrap@5.3.1/dist/css/bootstrap.min.css"
10        rel="stylesheet"
11    >
12</head>
13<body class="container">
14{% block page_content %}{% endblock page_content %}
15</body>
16</html>
With the code above, you create the skeleton of a valid HTML document. You also add a link to the Bootstrap content delivery network (CDN) in lines 8 to 11. A link like this is all that you need to add external CSS styles to your project. All future templates that you create will extend base.html and inherit the Bootstrap styling on every page without having to import the styles again.
Another interesting bit in the base.html parent template is the use of {% block %} template tags in lines 7 and 14. With this template tag, you can define content blocks that you can use or override in child templates that extend the parent template.
To see this inheritance in action, you need to adjust the home.html template:
<!-- pages/templates/pages/home.html -->

{% extends "base.html" %}

{% block page_content %}
    <h1>Hello, World!</h1>
{% endblock page_content %}
To extend a parent template, you must use the {% extends %} tag at the beginning of a child template.
Note that you only override the page_content block but not the title block. If you don’t override a block of the parent template, then you display the content from the parent’s block in the child template.
Before you can see the inheritance and the new styled application in action, you need to tell your Django example project that base.html exists. The default settings register templates/ directories in each app, but not in the root directory itself. In personal_portfolio/settings.py, update TEMPLATES:
# personal_portfolio/settings.py

# ...

TEMPLATES = [
    {
        "BACKEND": "django.template.backends.django.DjangoTemplates",
        "DIRS": [
            BASE_DIR / "templates/",
        ],
        "APP_DIRS": True,
        "OPTIONS": {
            "context_processors": [
                "django.template.context_processors.debug",
                "django.template.context_processors.request",
                "django.contrib.auth.context_processors.auth",
                "django.contrib.messages.context_processors.messages",
            ]
        },
    }
]

# ...
You’ve already defined the constant BASE_DIR in settings.py, and it points to your project’s root directory. Next, you join the path with the forward slash operator (/) from pathlib to point to the templates/ directory and add it to the "DIRS" list.
Now, when you visit localhost:8000, you can see that the page has been formatted with slightly different styling. Thanks to Bootstrap, the styling should look similar even when you load the page in a different browser:
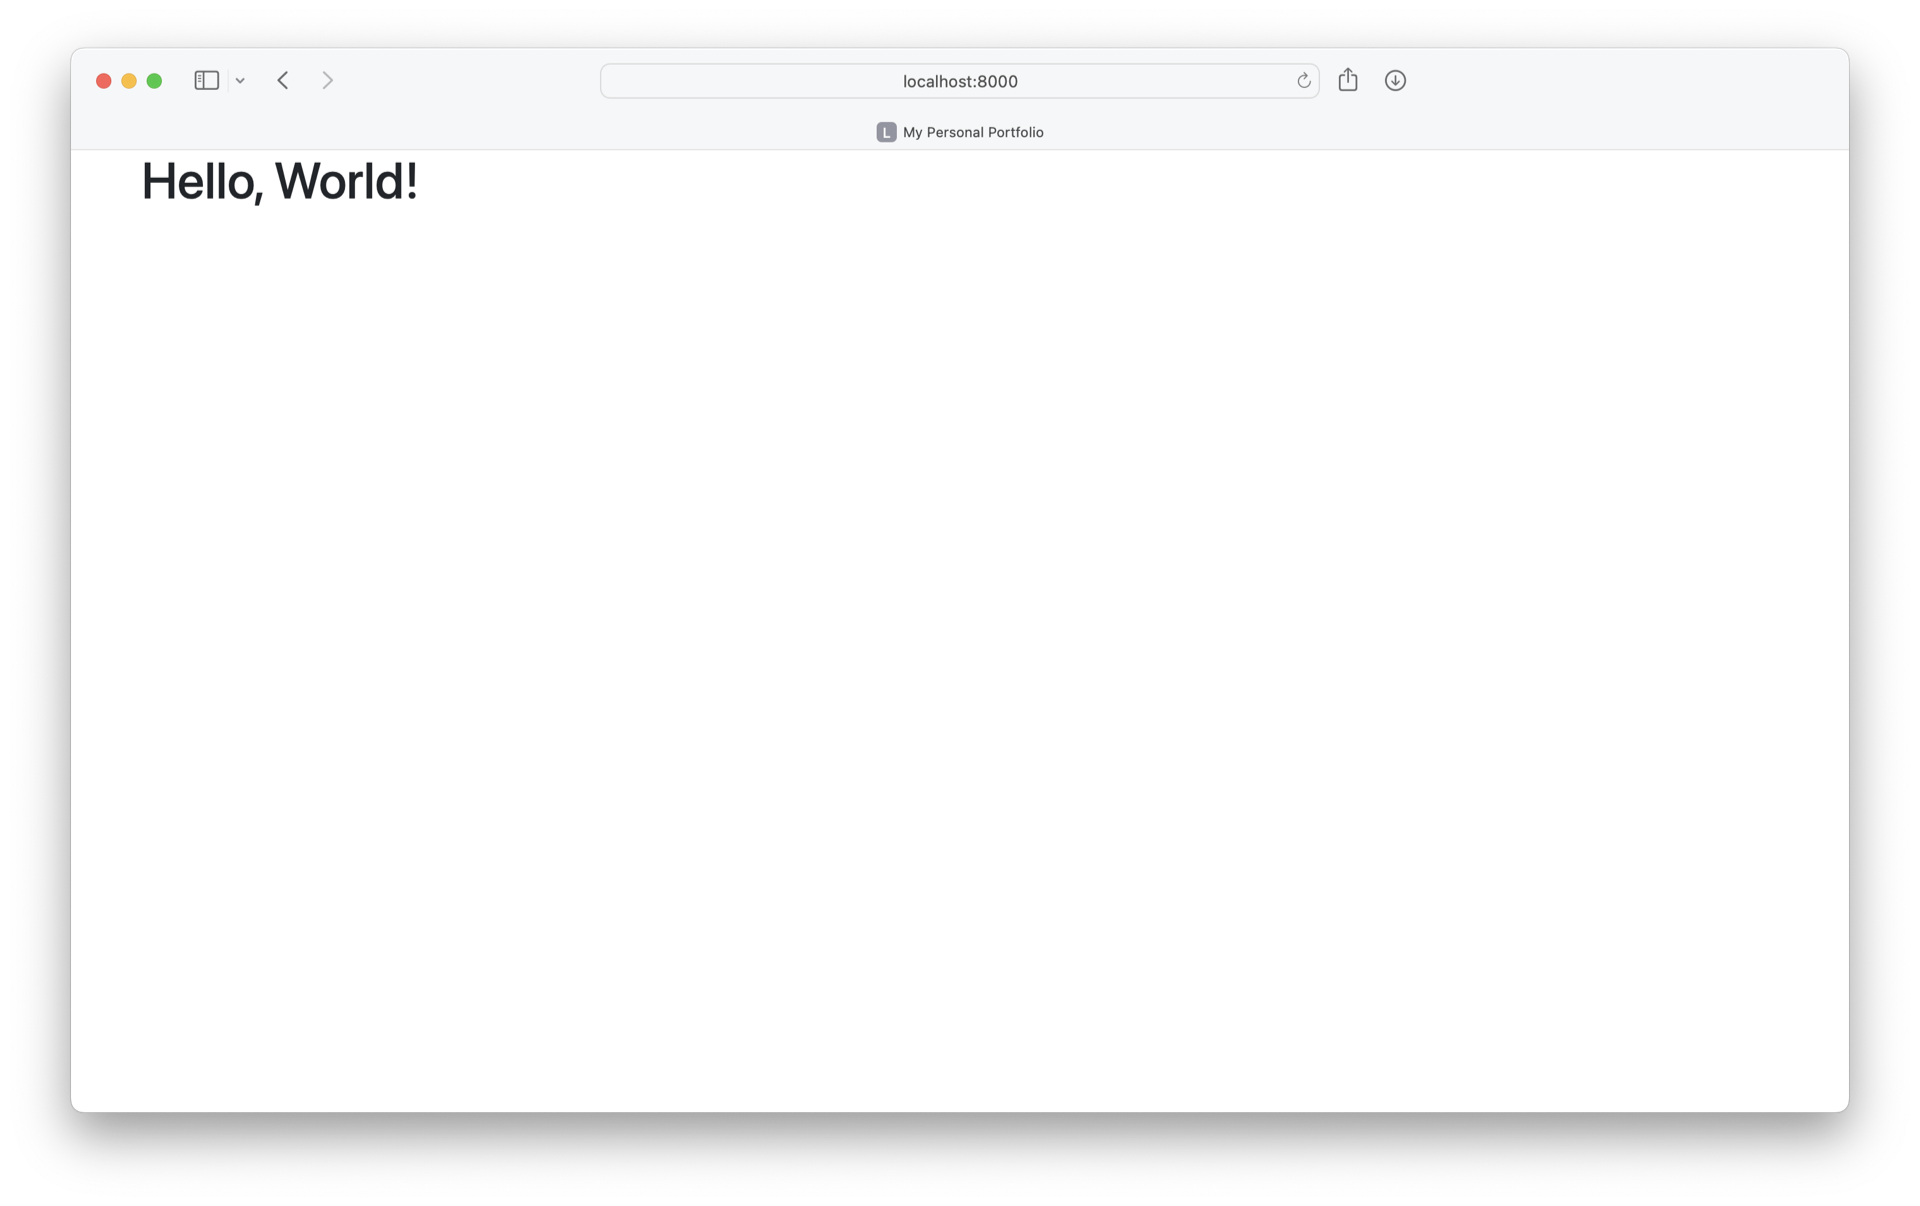
Here, you have the Hello, World! message that you defined in home.html, as well as the My Personal Portfolio title that you set in base.html. That means that the template inheritance works!
Whenever you want create templates or import scripts that you intend to use in all of your Django apps inside a project, you can add them to this project-level directory and extend them inside your app templates.
In this section, you learned how to create a Django app for basic pages. In the next section, you’ll create another application to showcase web development projects, and you’ll learn all about models in Django!
Add the Projects App
Any web developer looking to create a portfolio needs a way to show off projects that they’ve worked on. That’s what you’ll be building now. You’ll create another Django app named projects that will hold a series of sample projects that you want to display to the user. Users can click on projects and see more information about your work.
Make sure you’re in the rp-portfolio/ directory and run the following command in your console:
(venv) $ python manage.py startapp projects
This will create a directory named projects/. The files created are the same as those created when you set up the pages application.
Once you’ve created the projects app, you need to install it in your project. In rp-portfolio/personal_portfolio/settings.py, add the following line of code under INSTALLED_APPS:
# personal_portfolio/settings.py

# ...

INSTALLED_APPS = [
    "pages.apps.PagesConfig",
    "projects.apps.ProjectsConfig",
    "django.contrib.admin",
    "django.contrib.auth",
    "django.contrib.contenttypes",
    "django.contrib.sessions",
    "django.contrib.messages",
    "django.contrib.staticfiles",
]

# ...
That line of code means that your project now knows that the projects app exists. Next, you’re going to enhance the portfolio app and build your first Django model.
Define a Model
If you want to store data to display on a website, then you’ll need a database. Typically, if you want to create a database with tables that contain columns, you’ll need to use SQL to manage the database. But when you use Django, you don’t need to learn a new language because it has a built-in object relational mapper (ORM).
An ORM is a program that allows you to create classes that correspond to database tables. Class attributes correspond to columns, and instances of the classes correspond to rows in the database. So, instead of learning a whole new language to create your database and its tables, you can just write some Python classes.
When you’re using an ORM, the classes that represent database tables are referred to as models. In Django, they live in the models.py module of each Django app.
In your projects app, you’ll only need one table to store the different projects that you’ll display to the user. That means you’ll only need to create one model in models.py.
The model that you’ll create will be named Project and will have the following fields:
| Name | Description |
|---|---|
title |
A short string field to hold the name of your project |
description |
A larger string field to hold a longer piece of text |
technology |
A string field, but its contents will be limited to a select number of choices |
To create the Project model, you’ll create a new class in models.py and add the following fields:
# projects/models.py

from django.db import models

class Project(models.Model):
    title = models.CharField(max_length=100)
    description = models.TextField()
    technology = models.CharField(max_length=20)
Django models come with many built-in model field types. You’ve only used two in this model. You used CharField, which works for short strings and specifies a maximum length.
A TextField is similar to a CharField, but you can use it for longer text because it doesn’t have a maximum length limit.
Now that you’ve created your Project class, you need Django to create the database. By default, the Django ORM creates databases in SQLite, but you can use other databases that use the SQL language, such as PostgreSQL or MySQL, with the Django ORM.
To start the process of creating your database, you need to create a migration. A migration is a file containing a Migration class with rules that tell Django what changes need you’re making to the database. To create the migration, type the following command in the console, making sure that you’re in the rp-portfolio/ directory:
(venv) $ python manage.py makemigrations projects
Migrations for 'projects':
  projects/migrations/0001_initial.py
    - Create model Project
You should see that you’ve created migrations/ inside projects/, and it includes a file named 0001_initial.py. This file contains the instructions that Django should perform on the database.
Now that you’ve create a migration file, you need to apply the migrations from in the migrations file and create your database using the migrate command:
(venv) $ python manage.py migrate projects
Operations to perform:
  Apply all migrations: projects
Running migrations:
  Applying projects.0001_initial... OK
When running both the makemigrations and migrate commands, you added projects to your command. This tells Django to only look at models and migrations in the projects app.
If you run makemigrations and migrate without the projects flag, then all the migrations for all the default models in your Django projects will be created and applied because Django comes with several models already. This isn’t a problem, but for the purposes of this section, you don’t need the migrations for these models.
After running the migrations, you should see that there’s now a file named db.sqlite3 in rp-portfolio/. This is your database. You can now create rows in your table for the various projects that you want to show on your portfolio site.
Dive Into the Django Shell
To add new entries to your Project database table, you need to create instances of your Project class. For this, you’re going to use the Django shell.
The Django shell is similar to the Python shell but allows you to access the database and create entries. To access the Django shell, you use another Django management command:
(venv) $ python manage.py shell
Once you’ve accessed the shell, you’ll notice that the command prompt will change from the dollar sign ($) to three carets (>>>). You can then import your Project model:
>>> from projects.models import Project
Then, you can create an instance of the Project class in the Django shell:
>>> first_project = Project(
...     title="My First Project",
...     description="A web development project.",
...     technology="Django",
... )
>>> first_project.save()
After creating first_project as a new Project class instance, you need to run the .save() method.
This creates a new entry in your projects table and saves it to the database. Now you’ve added a project that you can display on your portfolio site later.
Go on and create two additional projects in the database:
>>> second_project = Project(
...     title="My Second Project",
...     description="Another web development project.",
...     technology="Flask",
... )
>>> second_project.save()
>>> third_project = Project(
...     title="My Third Project",
...     description="A final development project.",
...     technology="Django",
... )
>>> third_project.save()
>>> exit()
Once you’ve created these two additional projects, you run exit() to quit the Django shell. Next, you’ll take the projects that you added to the database and create a view function to display them to users on a web page.
Create the Views
Now that you’ve created the projects, you’ll need to create view functions to send the data from the database to the templates to display them on your portfolio site.
In the projects app, you’ll create two different views:
- An index view that shows a snippet of information about each project
- A detail view that shows more information on a particular topic
You’ll add both views to the views.py file that Django already created for you. Inside views.py, you’ll need to import the Project class from models.py and create a project_index() function that renders a template named project_index.html. In the body of this function, you’ll make a Django ORM query to select all the objects in the Project table:
 1# projects/views.py
 2
 3from django.shortcuts import render
 4from projects.models import Project
 5
 6def project_index(request):
 7    projects = Project.objects.all()
 8    context = {
 9        "projects": projects
10    }
11    return render(request, "projects/project_index.html", context)
There’s quite a lot going on in this code block, so you can break it down.
In line 7, you perform a query. A query is a command that allows you to create, retrieve, update, or delete objects (or rows) in your database. In this case, you’re retrieving all the objects in the projects table.
A database query returns a collection of all the objects that match the query, known as a Queryset. In this case, you want all the objects in the table, so it’ll return a collection of the three projects that you created before.
In line 8 of the code block above, you define a dictionary named context. The dictionary only has one entry, projects, to which you assign your Queryset containing all the projects. Django uses the context dictionary to send information to your template.
In line 11, you add context as an argument to render(). Any entries in the context dictionary are available in the template, as long as you pass the context argument to render(). You’ll need to create a context dictionary and pass it to render in each view function that you create.
Note: You also add the path to a template named project_index.html to render(). This template doesn’t exist yet. Don’t worry about that for now. You’ll create the templates in the next section.
Next, you’ll need to create the project_detail() view function. This function will have the primary key of the project that’s being viewed as an additional argument:
 1# projects/views.py
 2
 3# ...
 4
 5def project_detail(request, pk):
 6    project = Project.objects.get(pk=pk)
 7    context = {
 8        "project": project
 9    }
10    return render(request, "projects/project_detail.html", context)
In line 6, you perform another query. This query retrieves the project with a primary key, pk, equal to the function’s argument. The primary key is the unique identifier of a database entry. If you’re curious about the queries that you use in your views, then you can click the collapsible below to investigate them:
You used the Django shell before to create database entries. Another great use of the Django shell is to try out queries that you use in your views.
Just like before, start the Django shell with this command:
(venv) $ python manage.py shell
After the Django shell has started, you can import the Project model:
>>> from projects.models import Project
Then, you can try out the queries that you used in project_index():
>>> Project.objects.all()
<QuerySet [<Project: Project object (1)>, <Project: Project object (2)>, ...]>
The Queryset contains the three projects that you created before. The number between the parentheses is the primary key of the project. You can use the primary key to get the database entry of the corresponding project:
>>> project = Project.objects.get(pk=1)
>>> project.title
'My First Project'

>>> project.description
'A web development project.'
In the example above, you query the database to hand you the project with the primary key 1 and assign it to project. Once you’ve received the database entry, you can access its attributes, like .title or .description.
With the Django shell, you can verify that the Queryset of a view contains the expected objects. In project_detail(), you define context, to which you add the requested project.
In line 10 of views.py, you pass in a template named project_detail.html. That’s another template that doesn’t exist yet. Read on to create the templates for your portfolio project.
Craft the Templates
As you’ve already added Bootstrap styles to your project, you can use some pre-styled components to make the templates look nice. The two templates that you’ll work with are named project_index.html and project_detail.html. Create them inside a projects/ subfolder in the templates/ folder of your projects app:
(venv) $ mkdir -p projects/templates/projects
(venv) $ touch projects/templates/projects/project_index.html
(venv) $ touch projects/templates/projects/project_detail.html
For the project_index.html template, you’ll create a grid of Bootstrap cards, with each card displaying details of the project. Of course, the number of projects to display will vary over time.
So that you don’t have to create a bunch of Bootstrap cards by hand and hard-code all the information into each project, you’re going to use a feature of the Django template engine: for loops.
With this feature, you’ll be able to loop through all the projects and create a card for each one. The for loop syntax in the Django template engine is as follows:
{% for project in projects %}
   <!-- Do something -->
{% endfor %}
Now that you know how for loops work, create a new project_index.html file in projects/templates/projects. You can add the following code to it:
 1<!-- projects/templates/projects/project_index.html -->
 2
 3{% extends "base.html" %}
 4
 5{% block page_content %}
 6<h1>Projects</h1>
 7<div class="row">
 8{% for project in projects %}
 9    <div class="col-md-4">
10        <div class="card mb-2">
11            <div class="card-body">
12                <h5 class="card-title">{{ project.title }}</h5>
13                <p class="card-text">{{ project.description }}</p>
14                <a href="{% url 'project_detail' project.pk %}"
15                   class="btn btn-primary">
16                    Read More
17                </a>
18            </div>
19        </div>
20    </div>
21    {% endfor %}
22</div>
23{% endblock %}
There’s a lot of Bootstrap HTML here, which isn’t the focus of this tutorial. Feel free to copy and paste it for now, and take a look at the Bootstrap docs if you’re interested in learning more. Instead of focusing on the Bootstrap, you should notice a few points in this code block.
In line 3, you extend base.html as you did in the pages app.
On line 8, you begin the for loop, looping over all the projects that the context dictionary passes in.
Inside this for loop, you can access each individual project. To access the project’s attributes, you can use dot notation inside double curly brackets. For example, to access the project’s title, you use {{ project.title }}. You can use the same notation to access any of the project’s attributes.
The final point to note is the link on line 14. This is the link to the project_detail page. Accessing URLs in Django is similar to accessing static files. The code for the URL has the following form:
{% url '<url path name>' <view_function_arguments> %}
In this case, you’re linking a URL path named project_detail, which takes integer arguments corresponding to the pk number of the project.
Note: This URL doesn’t exist yet. You’ll create it in the next section.
With the project_index.html template in place, it’s time to create the project_detail.html template. The code for this template is below:
<!-- projects/templates/projects/project_detail.html -->

{% extends "base.html" %}

{% block page_content %}
<h1>{{ project.title }}</h1>
<div class="row">
    <div class="col-md-4">
        <h5>About the project:</h5>
        <p>{{ project.description }}</p>
        <br>
        <h5>Technology used:</h5>
        <p>{{ project.technology }}</p>
    </div>
</div>
{% endblock page_content %}
The code in this template has the same functionality as each project card in the project_index.html template. The only difference is the introduction of some Bootstrap columns.
Now that the views and templates exist, it’s time to add the corresponding routes so you can see the templates that you just created in action.
Add the Routes
Once you define view functions, you need to hook them up to URLs. Start by creating a projects/urls.py file to hold the URL configuration for the projects app. This file should contain the following code:
 1# projects/urls.py
 2
 3from django.urls import path
 4from projects import views
 5
 6urlpatterns = [
 7    path("", views.project_index, name="project_index"),
 8    path("<int:pk>/", views.project_detail, name="project_detail"),
 9]
In line 7, you connect the root URL of the projects app to the project_index view. It’s slightly more complicated to connect the project_detail view. You want the URL to be /1, /2, or whatever number corresponds to the primary key of the project. The pk value in the URL is the same pk passed to the view function, so you need to dynamically generate these URLs depending on which project you want to view. To do this, you use the <int:pk> notation.
This notation tells Django that the value passed in the URL is an integer, and its variable name is pk. That’s the parameter of your project_detail() view function.
With the routes of your projects app set up, you need to hook these URLs up to the main Django project’s URLs. In personal_portfolio/urls.py, add the following highlighted line of code:
# personal_portfolio/urls.py

from django.contrib import admin
from django.urls import path, include

urlpatterns = [
    path("admin/", admin.site.urls),
    path("", include("pages.urls")),
    path("projects/", include("projects.urls")),
]
This line of code includes all the URLs in the projects app that include the prefix projects/. There are now two full URLs that you can access with your project.
If you start the Django server and visit http://localhost:8000/projects, then you should see something like this:

If you click a link to a project or visit http://localhost:8000/projects/1 directly, then you’ll see the detail page for that first project you created.
It’s cool to see the projects listed and visit their detail pages. However, a portfolio without images is a bit dull. In the next section, you’ll improve your Portfolio project to conveniently update projects and set the stage to add images to them.
Leverage the Django Admin Site
You may have already noticed that Django reminded you that there were some unapplied migrations when you were running the Django development server.
Now it’s time to finally apply these already-existing migrations:
(venv) $ python manage.py migrate
Operations to perform:
  Apply all migrations: admin, auth, contenttypes, projects, sessions
Running migrations:
  Applying contenttypes.0001_initial... OK
  Applying auth.0001_initial... OK
  Applying admin.0001_initial... OK
  Applying admin.0002_logentry_remove_auto_add... OK
  Applying admin.0003_logentry_add_action_flag_choices... OK
  Applying contenttypes.0002_remove_content_type_name... OK
  Applying auth.0002_alter_permission_name_max_length... OK
  Applying auth.0003_alter_user_email_max_length... OK
  Applying auth.0004_alter_user_username_opts... OK
  Applying auth.0005_alter_user_last_login_null... OK
  Applying auth.0006_require_contenttypes_0002... OK
  Applying auth.0007_alter_validators_add_error_messages... OK
  Applying auth.0008_alter_user_username_max_length... OK
  Applying auth.0009_alter_user_last_name_max_length... OK
  Applying auth.0010_alter_group_name_max_length... OK
  Applying auth.0011_update_proxy_permissions... OK
  Applying auth.0012_alter_user_first_name_max_length... OK
  Applying sessions.0001_initial... OK
Looking at the list of applied migrations gives you an impression about the features that Django already comes packed with. For example, you already have the authorization of users and the Django admin site.
To access the Django admin site, you must create an admin account for yourself first:
(venv) $ python manage.py createsuperuser
Username (leave blank to use 'root'): admin
Email address: admin@example.com
Password: RealPyth0n
Password (again): RealPyth0n
Superuser created successfully.
Running the createsuperuser management command will prompt you to choose a username, provide an email address, and set a password. Use your own data for these fields and make sure to remember them.
Start the Django development server again, visit http://localhost:8000/admin, and log in with your credentials:
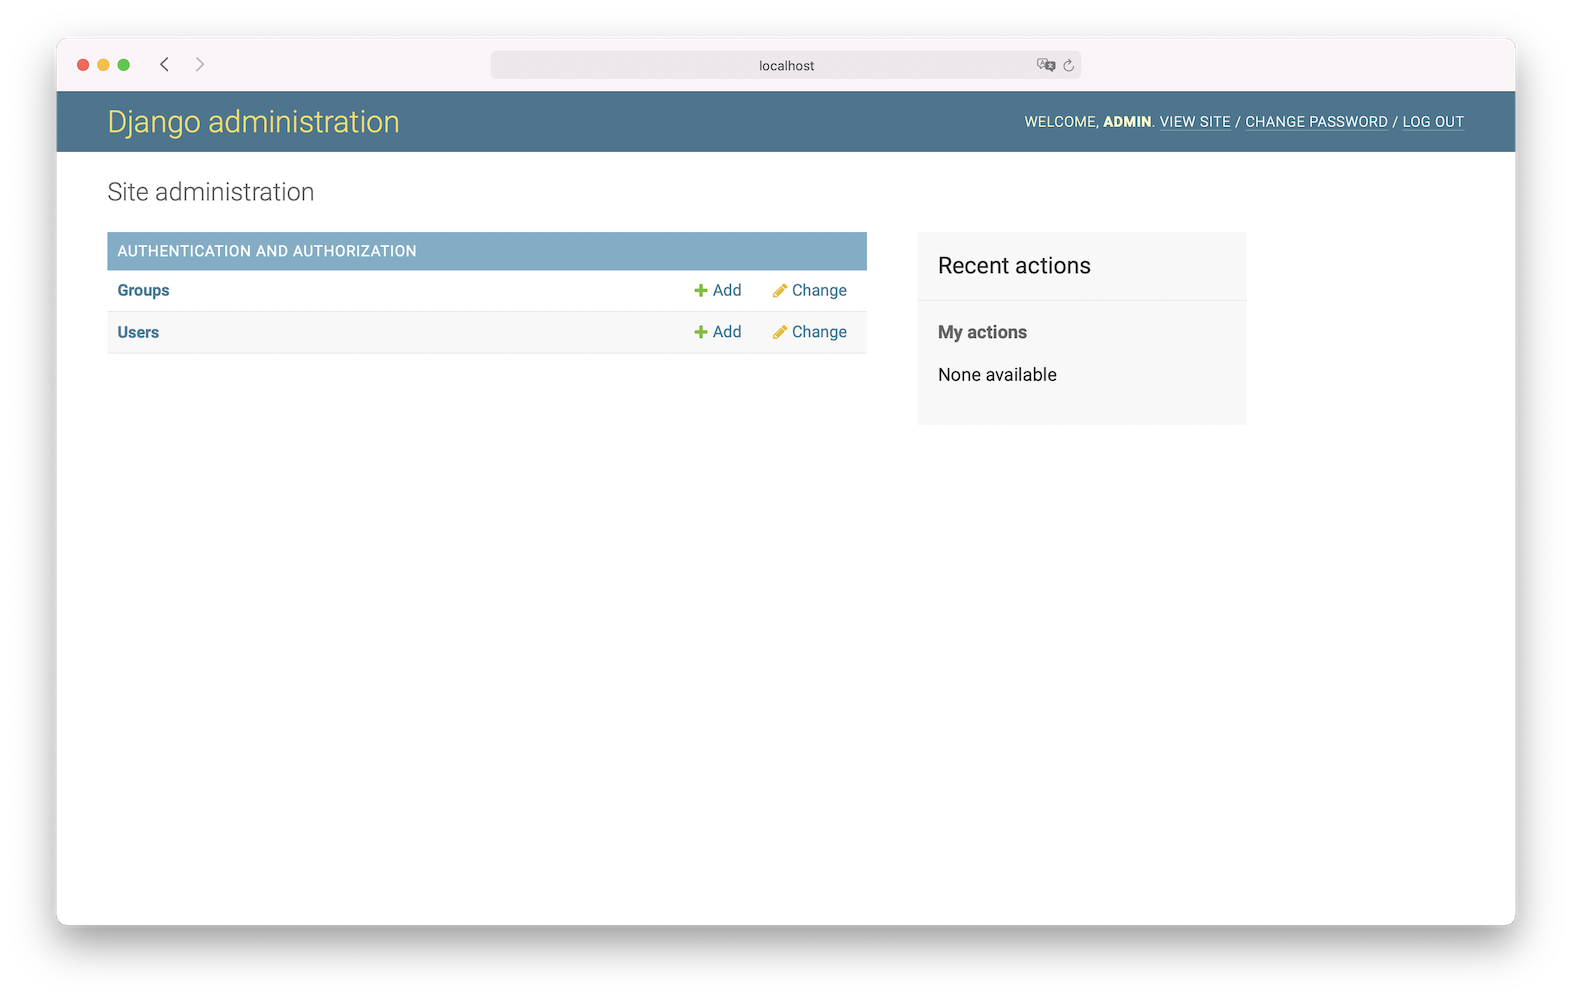
This is your very own admin area! With just a few adjustments, it gives you the ability to manage your portfolio projects from the comfort of your browser window instead of the Django shell.
To access your Project model in the Django admin site, you need to register the model first. Open the admin.py file of your projects app and add the code below:
# projects/admin.py

from django.contrib import admin
from projects.models import Project

class ProjectAdmin(admin.ModelAdmin):
    pass

admin.site.register(Project, ProjectAdmin)
When you visit http://localhost:8000/admin again, you can spot that your projects are displayed on the admin site.
Feel free to change any existing projects or add new ones. Once you’re ready, read on to learn how to add images to your project.
Upload Images
It’s a good idea to promote your projects with images to grab the attention of your visitors. To do so, you’ll add a new field to the Project model and upload images in the Django admin site.
Start by opening models.py and adding an image field to it:
# projects/models.py

from django.db import models

class Project(models.Model):
    title = models.CharField(max_length=100)
    description = models.TextField()
    technology = models.CharField(max_length=20)
    image = models.FileField(upload_to="project_images/", blank=True)
In your Project model, you define a FileField with a subfolder named project_images/. That’s where Django should store the images when you upload them.
You also set blank to True. That way, it’s okay if a project doesn’t contain a picture.
Note: You could be even more explicit and use an ImageField for your images. If you do so, then you need to install pillow into your development environment first.
Django constructs the path to your upload folder using the MEDIA_ROOT setting and the upload_to value. To collect all the images in an uploads/ folder and serve them with a media/ URL, add these two lines to settings.py:
# personal_portfolio/settings.py

# ...

MEDIA_ROOT = BASE_DIR / "uploads/"
MEDIA_URL = "media/"
The MEDIA_ROOT setting defines the folder that will store the media files in your file system. MEDIA_URL is the user-facing URL for the media folder that you present to visitors.
To successfully serve media files, you also need to register the static routes to your media files in urls.py inside personal_portfolio/:
# personal_portfolio/urls.py

from django.contrib import admin
from django.urls import path, include
from django.conf import settings
from django.conf.urls.static import static

urlpatterns = [
    path("admin/", admin.site.urls),
    path("", include("pages.urls")),
    path("projects/", include("projects.urls")),
] + static(settings.MEDIA_URL, document_root=settings.MEDIA_ROOT)
Since you made some changes to your Django model, you must create a new migration and then migrate the changes:
(venv) $ python manage.py makemigrations projects
Migrations for 'projects':
  projects/migrations/0002_project_image.py
    - Add field image to project

(venv) $ python manage.py migrate projects
Operations to perform:
  Apply all migrations: projects
Running migrations:
  Applying projects.0002_project_image... OK
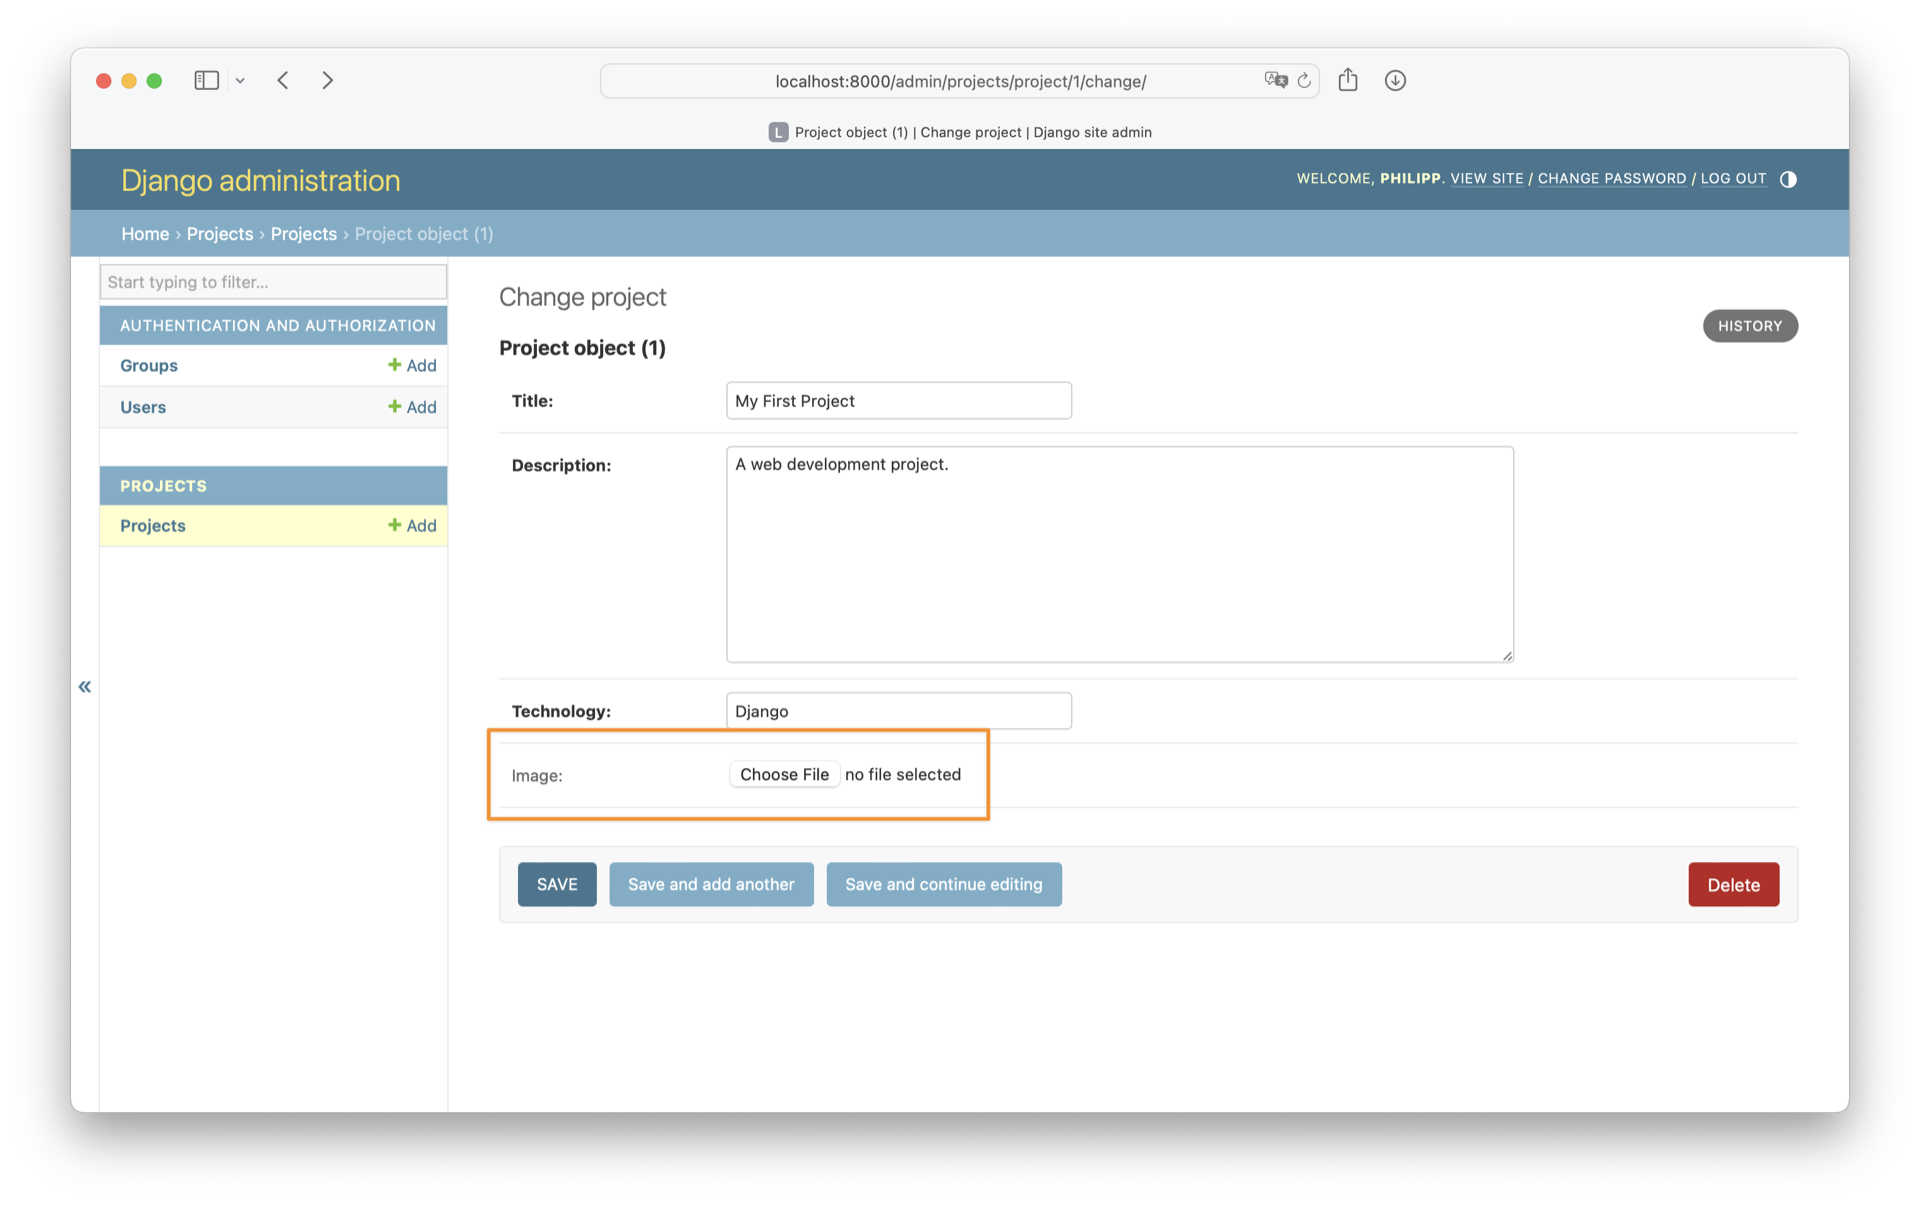
Visit http://localhost:8000/admin and go to Projects. When you click on a project, you’ll see the new Image field and the option to choose a file:
Upload an image for each of your projects. If you don’t have images at hand, then you can click the link below and download the images that this tutorial uses:
Get Your Code: Click here to download the Python source code for your Django portfolio project.
Once all your projects contain images, you can go ahead and add them to your templates. Start with project_index.html:
 1<!-- projects/templates/projects/project_index.html -->
 2
 3{% extends "base.html" %}
 4
 5{% block page_content %}
 6<h1>Projects</h1>
 7<div class="row">
 8{% for project in projects %}
 9    <div class="col-md-4">
10        <div class="card mb-2">
11            {% if project.image %}
12                <img class="card-img-top" src="{{ project.image.url }}">
13            {% endif %}
14            <div class="card-body">
15                <h5 class="card-title">{{ project.title }}</h5>
16                <p class="card-text">{{ project.description }}</p>
17                <a href="{% url 'project_detail' project.pk %}"
18                   class="btn btn-primary">
19                    Read More
20                </a>
21            </div>
22        </div>
23    </div>
24    {% endfor %}
25</div>
26{% endblock %}
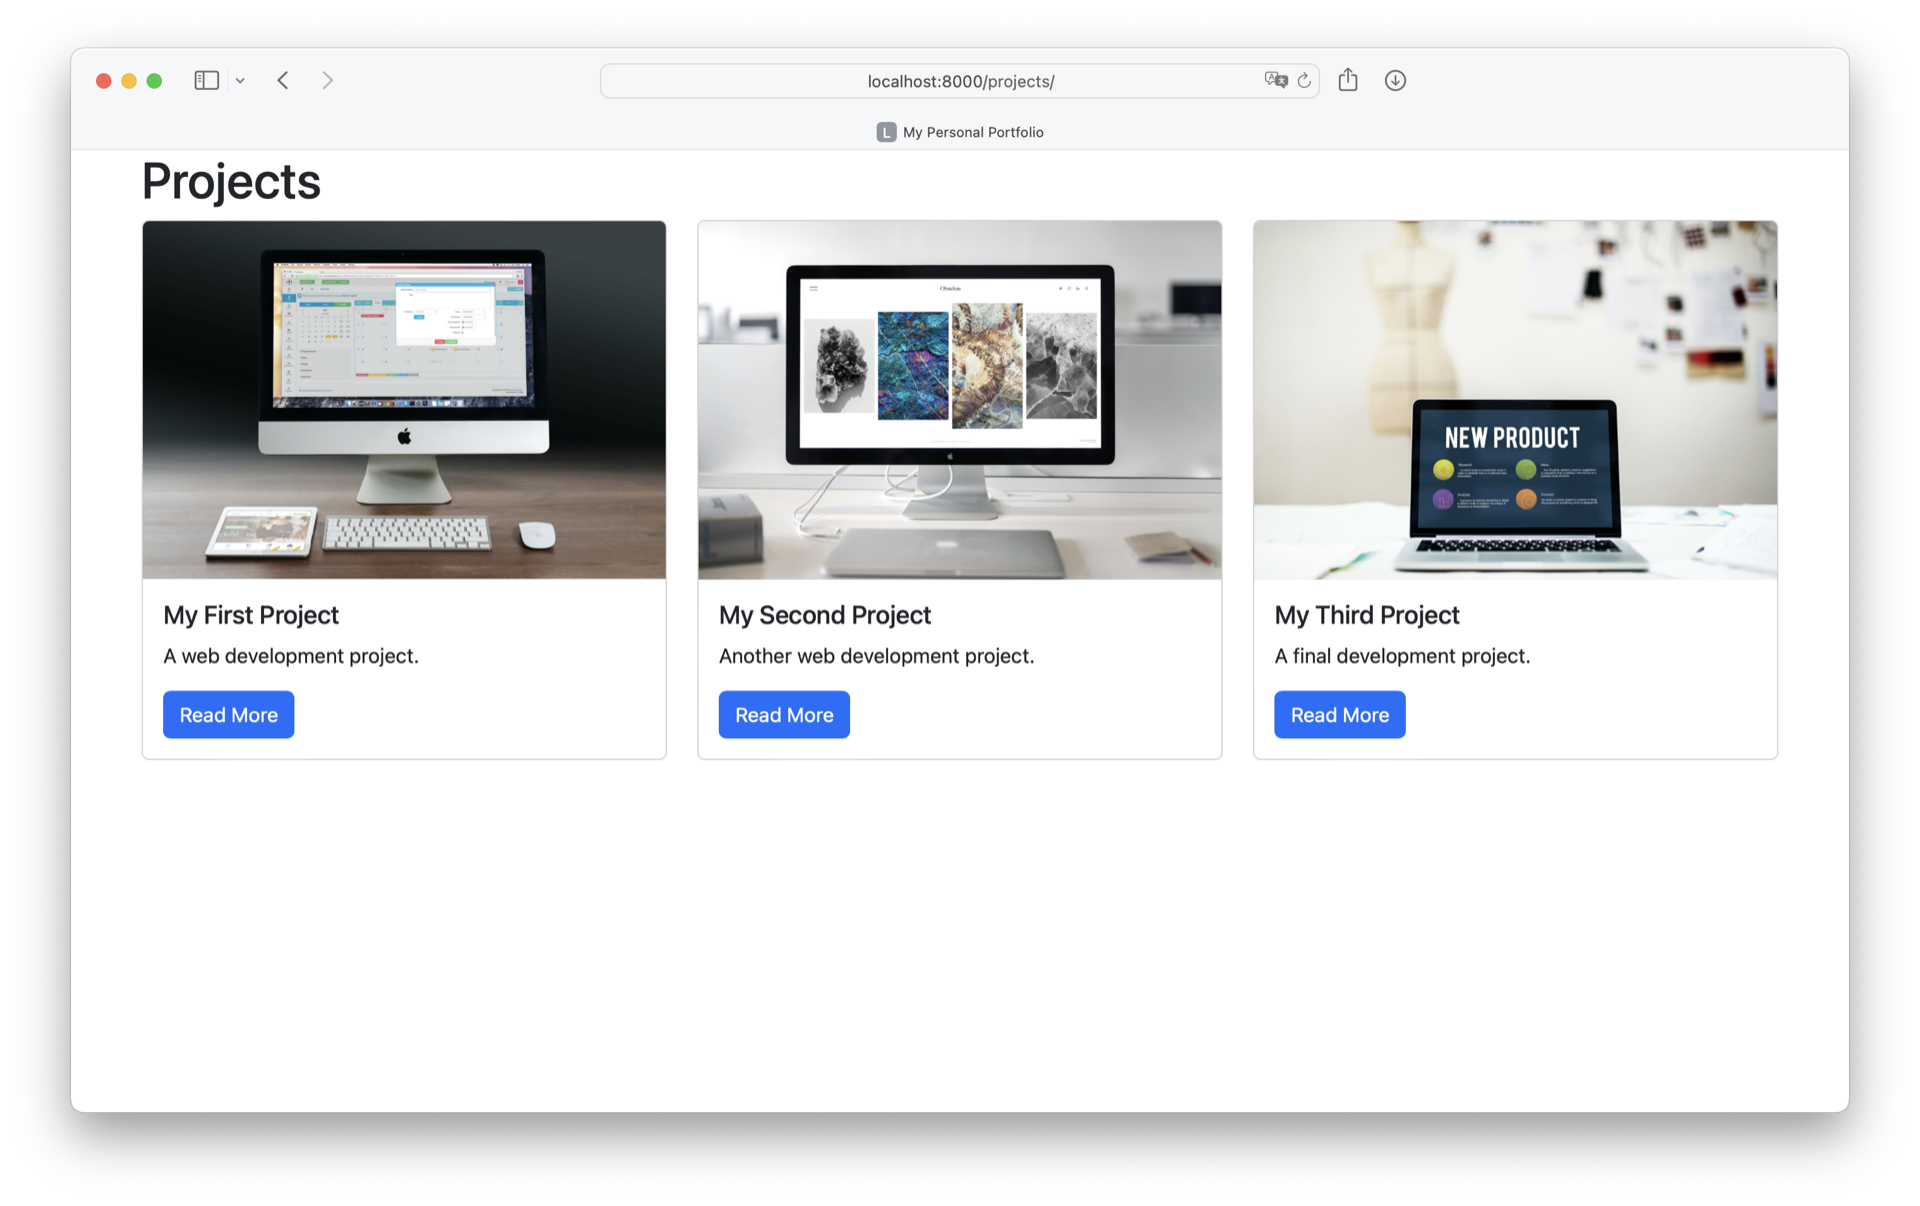
In lines 11 to 13, you’re checking if a project contains an image. If a project image exists, then you load the image URL and show the image to the visitor. Go to http://localhost:8000/projects/ and check it out for yourself:
Finally, you can add the image to the project_detail.html template. Just like before, you’ll wrap the image tag in an if condition:
<!-- projects/templates/projects/project_detail.html -->

{% extends "base.html" %}

{% block page_content %}
<h1>{{ project.title }}</h1>
<div class="row">
    <div class="col-md-8">
        {% if project.image %}
            <img src="{{ project.image.url }}" width="100%">
        {% endif %}
    </div>
    <div class="col-md-4">
        <h5>About the project:</h5>
        <p>{{ project.description }}</p>
        <br>
        <h5>Technology used:</h5>
        <p>{{ project.technology }}</p>
    </div>
</div>
{% endblock page_content %}
With the help of another HTML element and a Bootstrap column class you place an image to the left of the project information. You can see the layout in action when you visit a project’s detail page. For example, take a look at http://localhost:8000/projects/1/:
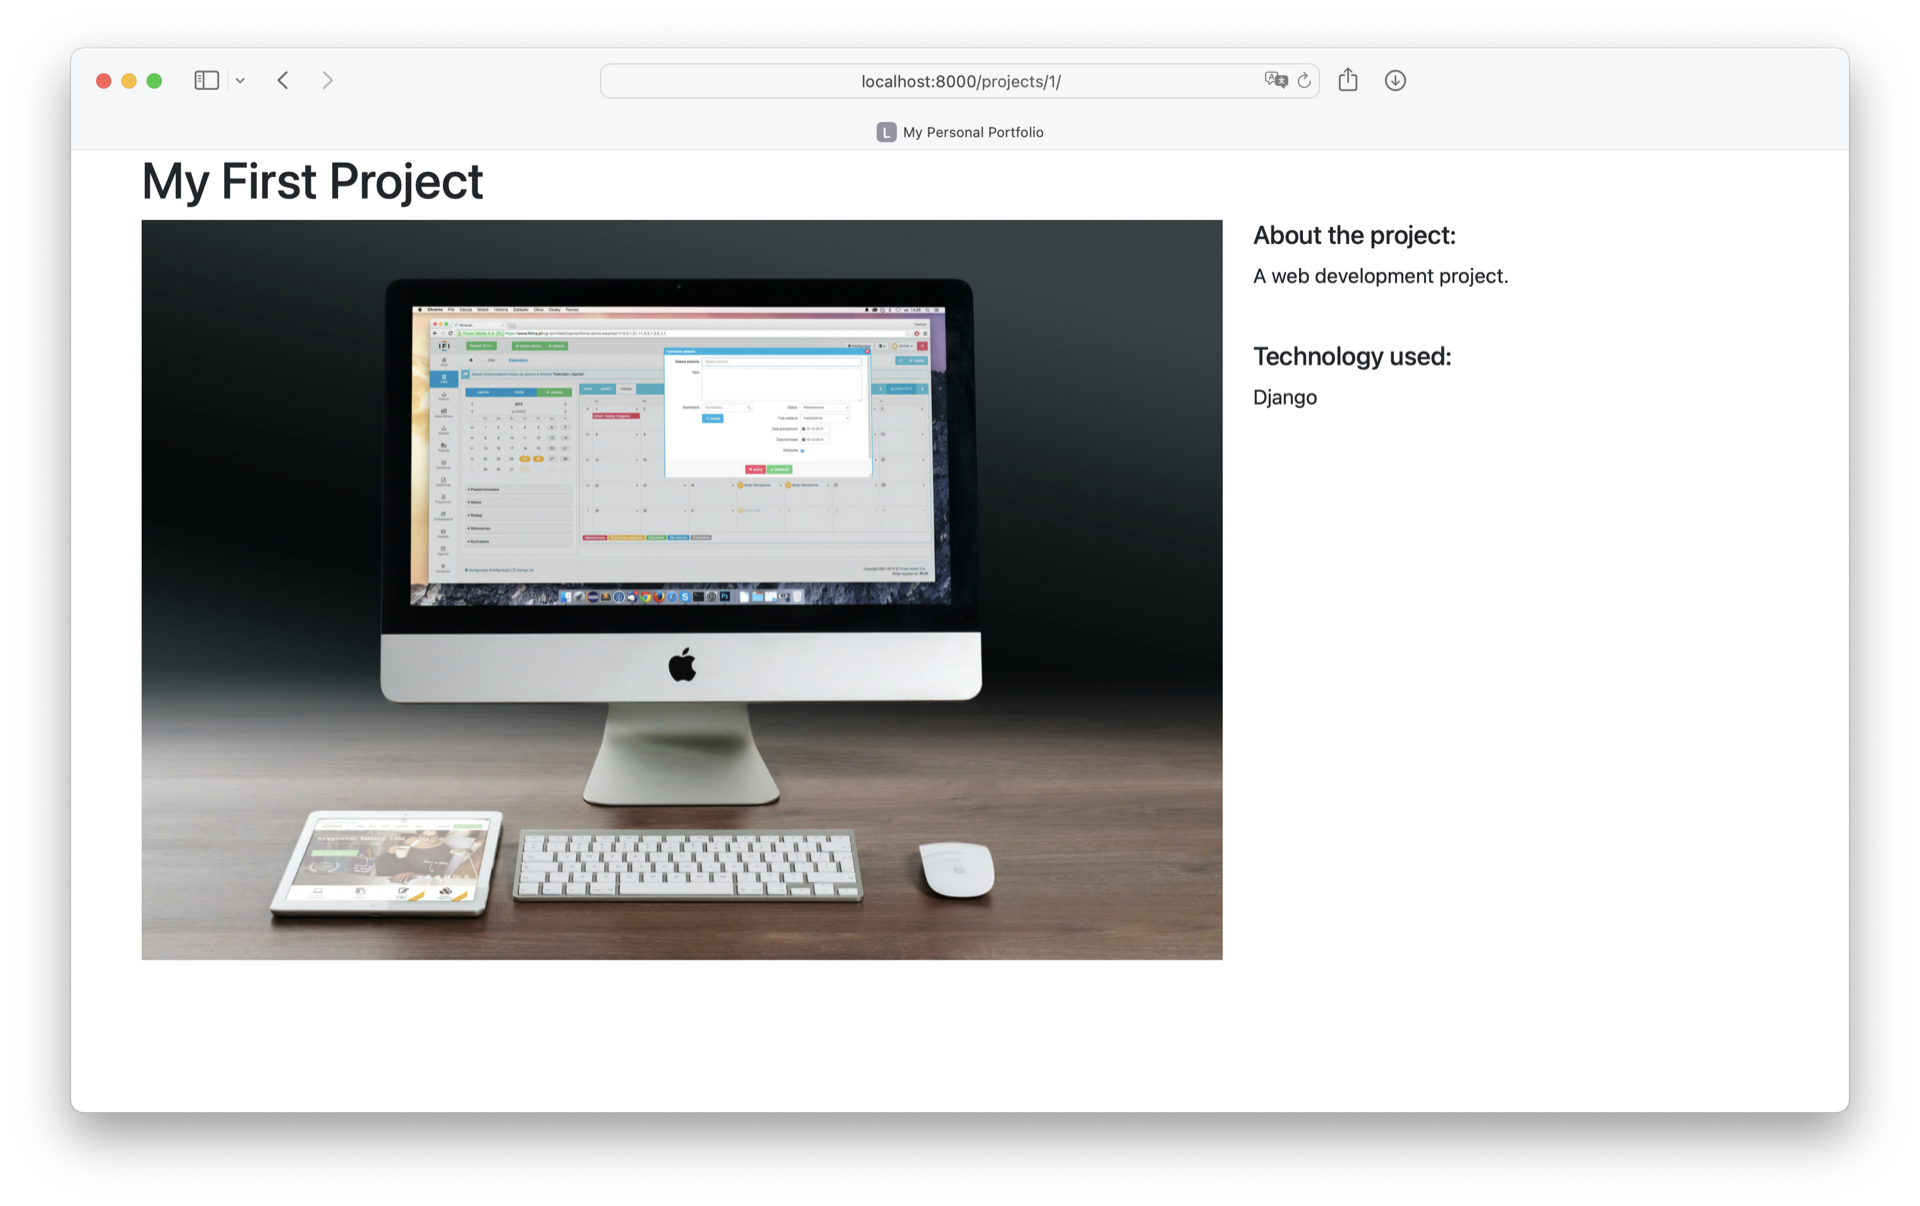
Having an image for each project really makes your portfolio shine. Well done!
Including the images in your projects app was the last step in this tutorial for your Django portfolio project. If you want to compare your code with the final code of this tutorial, then you can click the link below:
Get Your Code: Click here to download the Python source code for your Django portfolio project.
Conclusion
Congratulations, you’ve reached the end of the tutorial! You’ve covered a lot, so make sure to keep practicing and building. The more you build, the more intuitive it’ll become and the less you’ll have to refer back to this tutorial. You can also check out other tutorials in the Django for Web Delopment learning path.
In this tutorial, you’ve:
- Learned about the advantages of using Django
- Investigated the architecture of a Django site
- Set up a new Django project with multiple apps
- Built models and views
- Created and connected Django templates
- Uploaded images into your Django site
In addition, you’ve learned about the Django admin site and hooked your views and templates up with URL configurations to build your very own portfolio site.
Did you come up with ideas on how to improve your Django project while learning by example in this tutorial? If so, share your ideas with the Real Python community in the comments below.
Take the Quiz: Test your knowledge with our interactive “Get Started With Django: Build a Portfolio App” quiz. You’ll receive a score upon completion to help you track your learning progress:
Interactive Quiz
Get Started With Django: Build a Portfolio AppIn this quiz, you'll test your understanding of Django, a fully featured Python web framework. By working through this quiz, you'll revisit the steps to create a fully functioning web application and learn about some of Django's most important features.
Watch Now This tutorial has a related video course created by the Real Python team. Watch it together with the written tutorial to deepen your understanding: Get Started With Django: Build a Portfolio App