Wouldn’t it be cool to build a hangman game with a nice graphical user interface (GUI) in Python? Maybe you’ve built a text-based user interface version of hangman, and now you want to make an even more attractive game. For you as a Python programmer, building a GUI version of this game can be a rewarding challenge that can take you to the next skill level.
Throughout this tutorial, you’ll build the hangman game in Python in a series of steps. The game will have a neat graphical interface based on the PySimpleGUI library.
In this tutorial, you’ll:
- Create a GUI for your hangman game using PySimpleGUI
- Implement the logic for the hangman game
- Connect the game’s logic with its GUI layer
- Handle the game results and provide other options
To get the most from this tutorial, you should be comfortable with general Python programming, including how to lay out a project. You should also have some experience working with graphical user interfaces, especially those based on PySimpleGUI. You don’t need to have any previous knowledge about game programming, but it would be a plus.
All the code that you’ll write in this tutorial is available for download. You can get it by clicking the link below:
Get Your Code: Click here to download the free Python source code for your PySimpleGUI hangman game.
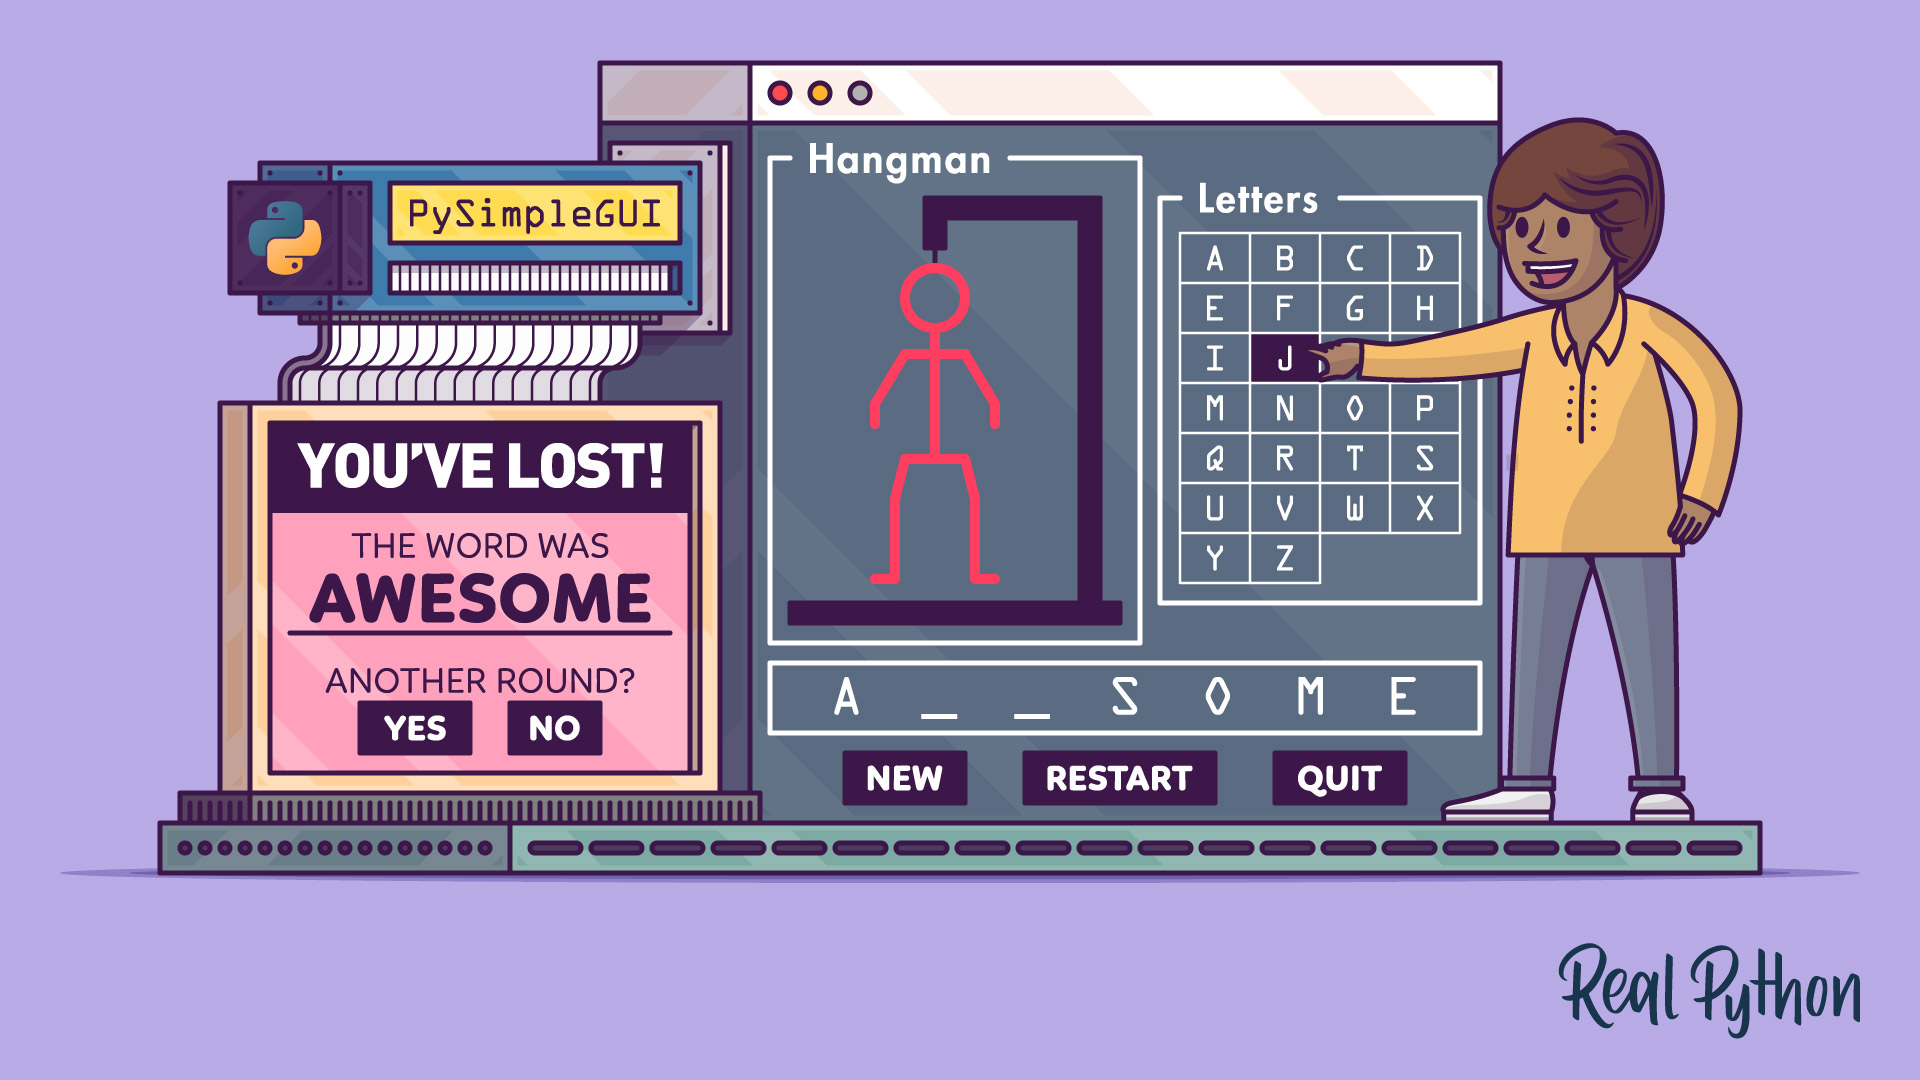
Demo: Hangman With Python and PySimpleGUI
In this tutorial, you’ll write an implementation of hangman using Python and PySimpleGUI. Once you’ve run all the steps to build the game, then you’ll end up with a graphical user interface (GUI) that will work something like the following:
In this tutorial, you’ll run through several challenges designed to help you solve specific game-related problems. Ultimately, you’ll have a hangman game that works like the demo above.
Project Overview
When creating a GUI version of hangman, you’ll use a GUI framework that can handle a text-based game like hangman while still providing the ability to draw a hanged man. There are several good GUI engines available for Python. While you can use any of them to good effect, you’ll rely on PySimpleGUI in this tutorial.
PySimpleGUI is a wrapper around several well-known GUI frameworks and libraries, such as Tkinter, wxPython, and PyQt. It allows you to design a GUI as data. You’ll use the Tkinter wrapper in this tutorial, but you can explore the wxPython and QT wrappers on PyPI.
While many people know hangman well, it’s helpful to have a formal description of the game. You’ll use this description to resolve programming issues later during development. The game’s description could vary from person to person. In this tutorial, you’ll describe the game as follows:
- Game setup: The game of hangman is for two or more players, comprising a selecting player and one or more guessing players.
- Word selection: The selecting player selects a word that the guessing players will try to guess.
- The selected word is traditionally represented as a series of underscores for each letter in the word.
- The selecting player also draws a scaffold to hold the hangman illustration.
- Guessing: The guessing players attempt to guess the word by selecting letters one at a time.
- Feedback: The selecting player indicates whether each guessed letter appears in the word.
- If the letter appears, then the selecting player replaces each underscore with the letter as it appears in the word.
- If the letter doesn’t appear, then the selecting player writes the letter in a list of guessed letters. Then, they draw the next piece of the hanged man. To draw the hanged man, they begin with the head, then the torso, the arms, and the legs for a total of six parts.
- Winning conditions: The selecting player wins if the hanged man drawing is complete after six incorrect guesses, in which case the game is over. The guessing players win if they guess the word.
- If the guess is right, the game is over, and the guessing players win.
- If the guess is wrong, the game continues.
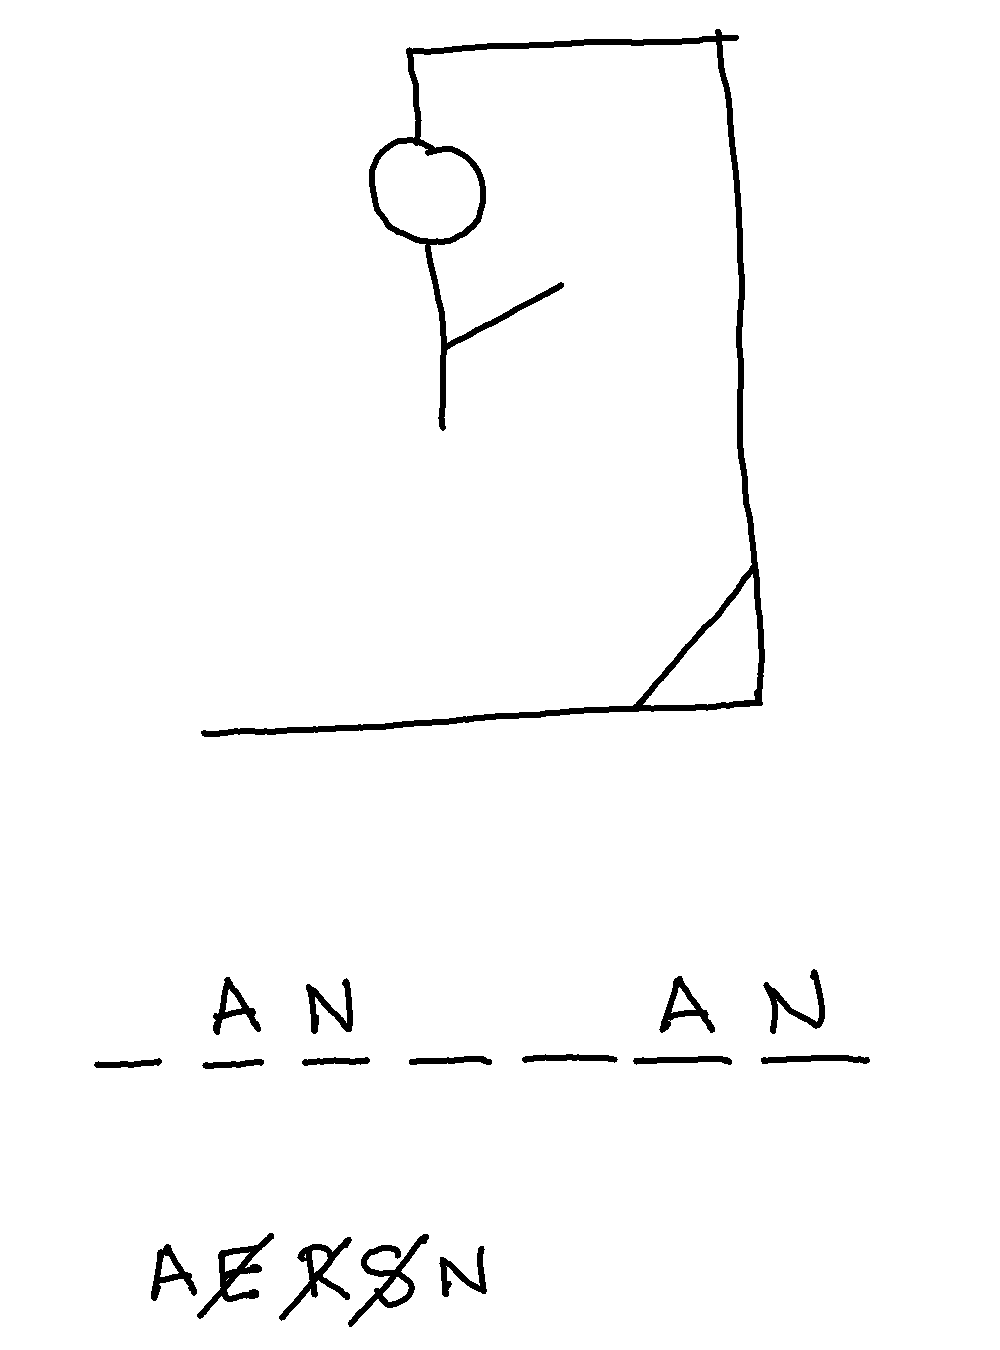
A game in progress is shown below. In this game, the word is hangman:
In this tutorial, you’ll make a few additional design decisions while writing the hangman game in Python:
- The game will be between the computer and one human player.
- The computer will act as the selecting player and will select the word to guess, process human input, and handle all output.
- The human player is the guessing player, hereafter simply referred to as the player. When the player knows the word, they continue to guess correct letters until the word is complete.
With this basic understanding of the game and some design decisions for the computer version, you can begin creating the game. First, however, you need to be aware of some knowledge requirements.
Prerequisites
The project that that you’ll build in this tutorial will require familiarity with general Python programming. You should have basic knowledge of the following topics:
- Creating GUI apps with PySimpleGUI
- Working with files and the
withstatement - Defining your own classes and working with object-oriented programming
- Writing
forloops,whileloops, and comprehensions - Working with conditional statements
- Working with Python strings, lists, and sets
However, if you don’t have all this knowledge yet, then that’s okay! You might learn more by going ahead and giving the project a shot. You can always stop and review the resources linked here if you get stuck.
With this short overview of your hangman project and the prerequisites, you’re all set up to start Pythoning and having fun while coding.
Step 1: Set Up the Hangman Project
Your hangman game will have a PySimpleGUI interface where the user will be able to play the game. They’ll select the word to guess, and the game will handle user input and display all output using the graphical interface.
You can download the files and resources for this step by clicking the link below and going to the source_code_step_1/ folder:
Get Your Code: Click here to download the free Python source code for your PySimpleGUI hangman game.
For writing the game, you’ll use a single file called hangman.py. In this file, you’ll create a Hangman class, which will contain the code for building the GUI and logic of the game. This file will also contain the game’s main loop, which will handle the game’s operations.
So, go ahead and create a directory called hangman/ and then create the hangman.py file using your favorite code editor or IDE.
You’ll also need a text file called words.txt to hold a list of target words. You’ll get a sample words.txt file in the Select the Target Word section. With this second file, you’ll have the following directory structure for the hangman project:
hangman/
├── hangman.py
└── words.txt
With these files, you have the minimal project layout that you need to build your hangman game. Now, you should create a Python virtual environment in hangman/ and install the PySimpleGUI library. Go ahead and open a terminal window on your hangman/ folder. Then run the following commands:
With the first two commands, you create and activate a Python virtual environment called venv in your working directory. Once the environment is active, you install PySimpleGUI using pip.
Note: Since June 2024, PySimpleGUI is licensed under a commercial model. See PySimpleGUI.com for more information.
With PySimpleGUI installed, you’re ready to work on your project.
Step 2: Sketch the Hangman Game’s GUI
Designing an effective GUI for an application can be a challenge. You won’t learn the art of UI design in this tutorial, but you’ll apply some relevant principles to your own design and then write a PySimpleGUI solution.
When designing the UI for hangman, you’ll keep in mind the following principles:
- The game controls should be intuitive to the user.
- The game controls should reflect the current game state.
- The game input and output should take advantage of appropriate GUI components.
The more intuitive the controls, the more pleasant it’ll be for a player to start playing right away. Making the controls react to changes in the game state means less checking for valid input and more providing visual information to the player. Finally, since you’ll use a graphical interface, it makes sense to use graphical components wherever you can.
With these concepts in mind, a good first step is to create a mock-up of the application’s GUI. Making a mock-up, even with a pencil on paper, helps solidify your design and can help resolve issues before you begin coding.
The GUI of your hangman game needs to do a few things:
- Draw the hanged man.
- Display the target word.
- Show the previously guessed letters.
- Allow the player to guess new letters.
- Allow the player to quit the game.
Here’s a first approach to how your game’s GUI will look:
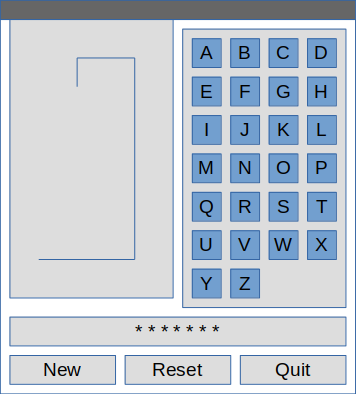
You’ll place the hanged man drawing in the box or frame on the left of the game’s window. Then, you’ll place twenty-six buttons in the right column. The player will use these buttons to guess letters. At the bottom, you’ll have the word being guessed above three buttons to start a new game, restart the current game, and quit the game, respectively.
Internally, you’ll use the properties of buttons to show which letters your player can select. For example, by disabling a button when a letter is selected, you’ll prevent the player from selecting a letter multiple times. Disabled buttons will also provide a visual hint of which letters are available for the next guessings.
Now that you’ve sketched the hangman’s GUI, it’s time to start building the actual GUI using the PySimpleGUI library.
Step 3: Code a Skeleton GUI App for Hangman
To start a PySimpleGUI project like a hangman game, you need to create a skeleton app. Then, you need to build the hangman’s GUI by following the sketched design from the previous step. Finally, you’ll write the code to draw the hanged man.
After concluding the different stages of this step, you’ll have completed the hangman’s GUI. However, the GUI won’t have much functionality, and more importantly, it won’t let you play the game yet.
Again, you can download the source code for this step by clicking the link below and going to the source_code_step_3/ folder:
Get Your Code: Click here to download the free Python source code for your PySimpleGUI hangman game.
A PySimpleGUI app will typically have a main window with a specific layout or GUI design and an event loop. To create the hangman game, go ahead and open the hangman.py file in your code editor and add the following code to it:
hangman.py
import PySimpleGUI as sg

class Hangman:
    def __init__(self) -> None:
        self._window = sg.Window(
            title="Hangman",
            layout=[[]],
            finalize=True,
            margins=(100, 100),
        )

    def read_event(self):
        event = self._window.read()
        event_id = event[0] if event is not None else None
        return event_id

    def close(self):
        self._window.close()
In this code, you first import the PySimpleGUI library as sg. This way of importing the library is a common practice in its official documentation, mostly because sg saves some typing. Additionally, the alias can help if you want to try a different backend, like wxPython or QT.
Next, you define the Hangman class. In the class initializer, .__init__(), you define the app’s window. To do this, you use the Window class. In this example, you set the window’s title to "Hangman". Then, you use a list as the window’s layout. Note that this is an empty list nested within a list, which allows you to create an empty window.
The finalize argument allows you to specify whether the window’s layout should be frozen. Freezing a window’s layout means that after you create the window, you can’t modify its layout. In your hangman game, the window should keep its layout during the game execution, so you set finalize to True.
The margins argument allows you to define the number of pixels to leave inside the window’s frame around the edges before showing the GUI components. In this app, you don’t have any graphical element yet, so you use the margins argument to render the window in a visible way. However, this argument is only temporary, so you’ll remove it when you start coding the actual window’s layout in the next section.
Next, you define the .read_event() method. This method relies on the Window.read() method to allow you to read all the user events on the app’s GUI. Remember that GUI apps are event driven, which means that they work by catching, processing, and responding to events like clicks, keypresses, and others.
Finally, you have the .close() method. This method lets you close the app’s main window and terminate the execution.
Now that you have your app’s main window in place, you need to define the app’s event loop. This loop allows you to start the app and process the user events in a loop. Here’s how to write a minimal event loop for your hangman game:
hangman.py
# ...

if __name__ == "__main__":
    game = Hangman()
    # Event loop
    while True:
        event_id = game.read_event()
        if event_id in {sg.WIN_CLOSED}:
            break
    game.close()
Because your hangman.py file contains executable code, you use the name-main idiom to wrap up the event loop. Before starting the loop, you create an instance of your Hangman class called game.
To define the event loop, you’ll use a potentially infinite while loop. The first line of code inside the loop calls .read_event() on the game object to catch any user event at the beginning of the loop.
Your .read_event() method returns an event identifier or None. You use this event identifier in the final part of the loop, where the conditional statement checks if the current event is in a set of events that will allow you to exit the loop and finish the app. At this point, the set only contains the sg.WIN_CLOSED identifier. However, in the future, it’ll contain the event from the Quit button, as well.
Now that you’ve coded the event loop, you can run the app from the command line. You’ll get the following window on your screen:
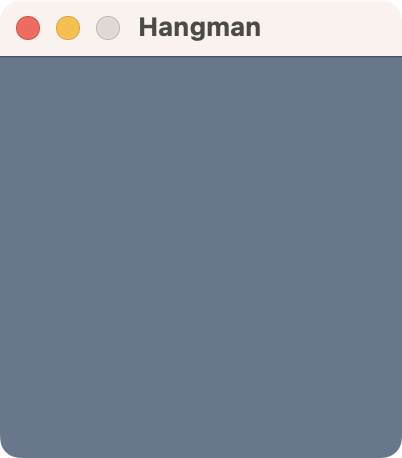
Great! Your window has the appropriate title, and it allows you to click the close button on the title bar to terminate the app. Now it’s time to build the hangman GUI.
Step 4: Code the Hangman GUI
PySimpleGUI lets you build GUIs declaratively as data rather than programmatically as code. In this sense, the library is similar to other GUI tools, such as Qt Designer, which generates GUIs as data using XML. It’s a powerful feature that allows you to separate the GUI design from the application’s functionality.
In the following sections, you’ll create a suitable layout for your hangman game. You’ll also figure out how to draw the scaffold and the hanged man.
To download the source code for this step, click the link below and go to the source_code_step_4/ folder:
Get Your Code: Click here to download the free Python source code for your PySimpleGUI hangman game.
Lay Out the Hangman GUI
In PySimpleGUI, you lay out your GUIs using nested lists. Each sublist represents a row and can contain multiple controls. Therefore, the first step in converting your design into code is to separate the GUI elements into rows or nested lists containing specific PySimpleGUI elements.
If you look back at your GUI design, then you’ll note that you can group the GUI components into three rows. Circling each row of controls will give you a good visual clue of where each element will live:
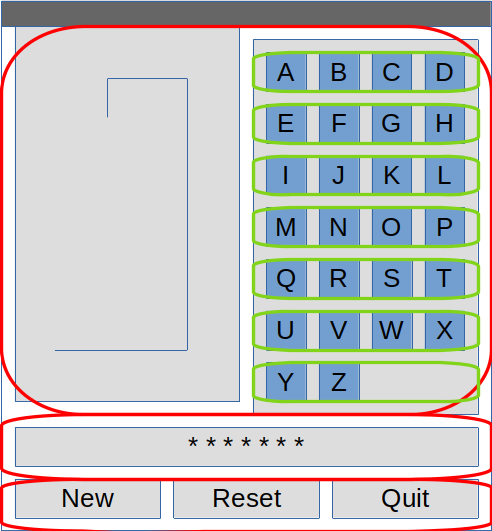
The red outlines show the major UI elements broken into rows:
- The first row contains the hanged man drawing area and the letter buttons.
- The second row contains the word being guessed.
- The third row shows the New, Reset, and Quit buttons.
To represent each row, you’ll use a separate nested list containing the appropriate PySimpleGUI controls for the elements in that row.
You should also notice the green circles separating the letter buttons into seven rows. You’ll group these buttons into sublists, which you’ll nest within the first row of the PySimpleGUI layout.
A PySimpleGUI layout is a regular Python list. Since the GUI’s global layout has three rows, you need to create a list with three nested lists. Go ahead and update the Hangman class as in the code below:
hangman.py
# ...

class Hangman:
    def __init__(self) -> None:
        layout = [
            [
                self._build_canvas_frame(),
                self._build_letters_frame(),
            ],
            [
                self._build_guessed_word_frame(),
            ],
            [
                self._build_action_buttons_frame(),
            ],
        ]
        self._window = sg.Window(
            title="Hangman",
            layout=layout,
            finalize=True,
        )

    # ...
In this code snippet, you define layout as a Python list of lists. All the nested lists contain method calls. You’ll write the implementation of all these methods in a moment.
The first nested list contains two method calls. The first method will build the hanged man drawing area, while the second method call will create the letter buttons.
The second nested list holds the call to a method that will build the guessed word row. Finally, the third nested list holds a method call that will build the New, Reset, and Quit action buttons. The last update in this code is to remove the margins argument from the definition of your ._window object.
To visually separate each element in the rows, you’ll use the Frame class. So, you’ll have the following four frames:
- The hanged man drawing area frame
- The letter buttons frame
- The target word frame
- The New, Reset, and Quit buttons frame
To create the hanged man drawing area, you’ll use the Graph class. Here’s the required code for the ._build_canvas_frame() helper method:
hangman.py
# ...

class Hangman:
    # ...

    def _build_canvas_frame(self):
        return sg.Frame(
            "Hangman",
            [
                [
                    sg.Graph(
                        key="-CANVAS-",
                        canvas_size=(200, 400),
                        graph_bottom_left=(0, 0),
                        graph_top_right=(200, 400),
                    )
                ]
            ],
            font="Any 20",
        )

    # ...
In this method, you first create a Frame object with the title "Hangman". The frame contains a list with a nested list in it. This list of lists represents the frame’s layout.
The Graph instance has a key called -CANVAS-. You’ll use this key to access the canvas of your Graph instance. The canvas is 200 pixels wide and 400 pixels tall, and the lower left corner is (0, 0), while the right corner is (200, 400). These coordinates will be important when you’re writing the code to draw the hanged man.
Note: You’ll typically use a descriptive string as the key of a given object in PySimpleGUI. However, keys can be of any hashable type, such as int, tuple, and str objects. In this tutorial, you’ll use uppercase strings with a leading and a trailing hyphen, which is common practice in most PySimpleGUI demo examples.
Now, it’s time to create the letter frame. The GUI design calls for seven rows of buttons arranged in a column. Therefore, you’ll place the letter buttons in a separate column using the Column class.
Here’s the code to create the letter frame:
hangman.py
 1from string import ascii_uppercase
 2# ...
 3
 4class Hangman:
 5    # ...
 6
 7    def _build_letters_frame(self):
 8        letter_groups = [
 9            ascii_uppercase[i : i + 4]
10            for i in range(0, len(ascii_uppercase), 4)
11        ]
12        letter_buttons = [
13            [
14                sg.Button(
15                    button_text=f" {letter} ",
16                    font="Courier 20",
17                    border_width=0,
18                    button_color=(None, sg.theme_background_color()),
19                    key=f"-letter-{letter}-",
20                    enable_events=True,
21                )
22                for letter in letter_group
23            ]
24            for letter_group in letter_groups
25        ]
26        return sg.Column(
27            [
28                [
29                    sg.Frame(
30                        "Letters",
31                        letter_buttons,
32                        font="Any 20",
33                    ),
34                    sg.Sizer(),
35                ]
36            ]
37        )
38
39    # ...
There’s a lot happening in this code. Here’s a breakdown:
- Lines 8 to 11 use a list comprehension to define the letter groups that will help you populate the seven rows of letters. To do this, you use the
ascii_uppercaseobject from thestringmodule. - Lines 12 to 25 define a new list using another comprehension that iterates over the letter groups and then over each letter in the groups. This comprehension creates a nested list of
Buttonobjects. Each button will display a letter. You also customize the buttons by tweaking some of their properties, including the font, border, color, and key. - Lines 26 to 37 create and return a
Columnobject. The layout of this object contains a single nested list that holds aFrameobject with all the letter buttons in it. Note that this frame will have the title"Letters".
With the ._build_letters_frame() helper method in place, you can go ahead and write the ._build_guessed_word_frame() method:
hangman.py
# ...

class Hangman:
    # ...

    def _build_guessed_word_frame(self):
        return sg.Frame(
            "",
            [
                [
                    sg.Text(
                        key="-DISPLAY-WORD-",
                        font="Courier 20",
                    )
                ]
            ],
            element_justification="center",
        )

    # ...
This row contains only one element, a Text object that will hold the guessed word, which you’ll display for the player’s information. Setting the font to Courier ensures that each character takes the same amount of horizontal space.
The last row in the game’s layout will contain three buttons to control other behaviors of the game:
hangman.py
# ...

class Hangman:
    # ...

    def _build_action_buttons_frame(self):
        return sg.Frame(
            "",
            [
                [
                    sg.Sizer(h_pixels=90),
                    sg.Button(
                        button_text="New",
                        key="-NEW-",
                        font="Any 20",
                    ),
                    sg.Sizer(h_pixels=60),
                    sg.Button(
                        button_text="Restart",
                        key="-RESTART-",
                        font="Any 20",
                    ),
                    sg.Sizer(h_pixels=60),
                    sg.Button(
                        button_text="Quit",
                        key="-QUIT-",
                        font="Any 20",
                    ),
                    sg.Sizer(h_pixels=90),
                ]
            ],
            font="Any 20",
        )

    # ...
In this code, the Frame object has a layout that consists of one nested list. The nested list contains four Sizer objects and three buttons. The Sizer objects allow you to add some padding in between the buttons.
Finally, notice the key attribute of each button. Any GUI elements with which you want to interact should have a key. Using this key, you can reference the element and know which element initiated an event. You’ll learn how to use keys in later sections.
With the layout complete, you can now begin writing code to draw the hanged man.
Draw the Hanged Man
For drawing the hanged man, you first need to have a reference to the drawing area. In a previous section, you added a Graph object to your app’s layout. This object will provide the drawing area. To identify the object, you used the "-CANVAS-" key. This key will allow you to create a reference to the object so that you can draw the hanged man.
Go ahead and add the following line to the initializer of Hangman:
hangman.py
# ...

class Hangman:
    def __init__(self) -> None:
        # ...
        self._canvas = self._window["-CANVAS-"]

    # ...
This line of code creates a ._canvas attribute that holds a reference to the drawing area. Now you can start drawing.
Before starting to draw anything, you need to be aware that to draw lines and shapes in a Graph object, you’ll use 2D coordinates to define specific points on the canvas. Then, you can draw lines and shapes using these points as guidelines. To define a pair of coordinates, you’ll use two-value tuples.
In this tutorial, you won’t need to compute which points to use. You can just copy and paste them into your local project’s file. However, in your own projects, you may need to do the work yourself and figure out which points to use in order to position the shapes and lines in the correct places.
To kick this process off, you’ll start by writing a method that draws the scaffold for the hanged man:
hangman.py
# ...

class Hangman:
    # ...

    def _draw_scaffold(self):
        lines = [
            ((40, 55), (180, 55), 10),
            ((165, 60), (165, 365), 10),
            ((160, 360), (100, 360), 10),
            ((100, 365), (100, 330), 10),
            ((100, 330), (100, 310), 1),
        ]
        for *points, width in lines:
            self._canvas.DrawLine(*points, color="black", width=width)

    # ...
To draw the scaffold, you need several lines, and to define a line, you need two points. You can provide each point as a two-value tuple. The lines list contains tuples that provide the points for each line. They also provide a final value that represents the line width.
In the for loop, you iterate over lines, unpacking the points and widths into the corresponding loop variables. Then, you use the .DrawLine() method of your Graph object to draw the lines. You’ll see this method in action in a moment.
Once you have the scaffold in place, you need to figure out how to draw the hanged man. The hanged man drawing requires you to draw the following components:
- Head
- Torso
- Left and right arms
- Left and right legs
So, you need to draw six parts to complete the drawing. For the head, you can use a circle. For the rest of the parts, you can use lines as you did when drawing the scaffold. Here’s the code to do that:
hangman.py
# ...

class Hangman:
    # ...

    def _draw_hanged_man(self):
        head = (100, 290)
        torso = [((100, 270), (100, 170))]
        left_arm = [
            ((100, 250), (80, 250)),
            ((80, 250), (60, 210)),
            ((60, 210), (60, 190)),
        ]
        right_arm = [
            ((100, 250), (120, 250)),
            ((120, 250), (140, 210)),
            ((140, 210), (140, 190)),
        ]
        left_leg = [
            ((100, 170), (80, 170)),
            ((80, 170), (70, 140)),
            ((70, 140), (70, 80)),
            ((70, 80), (60, 80)),
        ]
        right_leg = [
            ((100, 170), (120, 170)),
            ((120, 170), (130, 140)),
            ((130, 140), (130, 80)),
            ((130, 80), (140, 80)),
        ]
        body = [
            torso,
            left_arm,
            right_arm,
            left_leg,
            right_leg,
        ]
        if self._wrong_guesses == 1:
            self._canvas.DrawCircle(
                head,
                20,
                line_color="red",
                line_width=2,
            )
        elif self._wrong_guesses > 1:
            for part in body[self._wrong_guesses - 2]:
                self._canvas.DrawLine(*part, color="red", width=2)

    # ...
In this new helper method, you create head as a tuple that represents a point. This point will work as the head’s center because you’ll draw the head as a circle.
Then, you define torso as a list of tuples. This list defines two points, which you’ll use to draw the hanged man’s torso as a vertical line.
To draw the arms, you need three lines. They’ll represent the shoulder, arm, and forearm, respectively. Meanwhile, for the legs, you use four lines. They’ll represent the hip, thigh, calf, and foot, respectively. The torso, arms, and legs are all lines that will form body. So, you group them in a list.
The next step is to draw the head and the body. To draw the head, you use the .DrawCircle() method, which takes the center point as an argument. You also set the circle’s radius to twenty pixels, the line color to red, and the line width to two pixels.
Finally, you draw the body using the .DrawLine() method repeatedly. Again, you set the line color to red and the width to two pixels.
To see all this code in action, go ahead and add the following code to the initializer of Hangman:
hangman.py
# ...
MAX_WRONG_GUESSES = 6

class Hangman:
    def __init__(self) -> None:
        # ...
        self._canvas = self._window["-CANVAS-"]
        # Temporary code
        self._draw_scaffold()
        for index in range(MAX_WRONG_GUESSES):
            self._wrong_guesses = index + 1
            self._draw_hanged_man()

    # ...
In this code snippet, you define the MAX_WRONG_GUESSES constant. What is this constant? The hanged man drawing has six parts in total. You’ll draw each part progressively while the player makes wrong guesses. So, MAX_WRONG_GUESSES should be equal to 6, which is the maximum number of wrong guesses, at which point the player loses the game.
In this temporary code at the end of the snippet, you first call ._draw_scaffold() to draw the scaffold, and then you start a loop over a range that you define using MAX_WRONG_GUESSES.
Inside the loop, you update the value of ._wrong_guesses. You’ll learn about this attribute later. For now, you just use it as a temporary attribute. Finally, you call the ._draw_hanged_man() method. If you run the app now, then you’ll get a window like the following:
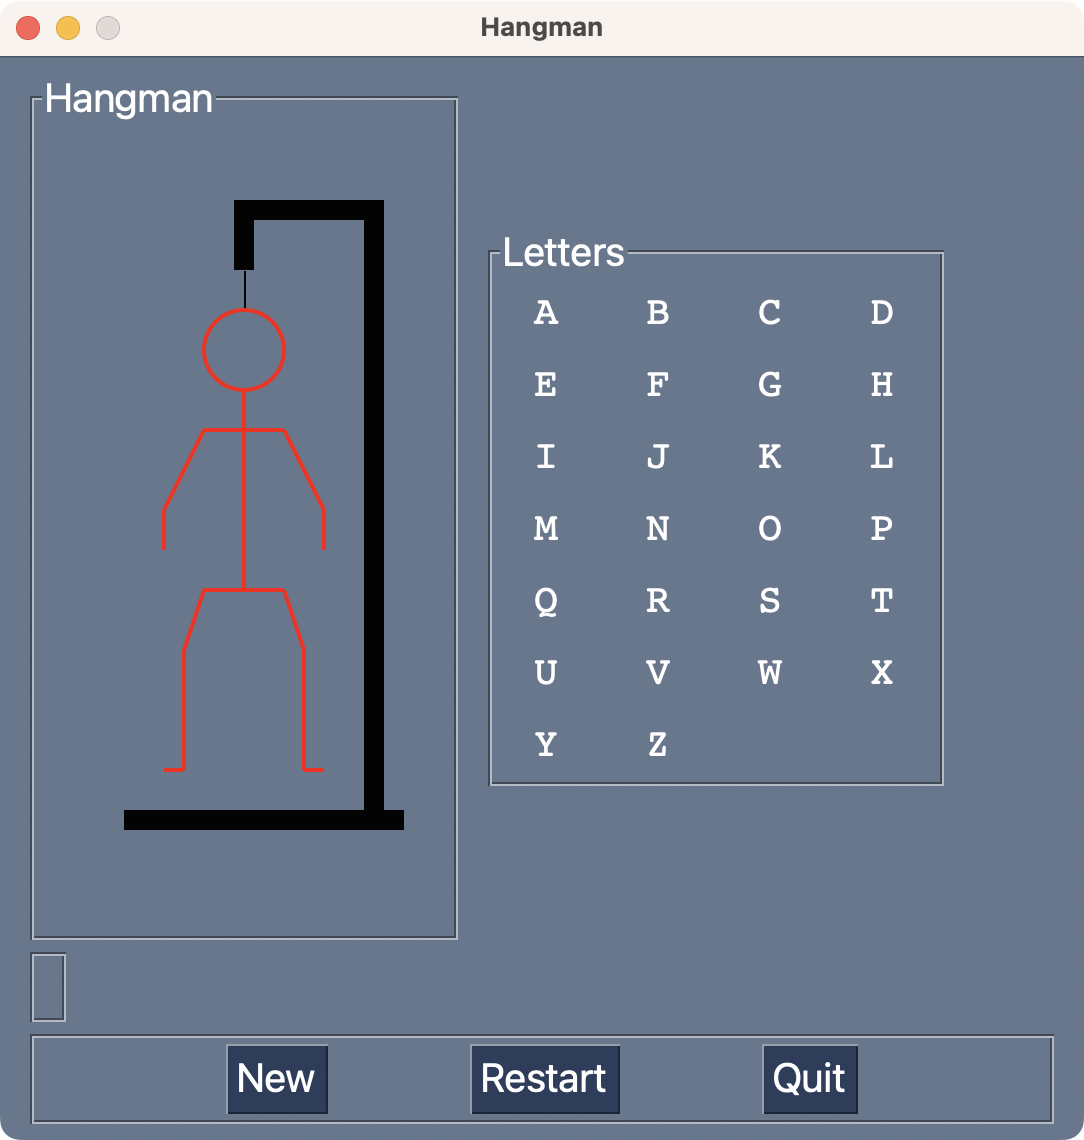
Great! Your hangman game is getting into shape. You’ve created a suitable GUI for the game that looks neat! The GUI doesn’t respond to user events yet, though. You need to fix that by coding the game’s logic and connecting it to the GUI.
Step 5: Code the Game’s Logic and Connect It to the GUI
Up to this point, you’ve coded the hangman GUI using PySimpleGUI. Now, you need to start coding the game’s logic. More importantly, you need to connect that logic to the game’s GUI so that the game responds to the player’s interactions.
Among other tasks, you need to write code that takes care of the following actions:
- Selecting the target word
- Tracking the guessed word or letters
- Setting up a new game
- Processing the player’s moves
- Determining whether the game is over
In the following sections, you’ll take care of implementing the required code for managing these tasks in your hangman project. To kick this off, you’ll start by adding a method to the Hangman class. This method will define how you select the target word for each hangman match.
To download the source code for this step, click the link below and go to the source_code_step_5/ folder:
Get Your Code: Click here to download the free Python source code for your PySimpleGUI hangman game.
Select the Target Word
The first step in playing hangman is to select the target word. When a human player selects a word for hangman, they pick one word from their own vocabulary. For the computer to select a word, it needs to have a vocabulary from which to select. Of course, its vocabulary doesn’t need to be as large as a human’s.
Go ahead and open the words.txt file. This file will contain a list of words from which the game will select the target word. You can download the complete source for this step, including the words.txt file, by clicking the link below:
Get Your Code: Click here to download the free Python source code for your PySimpleGUI hangman game.
Alternatively, you can click the collapsible section below to get some sample content for the words.txt file:
words.txt
prettiest
close
dog
massive
hollow
cultured
seashore
explode
dizzy
minister
competent
thoughtful
harbor
tidy
dance
children
zesty
clean
ball
nostalgic
plan
week
strap
board
slope
bat
steep
mourn
cat
girl
ancient
street
mice
dare
wasteful
tub
limping
whimsical
eager
eggs
detail
experience
beds
train
place
cows
admit
rare
respect
loose
group
enjoy
internal
macabre
imported
superb
crooked
confused
hug
feigned
unkempt
coal
meddle
hapless
country
zealous
sick
pray
lake
tiny
key
empty
labored
delirious
ants
need
omniscient
onerous
damp
subtract
sack
connection
toad
gather
record
new
trashy
flow
river
sparkling
kneel
daughter
glue
allow
raspy
eminent
weak
wrong
pretend
receipt
celery
plain
fire
heal
damaging
honorable
foot
ignorant
substance
box
crime
giant
learned
itchy
smoke
likable
station
jaded
innocent
dead
straw
tray
chin
pack
geese
guess
wealthy
slippery
book
curly
swing
cure
flowers
rate
ignore
insidious
necessary
snakes
entertaining
rich
comb
lamentable
fuel
camera
multiply
army
exist
sulky
brief
worried
third
magical
wary
laborer
end
somber
authority
rainstorm
anxious
purpose
agreeable
spiky
toe
mixed
waiting
hungry
lopsided
flagrant
windy
ground
slap
please
white
hurry
governor
abandoned
reject
spiritual
abrasive
hunt
weather
endurable
hobbies
occur
bake
print
tire
juicy
blush
listen
trousers
daffy
scarecrow
rude
stem
bustling
nail
sneeze
bellicose
love
Once you have a vocabulary, you need to find a way to select a random word from it. Here’s a possible solution:
hangman.py
from random import choice
# ...

class Hangman:
    # ...

    def _select_word(self):
        with open("words.txt", mode="r", encoding="utf-8") as words:
            word_list = words.readlines()
        return choice(word_list).strip().upper()

    # ...
In this code snippet, you create the ._select_word() method to select the word to guess from the words.txt file. You use a with statement to open the file and the .readlines() method to create a list of words. Then, you use choice() to choose a random word from the list.
Track the Guessed Word
In real-life hangman, once the selecting player has chosen the target word, they need to write an underscore for each letter in the word. These underscores tell the guessing players how many letters the target word has. As the guessing player makes guesses, the selecting player writes the correct letters over the underscores.
To emulate the above process in your hangman game, you’ll use the following helper method:
hangman.py
# ...

class Hangman:
    # ...

    def _build_guessed_word(self):
        current_letters = []
        for letter in self._target_word:
            if letter in self._guessed_letters:
                current_letters.append(letter)
            else:
                current_letters.append("_")
        return " ".join(current_letters)

    # ...
This function uses a for loop to populate the current_letters list. The loop looks at each letter in the ._target_word attribute and determines whether the letter exists in ._guessed_letters. If that’s the case, then your program appends letter to current_letters. If not, then it adds an underscore (_) to current_letters. Then, you use the .join() method to build a displayable word, which will include correct letters in their corresponding spots.
Note that you haven’t defined the ._target_word and ._guessed_letters attributes yet. You’ll do this in the following section.
Set Up or Restart a Game
Every time you start the hangman game or start a new match, you need to initialize a few attributes that represent the game state. These attributes are the following:
- The target word,
._target_word - The guessed letters,
._guessed_letters - The number of wrong guesses,
._wrong_guesses - The guessed word representation,
._guessed_word
To define how you’d start a new game, you need to initialize all these attributes. To do this, you’ll use the ._new_game() method:
hangman.py
# ...

class Hangman:
    # ...

    def _new_game(self):
        self._target_word = self._select_word()
        self._restart_game()

    # ...
Inside ._new_game(), you define the ._target_word attribute, which will hold the selected word for starting a new game. To determine which word to use, you call the ._select_word() method.
Then, you call the ._restart_game() method. In this method, you’ll initialize the rest of the attributes that define the game’s state. Note that having two separate methods will facilitate supporting the New and Restart buttons, respectively. You’ll do this in the next section.
Now, you’ll write the code for the ._restart_game() method:
hangman.py
# ...

class Hangman:
    # ...

    def _restart_game(self):
        self._guessed_letters = set()
        self._wrong_guesses = 0
        self._guessed_word = self._build_guessed_word()
        # Restart GUI
        self._canvas.erase()
        self._draw_scaffold()
        for letter in ascii_uppercase:
            self._window[f"-letter-{letter}-"].update(disabled=False)
        self._window["-DISPLAY-WORD-"].update(self._guessed_word)

    # ...
To track the guessed letters, you’ll use a Python set. Using a set allows you to efficiently check if the player has already guessed a given letter using membership tests with the in operator.
The ._wrong_guesses attribute will hold the count of wrong guesses that the player has made. So, you set its initial value to 0. Next up, you call ._build_guessed_word() to reset the target word. Note that restarting the game doesn’t imply selecting a new guessed word.
The final lines of this method are directly related to the game’s GUI and require a bit more explanation.
Whenever you restart the game, you need to reset the hanged man drawing. To do this, you first call the .erase() method on the Graph object that works as your canvas. Then, you redraw the scaffold. With these updates, the drawing area is ready for a new or restarted game.
Next, you iterate over the ASCII letters and enable all the letter buttons in your hangman GUI. Why do you need to do this? Remember how, in a real-life hangman game, you need to keep track of all the guessed letters?
Well, in your GUI implementation of hangman, you’ll keep track of the guessed letters by disabling the letter once the player has clicked the corresponding button.
To finish updating the game’s GUI, you update the guessed word so that it reflects the last player’s move. In the following section, you’ll take care of processing the player’s input.
Process the Player’s Input
In your hangman implementation, a player’s move happens when the guessing player clicks a letter button. A click is an event, so you can grab it and process it using PySimpleGUI’s capabilities. To do this, you’ll create two methods, .process_event() and ._play().
The .process_event() method is a generic method that you’ll use to handle all the relevant user interactions or events. Meanwhile, ._play() will take care of processing the player’s moves, which consist of clicking a letter button.
Here’s the code that defines the .process_event() method:
hangman.py
# ...

class Hangman:
    # ...

    def read_event(self):
        # ...

    def process_event(self, event):
        if event[:8] == "-letter-":
            self._play(letter=event[8])
        elif event == "-RESTART-":
            self._restart_game()
        elif event == "-NEW-":
            self._new_game()

    # ...
In .process_event(), the event argument holds only the event identifier, which you provided through the key argument when you defined the buttons in the layout. The conditional statement checks whether the current event is a letter-button click.
You originally set the letters key to f"-letter-{letter}-". In the conditional, you check if the first eight characters in the current event identifier match the string "-letter-". This is a way to determine that the current event is a click on a letter button. If that’s the case, then you call the ._play() method with the current letter as an argument.
The elif clauses process the "-RESTART-" and "-NEW-" events, respectively. The "-RESTART-" event happens when the player clicks the Restart button, and the "-NEW-" event occurs when the player clicks the New button. In either case, you call the appropriate method.
Now, you need to define the ._play() method:
hangman.py
# ...

class Hangman:
    # ...

    def _restart_game(self):
        # ...

    def _play(self, letter):
        if letter not in self._target_word:
            self._wrong_guesses += 1
        self._guessed_letters.add(letter)
        self._guessed_word = self._build_guessed_word()
        # Update GUI
        self._window[f"-letter-{letter}-"].update(disabled=True)
        self._window["-DISPLAY-WORD-"].update(self._guessed_word)
        self._draw_hanged_man()

    # ...
In the ._play() method, you first check if the guessed letter is not present in the target word. In that case, you increment the wrong guesses counter by one. If the current letter is in the target word, then you add the letter to the guessed letters set so that you can keep track of them. Next up, you update the guessed word by calling ._build_guessed_word().
The next three lines take care of updating the game’s GUI. First, you disable the clicked letter button. This action ensures that the player can’t click the letter button again. Next, you update the guessed word, and finally, you update the hanged man drawing.
Now that you’ve written the code to catch and process the player’s input, you need to determine when the game is over.
Determine Whether the Game Is Over
Games normally end due to a condition set up by the player’s moves. Perhaps the player has finally reached the goal, or they failed some task and lost the game.
Normally, hangman ends when one of two events happens:
- The player made six incorrect guesses, which means that they lost the game.
- The player guessed the word correctly, which means that they won.
You have two conditions to check, so you can encapsulate them in a new method. You’ll call the method .is_over(), and it’ll be a predicate method that returns True or False.
Here’s its implementation:
# ...

class Hangman:
    # ...

    def process_event(self, event):
        # ...

    def is_over(self):
        return any(
            [
                self._wrong_guesses == MAX_WRONG_GUESSES,
                set(self._target_word) <= self._guessed_letters,
            ]
        )

    # ...
Checking the number of wrong guesses is straightforward. You already have the MAX_WRONG_GUESSES constant. So, you only need to check whether the number of wrong guesses is equal to that value.
In contrast, checking if the player guessed the word correctly might need a little explanation. If you’re playing hangman on a whiteboard, then the selecting player can look at the whole word to make sure that it’s correct. But your GUI can’t do that. It has to look at each letter individually.
That’s where the built-in set class comes in. It turns any iterable into a set object. Because every item in a set is unique, this creates a set consisting of the letters that make up the target word but without repetition.
Then, you use the less-than or equal (<=) operator to compare this set with the set holding the guessed letters. This expression checks if every item in the left-hand set is a member of the right-hand set. If that’s the case, then the player has guessed all the letters, meeting the second condition.
The built-in any() function returns True if at least one of the listed conditions is true. Otherwise, it returns False.
The outcome of .is_over() depends on the player’s move. Therefore, it makes sense to use this method to control the game’s event loop.
Update the Event Loop and Run the Game
Up to this point, you’ve done a lot of coding. You’ve implemented the hangman’s logic and connected it to the PySimpleGUI-based GUI. However, you need to put all that code to work in a real game. You’ll do that in the game’s main loop.
Go ahead and update the main loop as in the code below:
hangman.py
# ...

if __name__ == "__main__":
    game = Hangman()
    # Event loop
    while not game.is_over():
        event_id = game.read_event()
        if event_id in {sg.WIN_CLOSED}:
            break
        game.process_event(event_id)
    game.close()
In this new version of your game’s event loop, you use .is_over() to control the loop. Now, the loop will run until one of the game-over conditions is met. Inside the loop, you add a call to .process_event() with the current event identifier as an argument.
Go ahead and run your hangman game. It’ll behave something like the following:
You’ll note that now the letter buttons, the hanged man drawing, and the guessed word all work. You can even play your first match. You’ll also find that the New and Restart buttons work.
Note that the letter buttons don’t differentiate themselves from the rest of the GUI in terms of background color. However, when you move the mouse over them, they automatically highlight to communicate that you can click them. If you’ve already clicked a given letter button, then it gets disabled, and when you move the mouse over it, its color doesn’t change anymore.
Step 6: Handle the Game’s Results
Going into this step, you have a functional hangman game. It allows you to play by clicking the letter buttons. The New and Restart buttons also work. However, the game automatically closes when you win or lose the current match. That’s not very nice, is it?
You need to give your hangman game a way to check the winning conditions and inform the player about the final result. It’d also be nice to allow the player to play multiple rounds while showing them the cumulative results. To kick things off, you’ll start by determining the winner and giving the player the option to play again.
Again, you can download the source code for this step by clicking the link below and going to the source_code_step_6/ folder:
Get Your Code: Click here to download the free Python source code for your PySimpleGUI hangman game.
Determine the Winner and Play Again
In your hangman game, the guessing player wins when they guess the selected word before making six wrong guesses. In that case, you’d like to show a congratulatory message to recognize the winner. Otherwise, you’d like to inform the player that they’ve lost the match.
Here’s a .check_winner() method that allows you to check the winning condition and execute a pop-up window with appropriate information for the guessing player:
hangman.py
# ...

class Hangman:
    # ...

    def is_over(self):
        # ...

    def check_winner(self):
        if self._wrong_guesses < MAX_WRONG_GUESSES:
            answer = sg.PopupYesNo(
                "You've won! Congratulations!\n"
                "Another round?",
                title="Winner!",
            )
        else:
            answer = sg.PopupYesNo(
                f"You've lost! The word was '{self._target_word}'.\n"
                "Another round?",
                title="Sorry!",
            )
        self.quit = answer == "No"
        if not self.quit:
            self._new_game()

    # ...
In .check_winner(), you check if the number of wrong guesses is less than the maximum number of allowed wrong guesses, 6. Remember that this number corresponds to the number of parts in the hanged man drawing. If the condition is true, then the guessing player has won, and you show a congratulatory message in a pop-up window.
If the condition is false, then you display a pop-up window telling the player that they’ve lost the match. It also provides information about the target word.
Note that both pop-up windows also ask the guessing player whether they want to play another round. After the conditional, you set the .quit attribute to a Boolean value that depends on the player’s response about playing another round.
If .quit is False, then you call ._new_game() to reset the target word and start a new match of hangman.
For this code to work, you need to add the .quit attribute to your Hangman class’s initializer:
hangman.py
# ...

class Hangman:
    def __init__(self):
        # ...
        self._new_game()
        self.quit = False

    # ...
This new line of code adds the .quit attribute to Hangman. The attribute defaults to False. Now that you have these additions in place, you can update the game’s loop. To manage multiple rounds, you’ll wrap the event loop into an outer loop targeting .quit:
hangman.py
# ...

if __name__ == "__main__":
    game = Hangman()
    # Rounds
    while not game.quit:
        # Event loop
        while not game.is_over():
            event_id = game.read_event()
            if event_id in {sg.WIN_CLOSED, "-QUIT-"}:
                game.quit = True
                break
            game.process_event(event_id)

        if not game.quit:
            game.check_winner()

    game.close()
In this code update, you wrap the event loop in an outer loop that will take care of processing multiple rounds of hangman. This external loop uses the .quit attribute in the control condition. The loop keeps iterating until the player closes the game’s window or clicks the Quit button, at which point the .quit attribute becomes True, and the loop condition becomes false.
The two final highlighted lines add a conditional statement that checks if the player decided not to quit the game. If that’s the case, then you call the .check_winner() method.
When you guess the target word, the game shows a message telling you that you won and inviting you to play another match. If you click the Yes button, then the game selects another target word, and you can start a new round. If you click the No button, then the game terminates. Go ahead and give it a try!
Keep Scores and Results
Great, now you know who won a single game! But what if your user wants to challenge the computer to best out of three? Keeping a player’s score through multiple rounds is another interesting feature to have in your hangman game. You can keep track of the played games and the won games. So, you need to define two new attributes:
hangman.py
# ...

class Hangman:
    def __init__(self):
        # ...
        self.quit = False
        self._played_games = 0
        self._won_games = 0

    # ...
These two attributes allow you to keep track of the number of played games and also the number of won games. Now, you can add the required code to support this new feature.
To do this, you can update the .check_winner() method as in the code snippet below:
hangman.py
# ...

class Hangman:
    # ...

    def check_winner(self):
        self._played_games += 1
        if self._wrong_guesses < MAX_WRONG_GUESSES:
            self._won_games += 1
            answer = sg.PopupYesNo(
                "You've won! Congratulations!\n"
                f"That's {self._won_games} out of {self._played_games}!\n"
                "Another round?",
                title="Winner!",
            )
        else:
            answer = sg.PopupYesNo(
                f"You've lost! The word was '{self._target_word}'.\n"
                f"That's {self._won_games} out of {self._played_games}!\n"
                "Another round?",
                title="Sorry!",
            )
        self.quit = answer == "No"
        if not self.quit:
            self._new_game()

    # ...
In the first line of .check_winner(), you increment the number of played games using an augmented assignment. In the conditional’s if clause, you increment the number of won games. These two counters allow you to keep track of relevant info, which you then add to the displayed message in both pop-up windows.
Here’s a quick demo of how your final hangman app works now:
Your hangman game is ready for a tournament! It allows you to play multiple rounds, and it keeps scores and information about your results. Go ahead and give it a try, and then invite some friends to join you!
Conclusion
Building a hangman game with Python and PySimpleGUI is a great way to grow your programming skills, learn new techniques, and introduce yourself to the world of GUI-based computer games. By writing the game in Python, you’ve participated in several coding and design challenges, including building a suitable GUI, catching and processing the user’s events, and updating the game’s interface according to the game’s state.
In this tutorial, you’ve learned how to:
- Use PySimpleGUI to build a graphical user interface for your hangman game
- Implement the hangman’s logic and rules in Python
- Connect the game’s logic and the GUI components
- Manage the outcome of the game and offer additional options to the users
You now have the tools and knowledge to continue adding features and improvements to your hangman game. You can also go off and build other similar games.
Next Steps
Now that you’ve finished building your hangman game, you can go a step further by implementing a few additional features. Adding new features by yourself will help you learn about exciting new topics.
Here are some ideas for new features:
- Using specialized word lists: You can add different word lists to the game so that you can select the most convenient one depending on the audience and their interest.
- Setting difficulty levels: You can classify the target words by their difficulty level based on the word length and popularity, for example.
- Using foreign-language words: You can have word lists in different languages so that the players can practice their language skills.
- Adding sound effects: You can add custom sound effects to the game to emphasize the most important actions. To implement this feature, you can take a look at some of the available options for playing sounds in Python.
- Tweaking the letter button’s background color: You can set a different background color for those letter buttons that the player has already clicked. This behavior will provide a visual hint for the player and improve their global picture of the game.
Now that you’ve finished building your hangman game, you can change gears and jump into other cool projects. Here are some great next steps for you to continue learning Python and building games:
- Build a Tic-Tac-Toe Game With Python and Tkinter: In this step-by-step project, you’ll learn how to create a tic-tac-toe game using Python and the Tkinter GUI framework. Tkinter is cross-platform and is available in the Python standard library.
- Build an Asteroids Game With Python and Pygame: In this tutorial, you’ll build a clone of the Asteroids game in Python using Pygame. Step by step, you’ll add images, input handling, game logic, sounds, and text to your program.
- Build a Platform Game in Python With Arcade: In this step-by-step tutorial, you’ll build a platform game in Python using the arcade library. You’ll cover techniques for designing levels, sourcing assets, and implementing advanced features.
What will you build next? Share your ideas in the comments!
Get Your Code: Click here to download the free Python source code for your PySimpleGUI hangman game.