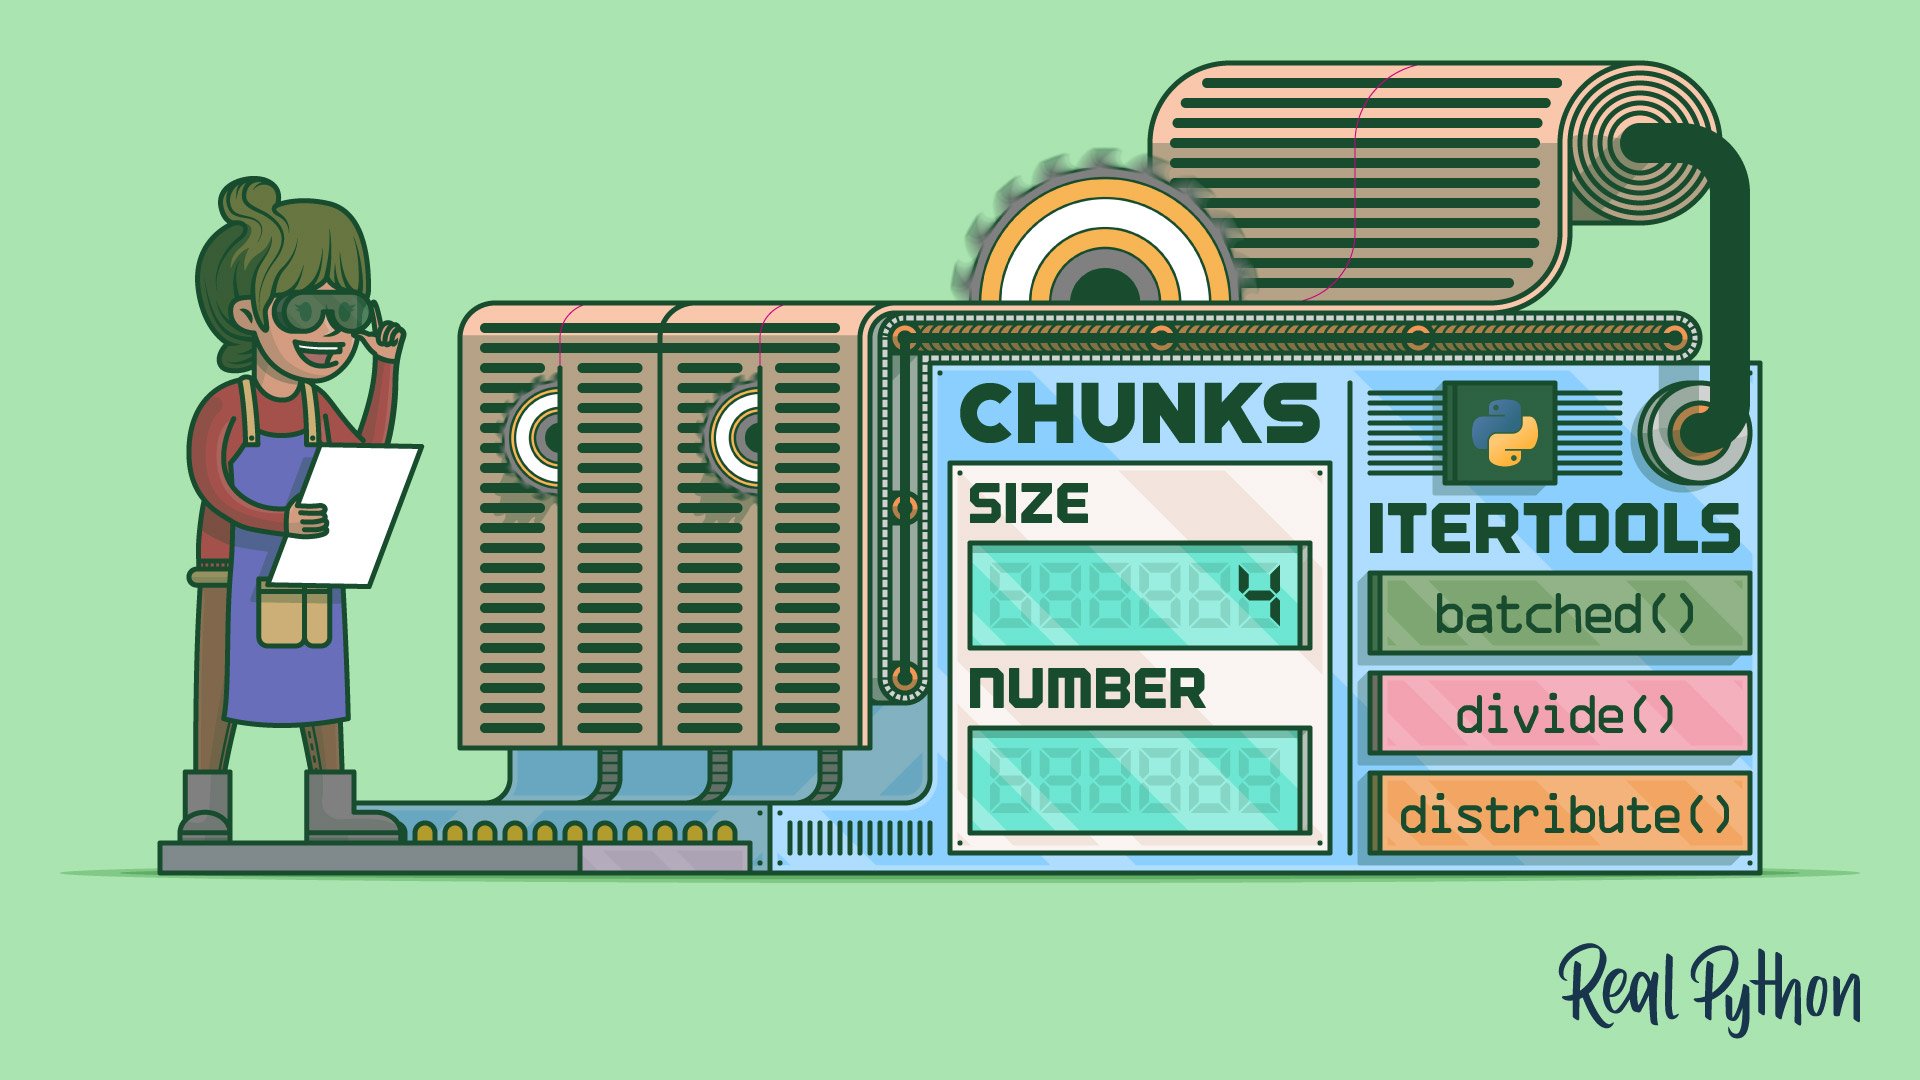
Splitting a Python list into chunks is a common way of distributing the workload across multiple workers that can process them in parallel for faster results. Working with smaller pieces of data at a time may be the only way to fit a large dataset into computer memory. Sometimes, the very nature of the problem requires you to split the list into chunks.
In this tutorial, you’ll explore the range of options for splitting a Python list—or another iterable—into chunks. You’ll look at using Python’s standard modules and a few third-party libraries, as well as manually looping through the list and slicing it up with custom code. Along the way, you’ll learn how to handle edge cases and apply these techniques to multidimensional data by synthesizing chunks of an image in parallel.
In this tutorial, you’ll learn how to:
- Split a Python list into fixed-size chunks
- Split a Python list into a fixed number of chunks of roughly equal size
- Split finite lists as well as infinite data streams
- Perform the splitting in a greedy or lazy manner
- Produce lightweight slices without allocating memory for the chunks
- Split multidimensional data, such as an array of pixels
Throughout the tutorial, you’ll encounter a few technical terms, such as sequence, iterable, iterator, and generator. If these are new to you, then check out the linked resources before diving in. Additionally, familiarity with Python’s itertools module can be helpful in understanding some of the code snippets that you’ll find later.
To download the complete source code of the examples presented in this tutorial, click the link below:
Free Sample Code: Click here to download the free source code that you’ll use to split a Python list or iterable into chunks.
Split a Python List Into Fixed-Size Chunks
There are many real-world scenarios that involve splitting a long list of items into smaller pieces of equal size. The whole list may be too large to fit in your computer’s memory. Perhaps it’s more convenient or efficient to process the individual chunks separately rather than all at once. But there could be other reasons for splitting.
For example, when you search for something online, the results are usually presented to you in chunks, called pages, containing an equal number of items. This technique, known as content pagination, is common in web development because it helps improve the website’s performance by reducing the amount of data to transfer from the database at a time. It can also benefit the user by improving their browsing experience.
Most computer networks use packet switching to transfer data in packets or datagrams, which can be individually routed from the source to the destination address. This approach doesn’t require a dedicated physical connection between the two points, allowing the packets to bypass a damaged part of the network. The packets can be of variable length, but some low-level protocols require the data to be split into fixed-size packets.
Note: When splitting sequential data, you need to consider its size while keeping a few details in mind.
Specifically, if the total number of elements to split is an exact multiple of the desired chunk’s length, then you’ll end up with all the chunks having the same number of items. Otherwise, the last chunk will contain fewer items, and you may need extra padding to compensate for that.
Additionally, your data may have a known size up front when it’s loaded from a file in one go, or it can consist of an indefinite stream of bytes—while live streaming a teleconference, for example. Some solutions that you learn in this tutorial will only work when the number of elements is known before the splitting begins.
Most web frameworks, such as Django, will handle content pagination for you. Also, you don’t typically have to worry about some low-level network protocols. That being said, there are times when you’ll need to have more granular control and do the splitting yourself. In this section, you’ll take a look at how to split a list into smaller lists of equal size using different tools in Python.
Standard Library in Python 3.12: itertools.batched()
Using the standard library is almost always your best choice because it requires no external dependencies. The standard library provides concise, well-documented code that’s been tested by millions of users in production, making it less likely to contain bugs. Besides that, the standard library’s code is portable across different platforms and typically much more performant than a pure-Python equivalent, as most of it is implemented in C.
Unfortunately, the Python standard library hasn’t traditionally had built-in support for splitting iterable objects like Python lists. At the time of writing, Python 3.11 is the most recent version of the interpreter. But you can put yourself on the cutting edge by downloading a pre-release version of Python 3.12, which gives you access to the new itertools.batched(). Here’s an example demonstrating its use:
>>> from itertools import batched
>>> for batch in batched("ABCDEFGHIJ", 4):
...     print(batch)
...
('A', 'B', 'C', 'D')
('E', 'F', 'G', 'H')
('I', 'J')
The function accepts any iterable object, such as a string, as its first argument. The chunk size is its second argument. Regardless of the input data type, the function always yields chunks or batches of elements as Python tuples, which you may need to convert to something else if you prefer working with a different sequence type. For example, you might want to join the characters in the resulting tuples to form strings again.
Note: The underlying implementation of itertools.batched() could’ve changed since the publishing of this tutorial, which was written against an alpha release of Python 3.12. For example, the function may now yield lists instead of tuples, so be sure to check the official documentation for the most up-to-date information.
Also, notice that the last chunk will be shorter than its predecessors unless the iterable’s length is divisible by the desired chunk size. To ensure that all the chunks have an equal length at all times, you can pad the last chunk with empty values, such as None, when necessary:
>>> def batched_with_padding(iterable, batch_size, fill_value=None):
...     for batch in batched(iterable, batch_size):
...         yield batch + (fill_value,) * (batch_size - len(batch))

>>> for batch in batched_with_padding("ABCDEFGHIJ", 4):
...     print(batch)
...
('A', 'B', 'C', 'D')
('E', 'F', 'G', 'H')
('I', 'J', None, None)
This adapted version of itertools.batched() takes an optional argument named fill_value, which defaults to None. If a chunk’s length happens to be less than size, then the function appends additional elements to that chunk’s end using fill_value as padding.
You can supply either a finite sequence of values to the batched() function or an infinite iterator yielding values without end:
>>> from itertools import count

>>> finite = batched([1, 2, 3, 4, 5, 6, 7, 8, 9, 10], 4)
>>> infinite = batched(count(1), 4)

>>> finite
<itertools.batched object at 0x7f4e0e2ee830>

>>> infinite
<itertools.batched object at 0x7f4b4e5fbf10>

>>> list(finite)
[(1, 2, 3, 4), (5, 6, 7, 8), (9, 10)]

>>> next(infinite)
(1, 2, 3, 4)

>>> next(infinite)
(5, 6, 7, 8)

>>> next(infinite)
(9, 10, 11, 12)
In both cases, the function returns an iterator that consumes the input iterable using lazy evaluation by accumulating just enough elements to fill the next chunk. The finite iterator will eventually reach the end of the sequence and stop yielding chunks. Conversely, the infinite one will continue to produce chunks as long as you keep requesting them—for instance, by calling the built-in next() function on it.
In practice, itertools.batched() should be your preferred tool for splitting a Python list into fixed-size chunks. It’s shipped with the standard library starting in Python 3.12, making it well-tested, documented, portable, and efficient thanks to the native C implementation. It works with both finite and infinite iterables by evaluating their elements lazily. As a bonus, it makes your code look more readable and concise.
On the other hand, if you can’t take advantage of the standard library because either you or your end users are on an older Python version, then your next best option is finding a quality third-party library. The Python documentation for itertools showcases several recipes, which made their way into the external more-itertools library. It’s exactly the kind of library you might need, so you’ll explore it in more detail now.
Third-Party Library: more_itertools.batched()
Remember that you should only use an external library when the code that you need isn’t already present in the standard library. The more-itertools project is a pure-Python package, which will run much slower than the equivalent compiled C code in the standard library, especially for larger datasets. Nevertheless, a third-party library can sometimes be your only option.
To install more-itertools into your virtual environment, use the following command:
(venv) $ python -m pip install more-itertools
There are well over a hundred functions in the more-itertools library that can help you work with Python iterables. They’re grouped into several categories to make finding the right one for the job quicker. If you’re looking for the closest counterpart to Python 3.12’s itertools.batched(), then you can reach for a similarly named function:
>>> import itertools
>>> import more_itertools

>>> itertools.batched("ABCDEFGHIJ", 4)
<itertools.batched object at 0x7f6356024490>

>>> more_itertools.batched("ABCDEFGHIJ", 4)
<generator object batched at 0x7f6356019a40>

>>> for batch in itertools.batched("ABCDEFGHIJ", 4):
...     print(batch)
...
('A', 'B', 'C', 'D')
('E', 'F', 'G', 'H')
('I', 'J')

>>> for batch in more_itertools.batched("ABCDEFGHIJ", 4):
...     print(batch)
...
['A', 'B', 'C', 'D']
['E', 'F', 'G', 'H']
['I', 'J']

>>> infinite = more_itertools.batched(itertools.count(1), 4)
>>> next(infinite)
[1, 2, 3, 4]

>>> next(infinite)
[5, 6, 7, 8]

>>> next(infinite)
[9, 10, 11, 12]
The parallels between itertools.batched() and more_itertools.batched() aren’t limited to their common name. In fact, they both were explicitly based on a recipe from Python 3.11’s itertools documentation, which looks like this:
from itertools import islice

def batched(iterable, n):
    "Batch data into tuples of length n. The last batch may be shorter."
    # batched('ABCDEFG', 3) --> ABC DEF G
    if n < 1:
        raise ValueError('n must be at least one')
    it = iter(iterable)
    while (batch := tuple(islice(it, n))):
        yield batch
This recipe advances an iterator object a few elements at a time by calling itertools.islice() in a while loop until no more elements are available. Each batch of elements is assigned to a local variable using the walrus operator (:=), and then yielded from the underlying generator function. You’ll borrow parts of this code in your own implementation of batched() later in this tutorial.
Due to this similarity, both functions work almost exactly the same. The most important difference from a practical standpoint is that more_itertools.batched() yields Python lists instead of tuples. Moreover, the function from more_itertools returns a generator iterator instead of a class-based one, which indicates it was implemented as a generator function. However, this is a technical detail without any real impact.
Other functions in the more_itertools package that are similar to batched(), letting you split a Python list into fixed-size chunks, include:
| Function | Description |
|---|---|
more_itertools.chunked() |
Similar to batched() but implemented differently |
more_itertools.ichunked() |
Like chunked() but yields iterables instead of lists |
more_itertools.chunked_even() |
Distributes items such that the chunk lengths differ by at most one |
more_itertools.grouper() |
Pads the last chunk with an optional fill-in value if necessary |
more_itertools.sliced() |
Like chunked() but only works for iterables that support slicing |
These are only a few of the functions related to chunking lists or other iterables, but you’ll find many more in the more_itertools package. Have a look at the library’s online documentation to explore them in more detail.
Coming up next, you’ll focus your attention on a more specific yet widespread Python library in the data science community.
NumPy Library: np.array_split()
If your data is strictly numeric, then you can try leveraging one of the functions provided by the esteemed NumPy library to split a sequence of numbers into chunks. Thanks to its unmatched speed, NumPy is well suited to all kinds of number crunching, which would otherwise run significantly slower when implemented in pure Python.
You can install NumPy with pip as usual:
(venv) $ python -m pip install numpy
This scientific library comes with several array-splitting functions, which you can use to divide an array into smaller parts. They’re all based on a single function, which NumPy calls under the surface with different arguments. In the following table, you’ll get an overview of those functions and each one’s rough equivalent expressed in terms of np.array_split():
| Function | Rough Equivalent | Description |
|---|---|---|
np.array_split() |
None | Splits an array into possibly uneven chunks |
np.split() |
np.array_split(...) |
Splits an array into chunks of exactly equal size |
np.vsplit() |
np.split(..., axis=0) |
Splits an array vertically (row-wise) |
np.hsplit() |
np.split(..., axis=1) |
Splits an array horizontally (column-wise) |
np.dsplit() |
np.split(..., axis=2) |
Splits an array along the third axis (depth) |
Unfortunately, replicating precisely the same behavior as you’ve seen so far gets tricky with NumPy because all of these functions expect you to provide the number of chunks up front. Out of the box, the individual chunks can vary in size, and you don’t have much control over them.
If you limit yourself to one-dimensional arrays only, then you’ll be left with np.split() and np.array_split(). The first one checks if an array can be divided into chunks of equal size and, if so, delegates further processing to the second function. Otherwise, it’ll complain by raising an error:
>>> import numpy as np
>>> numbers = np.array([1, 2, 3, 4, 5, 6, 7, 8, 9, 10])

>>> np.split(numbers, 2)
[array([1, 2, 3, 4, 5]), array([ 6,  7,  8,  9, 10])]

>>> np.split(numbers, 3)
Traceback (most recent call last):
  ...
ValueError: array split does not result in an equal division

>>> np.array_split(numbers, 3)
[array([1, 2, 3, 4]), array([5, 6, 7]), array([ 8,  9, 10])]
You successfully split an array of numbers into two equally long sub-arrays with np.split(). But the function refuses to split the array into three chunks because the specified number of chunks doesn’t divide the original array length evenly. Calling np.array_split() avoids this problem, but it creates another one related to the lack of control over the chunks’ sizes.
Luckily, there’s another way to call those functions. Instead of specifying the number of chunks, you can pass a list of indices, which you must define in ascending order. NumPy will slice along them:
>>> np.array_split(numbers, [3, 6, 9])
[array([1, 2, 3]), array([4, 5, 6]), array([7, 8, 9]), array([10])]
The indices 3, 6, and 9 represent the boundaries dividing adjacent chunks. Using Python’s slicing notation, you can express the four resulting chunks as follows:
| Python Notation | Math Notation | Chunk’s Indices |
|---|---|---|
[:3] |
[0, 3) |
0, 1, 2 |
[3:6] |
[3, 6) |
3, 4, 5 |
[6:9] |
[6, 9) |
6, 7, 8 |
[9:] |
[9:10] |
9 |
Because slices and ranges in Python use half-open intervals, each chunk includes the leftmost index but not the rightmost one. So, for example, a chunk that starts at index three and ends at index six will contain three elements with indices 3, 4, and 5, respectively.
By choosing proper indices, you’ll effectively regain control over the sizes of your chunks. But how do you translate the desired chunk size to those indices exactly? One way would be to call NumPy’s np.arange(), which creates a range of numbers. To make your code reusable, you can encapsulate it in a function:
>>> def split_with_numpy(numbers, chunk_size):
...     indices = np.arange(chunk_size, len(numbers), chunk_size)
...     return np.array_split(numbers, indices)

>>> numbers = np.array([1, 2, 3, 4, 5, 6, 7, 8, 9, 10])

>>> split_with_numpy(numbers, 3)
[array([1, 2, 3]), array([4, 5, 6]), array([7, 8, 9]), array([10])]

>>> split_with_numpy(numbers, 4)
[array([1, 2, 3, 4]), array([5, 6, 7, 8]), array([ 9, 10])]

>>> split_with_numpy(numbers, 5)
[array([1, 2, 3, 4, 5]), array([ 6,  7,  8,  9, 10])]
The split_with_numpy() function takes an array of numbers and the size of a single chunk as arguments. It then finds the right division points and uses them as input for the np.array_split() function, just like you did before. This solution will allow you to split a numeric array into chunks of equal sizes, except for the last chunk, which may be shorter. But you can always append empty elements to it when needed, as in batched_with_padding().
If you don’t have the luxury of installing third-party libraries, such as more-itertools or NumPy, and the itertools module in Python’s standard library doesn’t cut it, then consider writing the splitting code by hand. You’ll examine a few ways to implement it in the next section.
Custom Implementation of batched()
Writing custom code gives you the ultimate flexibility, but it comes at a price, so you should always treat it as a last resort. To reap the benefits of the increased performance and reliability of the standard library, you can apply a gradual fallback strategy that’ll pick the best implementation available. To do so, create a utility module called splitting:
# splitting.py

import sys
from itertools import islice

if sys.version_info >= (3, 12):
    from itertools import batched
else:
    try:
        from more_itertools import batched
    except ImportError:
        def batched(iterable, chunk_size):
            iterator = iter(iterable)
            while chunk := tuple(islice(iterator, chunk_size)):
                yield chunk
This code provides the familiar batched() function. If your Python version is 3.12 or later, then the function gets imported directly from the itertools module in the standard library. On earlier Python versions, an attempt is made to import the function from the more-itertools third-party library. If that fails, then the function is defined explicitly in pure Python according to the recipe mentioned earlier.
Note: Because NumPy functions only work on strictly numeric data, they don’t fit nicely into this fallback strategy, which involves a generic chunking algorithm.
You can import the batched() function from your splitting utility module and use it in your code like this:
>>> # Python 3.12
>>> from splitting import batched
>>> for batch in batched("ABCDEFGHIJ", 4):
...     print(batch)
...
('A', 'B', 'C', 'D')
('E', 'F', 'G', 'H')
('I', 'J')

>>> # Python 3.11 with more-itertools installed
>>> from splitting import batched
>>> for batch in batched("ABCDEFGHIJ", 4):
...     print(batch)
...
['A', 'B', 'C', 'D']
['E', 'F', 'G', 'H']
['I', 'J']

>>> # Python 3.11 without more-itertools installed
>>> from splitting import batched
>>> for batch in batched("ABCDEFGHIJ", 4):
...     print(batch)
...
('A', 'B', 'C', 'D')
('E', 'F', 'G', 'H')
('I', 'J')
The splitting module conveniently takes care of the different Python versions for you and gives you a consistent API to work with. Notice, however, a slight discrepancy in the chunk types across these implementations. The implementation provided by the more-itertools library yields Python lists, as you saw earlier, while the other two implementations yield Python tuples.
The code borrowed from the itertools recipe isn’t the only way to implement batched(). For example, you can rewrite the above code more compactly using a functional style by eliminating the loop:
# splitting.py

# ...

def batched_functional(iterable, chunk_size):
    iterator = iter(iterable)
    return iter(
        lambda: tuple(islice(iterator, chunk_size)),
        tuple()
    )
The two-argument version of iter() takes a callable object and a sentinel value that’ll indicate the end of the iteration. In this case, the sentinel is an empty tuple. The returned iterator will call the supplied lambda expression on each iteration and stop when the lambda returns the sentinel. Otherwise, it’ll proxy the value that the lambda returns to the caller.
The two custom implementations presented above give the same results. However, they both have a few shortcomings. For instance, they don’t let you decide what to do with the last chunk when it becomes shorter, and they always yield tuples, which may be inefficient or inconvenient. Therefore, you’ll work on a few enhancements in the next section.
Enhanced Implementations
Feel free to skip this section if you find the solutions presented so far sufficient for your needs. However, if you decide to stick around for a little longer, then you’ll discover interesting ways to enhance your implementation of splitting. In particular, you’re about to add the ability to:
- Pad the last chunk with a fill-in value or drop it completely
- Yield subsequences of various types in a greedy manner
- Avoid memory allocation by yielding lightweight slice objects
To ensure that all the chunks are of equal size, you may sometimes need to pad the last chunk with a provided fill-in value. Recall the batched_with_padding() function implemented earlier, which did just that. Nevertheless, you can achieve the same behavior without relying on the existence of the batched() function from either itertools or more_itertools. Here’s how:
 1# splitting.py
 2
 3import sys
 4from itertools import islice, zip_longest
 5
 6# ...
 7
 8def split_with_padding(iterable, chunk_size, fill_value=None):
 9    return zip_longest(
10        *[iter(iterable)] * chunk_size,
11        fillvalue=fill_value
12    )
This alternative implementation uses itertools.zip_longest(), which is similar to the built-in zip() function. Both functions loop over multiple iterables simultaneously while combining their corresponding elements into tuples. However, unlike zip(), the zip_longest() function allows the iterables to be of different lengths and will fill in the blanks with a fillvalue argument instead of truncating them.
In this case, you follow a common idiom in Python for grouping elements of an iterable by zipping the corresponding iterator object with itself. Notice that, on line 10, you provide references pointing to exactly one copy of the iterator, which are then unpacked and passed to zip_longest().
To understand this better, you can assume a fixed chunk size—for example, always consisting of two elements—and then rewrite the code as follows:
# splitting.py

# ...

def split_into_pairs(iterable, fill_value=None):
    iterator = iter(iterable)
    return zip_longest(
        iterator, iterator,
        fillvalue=fill_value
    )
Here, rather than using element replication ([element] * size) and unpacking (*iterable) to account for the variable chunk size, you always provide two copies of the same iterator object.
What if you wanted to drop the last chunk instead of padding it with a fill-in value when it contains fewer elements than requested? You can replace zip_longest() with zip() to do so:
# splitting.py

# ...

def split_drop_last(iterable, chunk_size):
    return zip(*[iter(iterable)] * chunk_size)
This will produce chunks of exactly the requested size by dropping the last one if necessary:
>>> from splitting import split_drop_last

>>> for chunk in split_drop_last("ABCDEFGHIJ", 4):
...     print(chunk)
...
('A', 'B', 'C', 'D')
('E', 'F', 'G', 'H')

>>> for chunk in split_drop_last("ABCDEFGHIJ", 5):
...     print(chunk)
...
('A', 'B', 'C', 'D', 'E')
('F', 'G', 'H', 'I', 'J')
Despite requesting chunks of different sizes, you end up with the same number of chunks in both cases.
There’s a slight problem with all of the implementations that you’ve seen up to this point. Notice that they always yield tuples of elements regardless of what the original type of your input iterable was. When you pass a string, you get tuples of characters instead of substrings. Similarly, if you wanted to split a Python list into sublists, then you’d also end up with tuples.
To fix this, so that you’ll be getting segments of the original sequence instead of its elements wrapped in a tuple, you can leverage slicing:
# splitting.py

# ...

def split_sequence(sequence, chunk_size):
    for i in range(0, len(sequence), chunk_size):
        yield sequence[i: i + chunk_size]
This code is somewhat similar to the helper function that you defined earlier for splitting NumPy arrays. Unfortunately, it’ll only work with sequences of known size that support the square bracket syntax, such as lists, tuples, strings, or bytes. You won’t be able to split lazily evaluated iterators with it anymore, even if they’re finite, but you’ll get nicely carved-out substrings and sublists:
>>> from splitting import split_sequence

>>> for chunk in split_sequence("ABCDEFGHIJ", 4):
...     print(repr(chunk))
...
'ABCD'
'EFGH'
'IJ'

>>> for chunk in split_sequence([1, 2, 3, 4, 5, 6, 7, 8, 9, 10], 4):
...     print(chunk)
...
[1, 2, 3, 4]
[5, 6, 7, 8]
[9, 10]
The chunks yielded by split_sequence() are of the same type as the iterable that you passed as input. In the first case, they’re strings because you passed a string argument to the function, whereas in the second case, they’re sublists of the original list. Note that calling repr() on the chunks reveals the enclosing quotes (') around the string literals, which helps you spot their lengths.
Padding these chunks becomes more challenging because different sequence types exhibit unique behaviors. For instance, you can pad strings with characters only, while you can pad lists or tuples with any kind of object. The str(), list(), or range() constructors all create valid sequences, yet each expects a different set of arguments.
Instead of trying to write generic code that would handle all the possible use cases, you can implement specific functions dedicated to a few sequence types:
# splitting.py

# ...

def split_str(sequence, chunk_size, fill_value=" "):
    for chunk in split_sequence(sequence, chunk_size):
        padding = "".join([fill_value] * (chunk_size - len(chunk)))
        yield chunk + padding

def split_list(sequence, chunk_size, fill_value=None):
    for chunk in split_sequence(sequence, chunk_size):
        padding = [fill_value] * (chunk_size - len(chunk))
        yield chunk + padding
While these two functions share most of their code, the defaults for the fill_value parameter and the steps to build the padding are different.
Finally, to avoid allocating extra memory, consider yielding slice objects built into Python instead of chunks:
# splitting.py

# ...

def split_into_slices(sequence, slice_size):
    for i in range(0, len(sequence), slice_size):
        yield slice(i, i + slice_size)
The code is almost identical to split_sequence() except that this function yields slices instead of subsequences. You can think of a slice as a lightweight preview of the underlying data, which doesn’t incur the overhead of creating a copy of the sequence fragment.
This becomes important when you deal with mutable sequences, like lists, whose elements can change dynamically. Slices might also become useful for sharing data across multiple threads of execution without copying and serializing the chunks, as long as you can escape the Global Interpreter Lock (GIL). You’ll look into parallelizing your workload later in this tutorial.
Note that slices are disconnected from the data, so you’ll also need a reference to your original sequence if you want to get the corresponding chunks:
>>> from splitting import split_into_slices

>>> iterable = "ABCDEFGHIJ"
>>> for slice_ in split_into_slices(iterable, 4):
...     print(slice_, repr(iterable[slice_]))
...
slice(0, 4, None) 'ABCD'
slice(4, 8, None) 'EFGH'
slice(8, 12, None) 'IJ'
A slice is nothing more than the three indices—start, stop, and step—which you typically type with a colon (:) between them in square brackets. By default, the step is equal to None when omitted.
Okay, you’ve added a couple of enhancements, but there are still too many ways to implement list splitting in Python to fit in a tutorial of this size. Plus, you can express every loop as an equivalent list comprehension or a generator expression. To learn more, you can check out the complementary materials by clicking the link below:
Free Sample Code: Click here to download the free source code that you’ll use to split a Python list or iterable into chunks.
Split a Python List Into a Fixed Number of Chunks
Splitting linear data into a predetermined number of chunks is a common method of distributing the workload over multiple CPU cores or remote computers. By taking advantage of parallel computing, you can greatly reduce the time that it takes to complete a given task.
Note: The usual way of parallelizing computations in Python has always been through processes because of the Global Interpreter Lock (GIL), which prevents multiple threads from running at the same time. However, using threads in Python still makes sense for I/O-bound tasks, such as handling network requests or file operations.
You want the chunks to be roughly equal in size in order to ensure an even distribution of the workload. It’s more important to have a precise number of chunks that you can map onto your CPU cores rather than having chunks of the same length.
Getting it right, however, can be difficult when you consider all the small details. For example, you have to consume all the elements in your iterable to determine the contents of the next chunk. This precludes using infinite iterators as your input. Some of the chunks may end up empty if there are fewer items than the requested number of chunks. You’ll also want to consider the element order in your chunks.
In this section, you’ll look at a few possible techniques to split iterables, including a Python list, into a fixed number of chunks.
Third-Party Library: more_itertools.divide() and distribute()
Unlike before, there’s no direct equivalent of a robust function for splitting an iterable into a fixed number of chunks in Python’s standard library. You must either write the code yourself or rely on an external library, such as more-itertools, which you learned about earlier.
Specifically, the more-itertools library contains two similar-looking functions that you can use to split a Python list or another sequence into a predefined number of chunks with roughly equal size:
Both functions have an identical signature, accepting the number of chunks as their first argument, followed by an iterable object to split:
>>> import more_itertools

>>> more_itertools.divide(4, "ABCDEFGHIJ")
[
  <str_ascii_iterator object at 0x7f1dd1e1b880>,
  <str_ascii_iterator object at 0x7f1dd1e1b9a0>,
  <str_ascii_iterator object at 0x7f1dd1c4bf70>,
  <str_ascii_iterator object at 0x7f1dd1cbe770>
]

>>> more_itertools.distribute(4, "ABCDEFGHIJ")
[
  <itertools.islice object at 0x7f37c4ea2ac0>,
  <itertools.islice object at 0x7f37c4ce2d90>,
  <itertools.islice object at 0x7f37c4ce2cf0>,
  <itertools.islice object at 0x7f37c4dab060>
]
As you can see, they both return a list of iterators. However, with divide(), you’ll get iterators specific to a particular data type of the elements stored in your sequence, such as Python strings. In contrast, distribute() will alway return a list of itertools.islice() objects.
The two functions have more in common, as they require significant auxiliary storage, albeit for different reasons. The first function works in a greedy fashion and can only consume finite iterables. If you pass an iterator object instead of a sequence to divide(), then it’ll try turning that iterator into a tuple. Such a type conversion will only work for finite iterators.
On the other hand, distribute() will make several copies of each value yielded by the input iterable and store it in a separate queue. That can also lead to a lot of memory consumption. However, as long as you process the returned iterators in a lazy manner, you’ll be able to work with potentially infinite data streams.
One major difference between those two functions is that divide() maintains the element order within each chunk, while distribute() doesn’t. You can observe this by expanding the returned iterators into tuples, for example:
>>> for chunk in more_itertools.divide(4, "ABCDEFGHIJ"):
...     print(tuple(chunk))
...
('A', 'B', 'C')
('D', 'E', 'F')
('G', 'H')
('I', 'J')

>>> for chunk in more_itertools.distribute(4, "ABCDEFGHIJ"):
...     print(tuple(chunk))
...
('A', 'E', 'I')
('B', 'F', 'J')
('C', 'G')
('D', 'H')
If you look closer and think of the resulting chunks as a two-dimensional matrix, then you’ll notice that divide() puts consecutive elements in rows, while distribute() puts them in columns. The number of chunks and their lengths are the same, though. Therefore, only use distribute() when the order of elements in a chunk is unimportant.
When the input iterable’s length isn’t evenly divisible by the number of chunks, both divide() and distribute() return chunks that differ in size:
>>> numbers = [1, 2, 3, 4, 5, 6, 7, 8, 9, 10]

>>> for chunk in more_itertools.divide(4, numbers):
...     print(tuple(chunk))
...
(1, 2, 3)
(4, 5, 6)
(7, 8)
(9, 10)

>>> for chunk in more_itertools.distribute(4, numbers):
...     print(tuple(chunk))
...
(1, 5, 9)
(2, 6, 10)
(3, 7)
(4, 8)
However, it’s not just the last chunk that may contain fewer values, as was the case with splitting into fixed-size chunks. When you split into a fixed number of chunks, you want them to remain balanced by having at most one more or one fewer element than the rest. That’s desired because it ensures a uniform distribution of elements.
Additionally, if the requested number of chunks is greater than the number of the total elements in your iterable, then both functions will include empty chunks in their returned lists:
>>> for chunk in more_itertools.divide(4, [1, 2]):
...     print(tuple(chunk))
...
(1,)
(2,)
()
()

>>> for chunk in more_itertools.distribute(4, [1, 2]):
...     print(tuple(chunk))
...
(1,)
(2,)
()
()
Because two elements can’t be evenly distributed across four chunks, half of the chunks remain empty.
You can apply more-itertools to a variety of generic iterables. However, when you’re working with numbers, then you’re better off using NumPy for the efficient splitting of numeric arrays.
NumPy Library: np.array_split()
Again, you can take advantage of NumPy if the data that you’re working with is numeric. To split an array of numbers into a specified number of chunks, use the np.array_split() function as before:
>>> import numpy as np
>>> numbers = np.array([1, 2, 3, 4, 5, 6, 7, 8, 9, 10])

>>> np.array_split(numbers, 2)
[array([1, 2, 3, 4, 5]), array([ 6,  7,  8,  9, 10])]

>>> np.array_split(numbers, 3)
[array([1, 2, 3, 4]), array([5, 6, 7]), array([ 8,  9, 10])]

>>> np.array_split(numbers, 4)
[array([1, 2, 3]), array([4, 5, 6]), array([7, 8]), array([ 9, 10])]
This time, you don’t need to do anything other than calling the function, which already performs the expected splitting. It returns the requested number of chunks, which have about the same length regardless of the size of the input array.
Remember that the other function, np.split(), would only work for arrays that could be divided into chunks evenly. With np.array_split(), on the other hand, some chunks are allowed to contain fewer values. As expected, all the chunks that np.array_split() returns are well balanced.
If you request more chunks than are necessary to fit all the numbers, then you’ll get some empty chunks:
>>> np.array_split(np.array([1, 2]), 4)
[array([1]), array([2]), array([], dtype=int64), array([], dtype=int64)]
The first two arrays have exactly one element, while the other two have no elements at all.
Next up, you’ll get your hands dirty by creating your own functions that split a sequence into a fixed number of chunks. Please, only do this if you can’t take advantage of an existing library or when you’re looking to practice your coding skills.
Custom Implementations
If you don’t mind losing the original element order, then you can split a Python list into a fixed number of chunks by stepping through it with a stride length equal to the chunk size:
# splitting.py

# ...

def split_strides(sequence, num_chunks):
    for i in range(num_chunks):
        yield sequence[i::num_chunks]
This will produce results similar to more_itertools.distribute(), which you saw earlier with the flipped rows and columns. Each chunk starts at an offset determined by the index, i, and contains elements located num_chunks apart from each other.
Note that your input iterable must be a sequence, such as a Python list, which supports subscription or indexing through the square brackets operator, so you can’t feed the function with an iterator object:
>>> from splitting import split_strides

>>> for chunk in split_strides("ABCDEFGHIJ", 4):
...     print(repr(chunk))
...
'AEI'
'BFJ'
'CG'
'DH'

>>> for chunk in split_strides(iter("ABCDEFGHIJ"), 4):
...     print(repr(chunk))
...
Traceback (most recent call last):
  ...
TypeError: 'str_ascii_iterator' object is not subscriptable
Because you use the subscript syntax for slicing, the chunks become segments of the input sequence with the same data type. For example, when you pass a string to your function, the resulting chunks will also be strings rather than tuples or lists of characters.
To make a function that’ll accept any iterable and still produce a predetermined number of chunks, you can implement a round-robin algorithm that cycles through the chunks:
# splitting.py

import sys
from itertools import cycle, islice, zip_longest

import numpy as np

# ...

def split_round_robin(iterable, num_chunks):
    chunks = [list() for _ in range(num_chunks)]
    index = cycle(range(num_chunks))
    for value in iterable:
        chunks[next(index)].append(value)
    return chunks
The first chunk will contain the first element of the iterable, the second chunk will contain the second element, and so on. After putting an element into the last chunk, provided that more elements are still left in the iterable, you wrap around and start over from the first chunk again.
With this new function, you can now supply a finite iterator object and have its elements chunked:
>>> from splitting import split_round_robin

>>> for chunk in split_round_robin(iter("ABCDEFGHIJ"), 4):
...     print(chunk)
...
['A', 'E', 'I']
['B', 'F', 'J']
['C', 'G']
['D', 'H']
The downside is that chunks become Python lists, and you’re still dealing with mixed-up elements within each one of them. To bring back the original order of elements, you can transpose rows and columns by calling itertools.zip_longest() on the returned chunks:
>>> from itertools import zip_longest

>>> for chunk in zip_longest(*split_round_robin("ABCDEFGHIJ", 4)):
...     print(chunk)
...
('A', 'B', 'C', 'D')
('E', 'F', 'G', 'H')
('I', 'J', None, None)
Unfortunately, that’ll change the number of chunks, making each chunk have the length equal to the requested number of chunks instead. Other than that, you’ll get unwanted padding where the missing values are.
To preserve the element order in each chunk, you must take a step back and use the subscript syntax again, but with different indexing this time:
# splitting.py

# ...

def split_n(sequence, num_chunks):
    chunk_size, remaining = divmod(len(sequence), num_chunks)
    for i in range(num_chunks):
        begin = i * chunk_size + min(i, remaining)
        end = (i + 1) * chunk_size + min(i + 1, remaining)
        yield sequence[begin:end]
First, you use the built-in divmod() function to calculate the expected size of each chunk and the number of elements that may remain after filling all the chunks with such a size. Then, you find the beginning and ending index of the next chunk to yield and use the slicing syntax to make that chunk.
Here’s a quick example demonstrating the use of your new function:
>>> from splitting import split_n

>>> for chunk in split_n("ABCDEFGHIJ", 4):
...     print(repr(chunk))
...
'ABC'
'DEF'
'GH'
'IJ'
Brilliant! Notice how you’ve preserved the order of elements in each individual chunk.
Okay. Now, you know how to split a list or a different kind of Python sequence into a fixed number of chunks without installing any third-party library. That’s great, but what if the data that you want to split isn’t linear? After all, harnessing the power of parallel computation isn’t uncommon in image processing. In the next section, you’ll learn how to split multidimensional lists and other iterables in Python.
Split Multidimensional Data
Say you have an image represented by a rectangular matrix of pixels that you want to process in some way. For the sake of an example, you can assume an operation that can run independently for each pixel. It could be anything from increasing the pixels’ brightness to desaturating their colors. On the contrary, running a convolution filter or kernel, such as the Gaussian blur or edge detection, would require access to the neighboring pixels.
Why is it convenient to avoid touching other pixels?
In a nutshell, it allows you to perform the same task against different parts of the image simultaneously using separate CPU cores, dramatically reducing the overall processing time. The more computing power you can throw at such a problem, the bigger the speedup you’ll observe, because the performance scales linearly in this case.
Note: Computer architectures that take advantage of such a parallel processing technique are known as SIMD, which stands for single instruction, multiple data. You’ll typically find this type of architecture in graphics processing units, or GPUs, where massive amounts of data can be processed in parallel.
There are a few ways to split data in more than one dimension. In some cases, you’ll be able to leverage the existing code that you used for splitting in one dimension. Libraries like NumPy can offer alternative strategies by letting you reshape a multidimensional array into a flat one and the other way around. Finally, you may need to craft a piece of custom code for more advanced use cases.
Store the Matrix in a Row-Major or Column-Major Order
Even when the data that you wish to split is inherently multidimensional, you can often build on top of the one-dimensional splitting functions you saw earlier. For example, it’s a common practice to arrange pixels in a flat, one-dimensional array by using either row-major or column-major order:

The above picture illustrates the two ways of arranging elements of a two-dimensional matrix in a one-dimensional array. In row-major order, you read elements row by row from top to bottom. Conversely, in column-major order, you read them column by column from left to right. Such a flattening happens to all multidimensional arrays under the surface anyway, because your computer memory is one-dimensional.
Think of an image consisting of red, green, and blue channels for each pixel. You can store their values in series one after the other like so, where n is the total number of pixels in the image:
R1, G1, B1, R2, G2, B2, R3, G3, B3, …, Rn, Gn, Bn
Essentially, it’s a long list of numbers. To interpret it, you need to know where the pixel boundaries are. If you read such pixels from a raw image file format, then you’ll need to scale their linear intensities to adjust for the correct exposure value and gamma before displaying the image on the screen:
>>> def adjust(pixels, exposure, gamma):
...     ev_correction = 2 ** exposure
...     gamma_correction = 1 / gamma
...     return [
...         (value * ev_correction) ** gamma_correction
...         for value in pixels
...     ]
The specific details of this function are irrelevant. What matters is that you can apply this scaling to each color component independently, letting you split the containing list without worrying about the boundaries between your chunks.
For example, a quick approach to splitting a pixel list into chunks would be to isolate the individual channels with the help of the slicing syntax:
>>> from random import random

>>> width, height = 1920, 1080
>>> pixels = [random() for _ in range(height * width * 3)]

>>> r = pixels[0::3]
>>> g = pixels[1::3]
>>> b = pixels[2::3]
First, you generate a flat list of random floating-point values ranging from 0.0 to 1.0, where zero means a completely turned-off channel and one represents a fully saturated channel. Notice that you generate three times as many values as pixels in the image to cover all color channels.
Next, you create three chunks for each color component—red, green, and blue—by taking every third value starting from the index zero, one, and two, respectively. After processing the chunks, potentially using separate processors in parallel, you can combine them again using zip() and itertools.chain:
>>> from itertools import chain

>>> exposure = 0.0
>>> gamma = 2.2

>>> scaled_pixels = list(
...     chain.from_iterable(
...         zip(
...             adjust(r, exposure, gamma),
...             adjust(g, exposure, gamma),
...             adjust(b, exposure, gamma),
...         )
...     )
... )
Note that in this code snippet, you’re splitting a list of pixels, but you’re processing the individual chunks sequentially without taking advantage of multiple processing units. If you’d like to see a hands-on example of parallel processing in Python, then check out the last section in this tutorial, where you’ll explore image generation.
The above implementation would’ve been wasteful if your computer had more than three CPU cores on board, as most of them would be just sitting there idle. To use the full processing power, you’ll need to split the list of pixels into more chunks, for example, using one of the splitting functions you worked with in earlier sections:
>>> from os import cpu_count
>>> from more_itertools import divide

>>> scaled_pixels = list(
...     chain.from_iterable(
...         adjust(chunk, exposure, gamma)
...         for chunk in divide(cpu_count(), pixels)
...     )
... )
Rather than always making only three chunks, you spread the pixel values over the number of available central processing units in your system. Note that you can’t use more_itertools.distribute() here because it would shuffle the values around, making it harder to assemble the processed chunks later.
This value scaling works even if a chunk boundary falls in the middle of a single pixel, making some of its color components land in two adjacent chunks. However, many image processing operations require access to all three color channels at once. For example, removing the color information from an image might look like this:
>>> def desaturate(pixels):
...     for r, g, b in zip(*[iter(pixels)] * 3):
...         yield (r + g + b) / 3
The function above yields new pixel values in grayscale, which is based on the red, green, and blue channels. Taking their average is one of the most straightforward and least accurate methods of desaturating an image, but it preserves the original pixel intensity. If the r, g, and b components of this pixel were in separate chunks, then this operation wouldn’t be possible.
To ensure that all the color components of a pixel stay together in the same chunk, you need to specify the desired chunk size instead of the number of chunks, and call more_itertools.batched():
>>> from more_itertools import batched

>>> chunk_size = (width * height) // cpu_count() * 3
>>> grayscale_pixels = list(
...     chain.from_iterable(
...         desaturate(chunk)
...         for chunk in batched(pixels, chunk_size)
...     )
... )
As a result, you might sometimes get an extra chunk to accommodate the remainder that didn’t fit in the chunks, whose length is now a multiple of the three color channels.
Because pixel values are typically numeric, you can again use NumPy’s array data type to represent them. Many image-processing libraries work hand in hand with NumPy, recognizing its superior features for organizing and manipulating data. Next up, you’ll load pixel data from a file into a multidimensional NumPy array and split it into equal chunks to process.
Flatten, Split, and Reshape a NumPy Array
To load an image into Python, you can use the Matplotlib or the Pillow library, both of which play nicely with NumPy. For example, loading pixel data straight into a NumPy array using Pillow is as short as a single line of code:
>>> import numpy as np
>>> from PIL import Image

>>> pixels = np.array(Image.open("/path/to/image.jpg"))

>>> pixels.shape
(3840, 6451, 3)

>>> pixels
array([[[255, 255, 255],
        [255, 255, 255],
        [255, 255, 255],
        ...,
        [ 64, 139, 220],
        [ 64, 139, 220],
        [ 63, 138, 219]],

       ...,

       [[119, 107,  95],
        [118, 100,  90],
        [ 93,  73,  64],
        ...,
        [118, 104,  69],
        [116, 101,  68],
        [112,  99,  65]]], dtype=uint8)
Make sure to specify a valid path to an existing image file on your computer. It doesn’t matter what that image is. In case you don’t have any good pictures around, you can always generate one with DALL·E 2.
In the example above, the loaded image was 3,840 pixels wide and 6,451 pixels high, with three color channels per pixel. Each pixel component was an 8-bit unsigned integer with values ranging from 0 to 255, which is a standard format for images, known as True Color.
The True Color standard isn’t always convenient to work with, so you might want to normalize pixel values by dividing each component by the maximum possible value, which is 255. NumPy is an excellent tool for such operations thanks to its vectorized calculations, which eliminate slow Python loops and make your code look more concise and readable:
>>> pixels / 255
array([[[1.        , 1.        , 1.        ],
        [1.        , 1.        , 1.        ],
        [1.        , 1.        , 1.        ],
        ...,
        [0.25098039, 0.54509804, 0.8627451 ],
        [0.25098039, 0.54509804, 0.8627451 ],
        [0.24705882, 0.54117647, 0.85882353]],

       ...,

       [[0.46666667, 0.41960784, 0.37254902],
        [0.4627451 , 0.39215686, 0.35294118],
        [0.36470588, 0.28627451, 0.25098039],
        ...,
        [0.4627451 , 0.40784314, 0.27058824],
        [0.45490196, 0.39607843, 0.26666667],
        [0.43921569, 0.38823529, 0.25490196]]])
It’s important to know that NumPy applies the division operator (/) to the entire array of pixels in an element-wise fashion. This runs much more quickly than an explicit loop written in Python but, in some cases, not as quickly as it could when you account for parallel processing. If you’d like to split this array and distribute its individual chunks for processing on separate CPUs, then you won’t have to write much more complicated code:
>>> from os import cpu_count
>>> np.concatenate(
...     [
...         chunk / 255
...         for chunk in np.array_split(
...             pixels.flatten(),
...             cpu_count()
...         )
...     ]
... ).reshape(pixels.shape)
array([[[1.        , 1.        , 1.        ],
        [1.        , 1.        , 1.        ],
        [1.        , 1.        , 1.        ],
        ...,
        [0.25098039, 0.54509804, 0.8627451 ],
        [0.25098039, 0.54509804, 0.8627451 ],
        [0.24705882, 0.54117647, 0.85882353]],

       ...,

       [[0.46666667, 0.41960784, 0.37254902],
        [0.4627451 , 0.39215686, 0.35294118],
        [0.36470588, 0.28627451, 0.25098039],
        ...,
        [0.4627451 , 0.40784314, 0.27058824],
        [0.45490196, 0.39607843, 0.26666667],
        [0.43921569, 0.38823529, 0.25490196]]])
First, you turn the three-dimensional array of pixels into a one-dimensional one by calling its .flatten() method. Next, you split the flat array using the familiar np.array_split() function, which takes the number of chunks. In this case, their number is equal to the number of your CPUs. Finally, you normalize the values in each chunk, assemble them with np.concatenate(), and reshape the array to restore its original size.
The result is identical to the non-chunked example, so you can now start figuring out how to process the chunks in parallel. Note, however, that the overhead of running code in parallel may sometimes offset or even outweigh any performance gains.
Things get slightly more complicated when you need to retain spatial information about your multidimensional data. Over the next few sections, you’ll write code that’ll help you split any data with an arbitrary number of dimensions. Later, you’ll use that code to generate an image with content based on the coordinates of each pixel using parallel processing in Python.
But first, you’ll determine how to partition such multidimensional data into equal chunks.
Find the Splitting Points in Space
When you have a one-dimensional list or array, finding the splitting points boils down to dividing the total number of elements by your desired number of chunks. You can then use a single loop to iterate over the list and slice it up.
However, with a two-dimensional matrix, you’ll have to find the division points along the two axes so that they produce chunks with an equal area. In other words, you need to find pairs of whole numbers whose product gives the desired number of chunks.
Say you have a Full HD image that’s 1,920 by 1,080 pixels, and you want to split it into sixteen chunks. There are five ways to do so:
- 1 row by 16 columns
- 2 rows by 8 columns
- 4 rows by 4 columns
- 8 rows by 2 columns
- 16 rows by 1 column
It doesn’t really matter if you have more rows than columns or the other way around, so where there are two symmetric ways of splitting the matrix, you can disregard one of them. This leaves you with only three actual options to choose from:
- 1 row by 16 columns
- 2 rows by 8 columns
- 4 rows by 4 columns
In all three cases, the pixel area of a single chunk is exactly the same:
| Chunk Width | Chunk Height | Chunk Area |
|---|---|---|
| 120 | 1,080 | 129,600 |
| 240 | 540 | 129,600 |
| 480 | 270 | 129,600 |
Therefore, the choice between them seems arbitrary. Nevertheless, the amount of computation and the consequential processing time can sometimes depend on the given area. For instance, this effect becomes especially pronounced when you compute fractals, which are very sensitive to the amount of detail in a given region.
To give each chunk a roughly equal chance of containing the same level of information, you should avoid bias toward any one direction. It would be best to favor chunks whose shape is as close to a square as possible while ignoring rectangular chunks stretched vertically or horizontally. Observation of the data leads to the conclusion that you should pick a combination of rows and columns whose sum is the smallest:
| Rows | Columns | Sum |
|---|---|---|
| 1 | 16 | 17 |
| 2 | 8 | 10 |
| 4 | 4 | 8 |
Unsurprisingly, the four-by-four chunk is the squarest of them all. When you add the corresponding number of rows and columns, you get the smallest sum.
How do you find optimal splitting points? First of all, you’re going to need to find the unique integer divisors of the given number of chunks:
# spatial_splitting.py

from math import floor, sqrt

def find_divisors(number):
    divisors = {1, number}
    for divisor in range(2, floor(sqrt(number)) + 1):
        factor, remainder = divmod(number, divisor)
        if remainder == 0:
            divisors.add(divisor)
            divisors.add(factor)
    return divisors
Every number is divisible by one and itself, so you add those to the resulting set of divisors. Next, you loop through the potential divisors from two until reaching the floor of the square root of the number plus one. This is enough because any greater number would have a factor that you already checked. With the help of divmod(), you check if the number is divisible by a factor without any remainder, and if it is, then you record both of them.
Go ahead and test your find_divisors() function in a Python REPL:
>>> from spatial_splitting import find_divisors

>>> find_divisors(16)
{1, 2, 4, 8, 16}
Based on these divisors, you can find the row and column combinations whose product is equal to the requested number of chunks:
# spatial_splitting.py

from itertools import combinations_with_replacement

from math import floor, prod, sqrt

# ...

def find_products(number, num_factors):
    divisors = find_divisors(number)
    for factors in combinations_with_replacement(divisors, num_factors):
        if prod(factors) == number:
            yield factors
This is a brute-force search approach, which tries all possible combinations of rows and columns, or potentially more dimensions if you increase the number of factors:
>>> from spatial_splitting import find_products

>>> list(find_products(16, 2))
[(1, 16), (2, 8), (4, 4)]

>>> list(find_products(16, 3))
[(1, 1, 16), (1, 2, 8), (1, 4, 4), (2, 2, 4)]
These tuples represent the number of chunks along each dimension. Once you have them, you can pick the most even one by calculating the sum of each tuple:
# spatial_splitting.py

# ...

def find_most_even(number, num_factors):
    products_by_sum = {
        sum(products): products
        for products in find_products(number, num_factors)
    }
    return products_by_sum[min(products_by_sum)]
You associate each product with the corresponding sum by placing them in a Python dictionary, and then return the product with the smallest sum:
>>> from spatial_splitting import find_most_even

>>> find_most_even(16, 2)
(4, 4)
In this case, the number of rows and columns that produce the most even chunks is four by four. You can now adapt your earlier split_n() function to turn such a tuple into slice objects:
# spatial_splitting.py

# ...

def get_slices(length, num_chunks):
    chunk_size, remaining = divmod(length, num_chunks)
    for i in range(num_chunks):
        begin = i * chunk_size + min(i, remaining)
        end = (i + 1) * chunk_size + min(i + 1, remaining)
        yield slice(begin, end)
The only difference is that this function expects the length of a sequence instead of the sequence itself. Here’s how it works:
>>> from spatial_splitting import get_slices

>>> for slice_ in get_slices(1920, 4):
...     print(slice_)
...
slice(0, 480, None)
slice(480, 960, None)
slice(960, 1440, None)
slice(1440, 1920, None)

>>> for slice_ in get_slices(1080, 4):
...     print(slice_)
...
slice(0, 270, None)
slice(270, 540, None)
slice(540, 810, None)
slice(810, 1080, None)
You get slices corresponding to the requested number of chunks along the given dimension. In this case, the slice objects determine the splitting points along the width and height of your sample image.
Now, you can combine these individual one-dimensional slice objects into multidimensional bounds of discrete points within a chunk. In the next section, you’re going to put together the functions that you’ve built so far.
Retain Spatial Information in a Bounds Object
At this point, you know how to divide each dimension so that the resulting chunks optimally partition the available space. However, the final piece of the puzzle is knowing the coordinates and values of the points in a given multidimensional chunk.
To find the associated points in space, you must call your get_slices() function on each pair of a dimension size and the number of chunks along that dimension. Because the number of dimensions can vary, you may implement a generic solution with the help of the starmap() and product() functions from the itertools module:
# spatial_splitting.py

from itertools import combinations_with_replacement, product, starmap

# ...

def split_multi(num_chunks, *dimensions):
    num_chunks_along_axis = find_most_even(num_chunks, len(dimensions))
    for slices_by_dimension in product(
            *starmap(get_slices, zip(dimensions, num_chunks_along_axis))
    ):
        yield Bounds(
            start_point=tuple(s.start for s in slices_by_dimension),
            end_point=tuple(s.stop for s in slices_by_dimension),
        )
This function yields objects of a custom Bounds type, which allows you to retain the spatial information of each chunk regardless of the number of dimensions. The code of Bounds is too long to fit here, but it’s included in the accompanying materials, which you can download by clicking the link below:
Free Sample Code: Click here to download the free source code that you’ll use to split a Python list or iterable into chunks.
Take a look at these three-dimensional bounds enclosing points within the requested number of chunks:
>>> from spatial_splitting import split_multi

>>> for bounds in split_multi(16, 1920, 1080, 3):
...     print(bounds)
...
Bounds(start_point=(0, 0, 0), end_point=(960, 540, 1))
Bounds(start_point=(0, 0, 1), end_point=(960, 540, 2))
Bounds(start_point=(0, 0, 2), end_point=(960, 540, 3))
Bounds(start_point=(0, 0, 3), end_point=(960, 540, 3))
Bounds(start_point=(0, 540, 0), end_point=(960, 1080, 1))
Bounds(start_point=(0, 540, 1), end_point=(960, 1080, 2))
Bounds(start_point=(0, 540, 2), end_point=(960, 1080, 3))
Bounds(start_point=(0, 540, 3), end_point=(960, 1080, 3))
Bounds(start_point=(960, 0, 0), end_point=(1920, 540, 1))
Bounds(start_point=(960, 0, 1), end_point=(1920, 540, 2))
Bounds(start_point=(960, 0, 2), end_point=(1920, 540, 3))
Bounds(start_point=(960, 0, 3), end_point=(1920, 540, 3))
Bounds(start_point=(960, 540, 0), end_point=(1920, 1080, 1))
Bounds(start_point=(960, 540, 1), end_point=(1920, 1080, 2))
Bounds(start_point=(960, 540, 2), end_point=(1920, 1080, 3))
Bounds(start_point=(960, 540, 3), end_point=(1920, 1080, 3))
You split the space corresponding to a hypothetical image that’s 1,920 pixels wide and 1,080 pixels high and has three color components per pixel. While you don’t have any concrete pixel values yet, you already know the three-dimensional bounds of sixteen cuboid chunks that you can apply to one or more Full HD images.
Note: Even though you asked for sixteen cuboids with an equal volume, in reality, you only got twelve. The highlighted lines indicate empty bounds, whose color dimension is the slice [3:3], which has no elements. This is an artifact of the numbers involved, as the third dimension was split into four chunks, even though there are only three color components.
Every Bounds object can be defined by the starting and ending points, which follow the half-open interval principle, just like the regular slice objects:
>>> from spatial_splitting import Bounds

>>> bounds = Bounds(
...     start_point=(960, 540, 1),
...     end_point=(1920, 1080, 2),
... )
It means that the starting point will be included within the bounds, while the ending point won’t, which becomes clear when you iterate over the bounds:
>>> # Points enclosed by the bounds
>>> for point in bounds:
...     print(point)
...
(960, 540, 1)
(960, 541, 1)
(960, 542, 1)
 ⋮
(1919, 1078, 1)
(1919, 1079, 1)

>>> # Points offset to the origin
>>> for point in bounds:
...     print(bounds.offset(*point))
...
(0, 0, 0)
(0, 1, 0)
(0, 2, 0)
 ⋮
(959, 538, 0)
(959, 539, 0)
The iteration results in tuples with numbers that resemble how a car odometer works by increasing the rightmost coordinate first. You can optionally translate the absolute coordinates by offsetting them to the origin, which might be useful for correctly indexing a chunk’s buffer.
Additionally, you can get a lot of useful information about a specific Bounds object by accessing its members:
>>> # The number of dimensions
>>> bounds.num_dimensions
3

>>> # The size of each dimension
>>> bounds.size
(960, 540, 1)

>>> # Slice objects in each dimension
>>> for slice_ in bounds.slices():
...     print(slice_)
...
slice(960, 1920, None)
slice(540, 1080, None)
slice(1, 2, None)

>>> # The number of bounded points
>>> len(bounds)
518400
For example, you can learn about the number of dimensions, their sizes, the corresponding slice objects, and the total number of discrete points in the bounds.
It’s worth noting that bounds aren’t the same as a chunk! While the Bounds instance can universally describe the coordinates in any space, implementing a specific chunk object will depend on the problem at hand. Head over to the final section in this tutorial for a concrete example, where you’ll tie everything about splitting in multiple dimensions together.
Synthesize an Image in Chunks Using Parallel Processing
In this closing section, you’re going to use what you’ve learned so far about splitting multidimensional data into chunks. Unlike before, however, you’ll finally process the chunks in parallel using multiple CPU cores and Python.
Define an Image Chunk
You’ll start by defining a custom data type to represent chunks of an image:
# parallel_demo.py

class Chunk:
    def __init__(self, bounds):
        self.bounds = bounds
        self.height = bounds.size[0]
        self.width = bounds.size[1]
The class constructor accepts an instance of Bounds as the only argument. Because you’re going to store pixels in row-major order, the first dimension of the bounds is the height, and the second dimension is the width of the chunk.
The actual pixel values are kept in a two-dimensional NumPy array, which initially contains zeros:
# parallel_demo.py

import numpy as np

class Chunk:
    def __init__(self, bounds):
        self.bounds = bounds
        self.height = bounds.size[0]
        self.width = bounds.size[1]
        self.pixels = np.zeros((self.height, self.width), dtype=np.uint8)
Each pixel is encoded using a single 8-bit unsigned integer, which can represent one of 256 levels of grayscale. In order to give the ability to read and update the value of a pixel, you can implement these two special methods in your class:
# parallel_demo.py

import numpy as np

class Chunk:
    def __init__(self, bounds):
        self.bounds = bounds
        self.height = bounds.size[0]
        self.width = bounds.size[1]
        self.pixels = np.zeros((self.height, self.width), dtype=np.uint8)

    def __getitem__(self, coordinates):
        return self.pixels[self.bounds.offset(*coordinates)]

    def __setitem__(self, coordinates, value):
        self.pixels[self.bounds.offset(*coordinates)] = value
They both calculate the pixel’s coordinates relative to the origin of its containing chunk by offsetting the absolute coordinates accordingly.
Here’s how you can fill such a chunk with random values and then read one of the pixels back:
>>> from random import randint
>>> from parallel_demo import Chunk
>>> from spatial_splitting import Bounds

>>> bounds = Bounds(
...     start_point=(960, 540),
...     end_point=(1920, 1080),
... )
>>> chunk = Chunk(bounds)
>>> for y, x in bounds:
...     chunk[y, x] = randint(0, 255)

>>> chunk.pixels
array([[237, 239,  78, ..., 161,  15,  10],
       [187,  19, 192, ...,  71,  37,  55],
       [ 45, 144, 190, ...,  23, 223, 220],
       ...,
       [113, 230, 120, ..., 174, 246, 210],
       [ 56, 236,  99, ..., 168, 213, 130],
       [  9, 180, 128, ...,  97, 185,  76]], dtype=uint8)

>>> chunk.pixels[0, 0]
237
Note that the top-left pixel located in the first row and the first column has absolute coordinates equal to 960 and 540. You must remember the need for conversion between absolute and relative coordinates when pixel values depend on their location in the image!
Now that you’ve implemented the Chunk data type, you’ll code the logic to fill it with some interesting data!
Generate and Combine the Chunks of an Image
For the purpose of this demonstration, you’ll render the Mandelbrot set, which is a fairly computationally intensive task. To spare you the details, you can grab the code from an earlier tutorial on drawing the Mandelbrot set, and then copy it into your Python module:
# parallel_demo.py

from dataclasses import dataclass
from math import log

import numpy as np

# ...

@dataclass
class MandelbrotSet:
    max_iterations: int
    escape_radius: float = 2.0

    def __contains__(self, c):
        return self.stability(c) == 1

    def stability(self, c, smooth=False, clamp=True):
        value = self.escape_count(c, smooth) / self.max_iterations
        return max(0.0, min(value, 1.0)) if clamp else value

    def escape_count(self, c, smooth=False):
        z = 0 + 0j
        for iteration in range(self.max_iterations):
            z = z**2 + c
            if abs(z) > self.escape_radius:
                if smooth:
                    return iteration + 1 - log(log(abs(z))) / log(2)
                return iteration
        return self.max_iterations
Read the related tutorial if you’re interested in how this code can help you reveal the famous fractal. Otherwise, feel free to take for granted that it works correctly and move on.
You’re also going to need to define a few constants and a transformation function, which takes pixel coordinates and turns them into a complex number:
# parallel_demo.py

from dataclasses import dataclass
from math import log
from os import cpu_count

import numpy as np

IMAGE_WIDTH, IMAGE_HEIGHT = 1920, 1080
CENTER = -0.7435 + 0.1314j
SCALE = 0.0000015
MAX_ITERATIONS = 256
ESCAPE_RADIUS = 1000
NUM_CHUNKS = cpu_count()

# ...

def transform(y, x):
    im = SCALE * (IMAGE_HEIGHT / 2 - y)
    re = SCALE * (x - IMAGE_WIDTH / 2)
    return complex(re, im) + CENTER
Again, you don’t need to worry about the technical details in this code, as they’re not essential to understanding multidimensional splitting.
The next function that you’ll define takes a Bounds instance and returns the corresponding Chunk object with its pixel values filled in:
# parallel_demo.py

# ...

def generate_chunk(bounds):
    chunk = Chunk(bounds)
    mandelbrot_set = MandelbrotSet(MAX_ITERATIONS, ESCAPE_RADIUS)
    for y, x in bounds:
        c = transform(y, x)
        instability = 1 - mandelbrot_set.stability(c, smooth=True)
        chunk[y, x] = int(instability * 255)
    return chunk
This function body looks similar to a code snippet from the previous section, in which you instantiated a new chunk and looped over the bounds, filling the pixels with random values. Here, on the other hand, you use some mathematical tricks to assign meaningful values that’ll produce an attractive image.
To merge the generated chunks into a viewable image, you can overwrite strides of a NumPy array using the corresponding slice objects:
# parallel_demo.py

from dataclasses import dataclass
from math import log
from os import cpu_count

import numpy as np
from PIL import Image

# ...

def combine(chunks):
    pixels = np.zeros((IMAGE_HEIGHT, IMAGE_WIDTH), dtype=np.uint8)
    for chunk in chunks:
        pixels[chunk.bounds.slices()] = chunk.pixels
    return Image.fromarray(pixels, mode="L")
First, you allocate a placeholder array for the image’s pixel data. Then, you iterate over the processed chunks and assign their values to the correct fragment of the array. Lastly, you create a grayscale image from the pixel data using the Pillow library.
You now have all the building blocks to synthesize an image of the Mandelbrot set. In the next section, you’ll generate the same image using two approaches. In both cases, you’ll split the problem space into identical chunks, though.
Process the Chunks Sequentially and in Parallel
Before trying to process the chunks in parallel, you should first check if the sequential version of your code will give the expected result. Go ahead and add the following two functions:
# parallel_demo.py

from dataclasses import dataclass
from math import log
from os import cpu_count

import numpy as np
from PIL import Image

from spatial_splitting import split_multi

# ...

def process_sequentially(bounds_iter):
    return map(generate_chunk, bounds_iter)

def main():
    bounds_iter = split_multi(NUM_CHUNKS, IMAGE_HEIGHT, IMAGE_WIDTH)
    image = combine(process_sequentially(bounds_iter))
    image.show()

if __name__ == "__main__":
    main()
Your main() function calls split_multi() to return an iterator of bounds for the specified number of chunks and image dimensions. It then combines the chunks produced sequentially for these bounds. The processing of chunks involves calling generate_chunk() on each Bounds instance.
You can run this script straight from your code editor, or you can use the command-line interface:
(venv) $ python parallel_demo.py
When you show the image rendered this way, it should look something like the following:

If it takes too long to generate that image, then try reducing the image size by updating the IMAGE_WIDTH and IMAGE_HEIGHT constants accordingly.
Now that you’ve verified the correctness of your sequential code, it’s time to schedule the chunks to be processed in parallel. You can specify another processing function and use it instead of the sequential one:
# parallel_demo.py

import multiprocessing
from dataclasses import dataclass
from math import log
from os import cpu_count

import numpy as np
from PIL import Image

from spatial_splitting import split_multi

# ...

def process_in_parallel(bounds_iter):
    with multiprocessing.Pool() as pool:
        return pool.map(generate_chunk, bounds_iter)

def main():
    bounds_iter = split_multi(NUM_CHUNKS, IMAGE_HEIGHT, IMAGE_WIDTH)
    image = combine(process_in_parallel(bounds_iter))
    image.show()

if __name__ == "__main__":
    main()
The parallel code looks shockingly similar to its sequential counterpart when you take advantage of the multiprocessing.Pool object. However, what happens under the surface is a bit more complicated. Python creates several worker processes and distributes a chunk of data to each of them. Because the workers communicate through the operating system, data gets serialized and sent back and forth, creating some overhead.
By default, the number of worker processes corresponds to the number of available CPU cores in your computer, allowing them to do their job simultaneously rather than in sequence. When all the workers are done, their results get transferred to the parent process, which can make sense of the partial results and combine the chunks.
How much more quickly the code will execute when you process the chunks in parallel depends on several factors, which you’ll explore now.
Measure the Performance Improvement
In general, the cost of data splitting, serializing, and combining may be too high to justify the use of multiple processes in the first place when the data isn’t big enough. However, in this section, you’ll be comparing the processing time of the chunks without considering a case without any splitting.
Note: While there are a few ways to monitor your Python code, you’ll measure the execution time using the timer.perf_counter() function from the standard library.
You might think that splitting a problem into smaller tasks and running them in parallel will always lead to faster code execution, but that couldn’t be further from the truth! Rendering the Mandelbrot set is a great example that can illustrate that. Here’s the breakdown of the rendering times of the image from the previous section, measured against different numbers of chunks:
| Code | Average Time | Speedup | Total Speed |
|---|---|---|---|
| Sequential | 41.53 | - | - |
| Parallel (n=1) | 41.40 | 1x | 1x |
| Parallel (n=2) | 21.35 | 1.94x | 1.94x |
| Parallel (n=3) | 15.84 | 1.35x | 2.61x |
| Parallel (n=4) | 12.34 | 1.28x | 3.35x |
Each of the implementations was executed five times before calculating the average running time. The computer it was tested on had a total of four CPU cores.
The baseline is your parallel code on a single core (n=1), which runs in almost exactly the same amount of time as the sequential version. Adding one additional core cuts the time nearly in half, which makes sense because your computer does twice as much work in the same amount of time. However, the running time between two and three cores is reduced only by about 25%, while adding an additional core reduces the time by even less than that.
Why is that? Shouldn’t the total speedup relative to the baseline grow linearly with each added worker so that four cores would result in four times the original speed?
It should, but only when the difficulty level of processing every chunk is the same. Yet, when you look at the rendered image, you’ll notice relatively large empty areas where there’s no fractal. If you zoom in on a different region with a more uniform distribution of information, then you’ll achieve more spectacular percentage gains. But in that case, you’ll most likely observe worse nominal execution times because there’s more work to be done.
You might become tempted to go overboard and split your data into more chunks than you have CPU cores. That’s not necessarily a good idea, though, because you’ll quickly reach a point of diminishing returns. Splitting your data too much will cause a lot of unnecessary overhead because there will be more data serialization and context switching between the worker processes.
As you can see, parallelizing a task isn’t as straightforward as it may seem at first. There are many factors to consider when optimizing for performance, and the best approach will depend on the specific problem that you’re trying to solve. But, if done right, the gains can be huge. After all, your parallel code runs over three times faster than the sequential version of rendering the Mandelbrot set!
Conclusion
Congratulations on getting to the end of this tutorial! You explored various ways of splitting a Python list into either fixed-size chunks or a fixed number of chunks with roughly equal sizes. You also looked at a few methods to partition multidimensional data.
In addition, you implemented a parallel processing solution to synthesize an image in chunks using Python and NumPy, and you compared the performance of the sequential and parallel versions.
In this tutorial, you’ve learned how to:
- Split a Python list into fixed-size chunks
- Split a Python list into a fixed number of chunks of roughly equal sizes
- Split finite lists as well as infinite data streams
- Perform the splitting in a greedy or lazy manner
- Produce lightweight slices without allocating memory for the chunks
- Split multidimensional data, such as an array of pixels
Deciding on the best method to split the list comes down to several factors, which might require you to answer the following questions:
- What Python version are you on?
- Can you import third-party packages?
- Are you working with numerical data?
- Do you know the size of your data up front?
- Does the order of elements matter?
- Are you okay with making copies of the elements?
- Do the chunk lengths need to be balanced?
Answering them should help you make the right choice. You can also look for inspiration in the supplemental materials, which you can download by clicking the link below:
Free Sample Code: Click here to download the free source code that you’ll use to split a Python list or iterable into chunks.