The Python calendar module provides several ways to generate calendars for Python programs. It also includes a variety of functions for working with calendar data as strings, numbers, and datetime objects.
In this tutorial, you’ll learn how to use the calendar module to create and customize calendars with Python.
By the end of this tutorial, you’ll be able to:
- Display calendars in your terminal with Python
- Create plain text and HTML calendars
- Format calendars for specific locales and display conventions
- Use calendar-related functions and methods to access lower-level calendar data in a variety of formats
Get Your Code: Click here to download the free sample code you’ll use to learn about creating calendars with the calendar module in Python.
Take the Quiz: Test your knowledge with our interactive “The Python calendar Module” quiz. You’ll receive a score upon completion to help you track your learning progress:

Interactive Quiz
The Python calendar ModuleIn this quiz, you'll test your understanding of the calendar module in Python. It'll evaluate your proficiency in manipulating, customizing, and displaying calendars directly within your terminal. By working through this quiz, you'll revisit the fundamental functions and methods provided by the calendar module.
Displaying Calendars in Your Terminal
Unix and Unix-like operating systems such as macOS and Linux include a cal command-line utility for displaying calendars in an interactive console:
$ cal
      May 2024
Su Mo Tu We Th Fr Sa
          1  2  3  4
 5  6  7  8  9 10 11
12 13 14 15 16 17 18
19 20 21 22 23 24 25
26 27 28 29 30 31
Python provides a similar tool, which allows you to run the calendar module as a command-line script. To begin exploring the Python calendar module, open up your terminal program and enter the following command:
$ python -m calendar
                                  2024

      January                   February                   March
Mo Tu We Th Fr Sa Su      Mo Tu We Th Fr Sa Su      Mo Tu We Th Fr Sa Su
 1  2  3  4  5  6  7                1  2  3  4                   1  2  3
 8  9 10 11 12 13 14       5  6  7  8  9 10 11       4  5  6  7  8  9 10
15 16 17 18 19 20 21      12 13 14 15 16 17 18      11 12 13 14 15 16 17
22 23 24 25 26 27 28      19 20 21 22 23 24 25      18 19 20 21 22 23 24
29 30 31                  26 27 28 29               25 26 27 28 29 30 31

       April                      May                       June
Mo Tu We Th Fr Sa Su      Mo Tu We Th Fr Sa Su      Mo Tu We Th Fr Sa Su
 1  2  3  4  5  6  7             1  2  3  4  5                      1  2
 8  9 10 11 12 13 14       6  7  8  9 10 11 12       3  4  5  6  7  8  9
15 16 17 18 19 20 21      13 14 15 16 17 18 19      10 11 12 13 14 15 16
22 23 24 25 26 27 28      20 21 22 23 24 25 26      17 18 19 20 21 22 23
29 30                     27 28 29 30 31            24 25 26 27 28 29 30

        July                     August                  September
Mo Tu We Th Fr Sa Su      Mo Tu We Th Fr Sa Su      Mo Tu We Th Fr Sa Su
 1  2  3  4  5  6  7                1  2  3  4                         1
 8  9 10 11 12 13 14       5  6  7  8  9 10 11       2  3  4  5  6  7  8
15 16 17 18 19 20 21      12 13 14 15 16 17 18       9 10 11 12 13 14 15
22 23 24 25 26 27 28      19 20 21 22 23 24 25      16 17 18 19 20 21 22
29 30 31                  26 27 28 29 30 31         23 24 25 26 27 28 29
                                                    30

      October                   November                  December
Mo Tu We Th Fr Sa Su      Mo Tu We Th Fr Sa Su      Mo Tu We Th Fr Sa Su
    1  2  3  4  5  6                   1  2  3                         1
 7  8  9 10 11 12 13       4  5  6  7  8  9 10       2  3  4  5  6  7  8
14 15 16 17 18 19 20      11 12 13 14 15 16 17       9 10 11 12 13 14 15
21 22 23 24 25 26 27      18 19 20 21 22 23 24      16 17 18 19 20 21 22
28 29 30 31               25 26 27 28 29 30         23 24 25 26 27 28 29
                                                    30 31
Running python -m calendar with no arguments outputs a full year’s calendar for the current year. To display the full calendar for a different year, pass in the integer representation of a year as the first argument of the calendar command:
$ python -m calendar 1989
To view a single month, pass in both a year and a month as the second parameter:
$ python -m calendar 2054 07
     July 2054
Mo Tu We Th Fr Sa Su
       1  2  3  4  5
 6  7  8  9 10 11 12
13 14 15 16 17 18 19
20 21 22 23 24 25 26
27 28 29 30 31
As you can see in these examples, the calendar module can display calendars for both past and future dates. According to the official documentation, the calendar module uses the current Gregorian calendar, extended indefinitely in both directions. It also uses the ISO 8601 standard, which is an international standard for exchanging and communicating date and time-related data.
Now that you know how to display calendars in your terminal with Python, you can move on and explore other approaches to creating calendars as plain text or HTML markup representations.
Creating Text-Based Calendars
To generate plain text calendars, the calendar module provides calendar.TextCalendar with methods to format and print monthly and yearly calendars.
TextCalendar.formatyear() accepts a single parameter for the year, like the calendar command-line script. Try it out in your Python REPL by executing the following code:
>>> import calendar
>>> text_calendar = calendar.TextCalendar()
>>> text_calendar.formatyear(2024)
'                                  2024\n\n      January    (...)'
Here, after instantiating a text_calendar instance of calendar.TextCalendar, you call .formatyear(2024), which returns the full calendar for 2024 as a multiline string. You can make that look nicer with TextCalendar.pryear(), which prints the year’s calendar in a more readable format:
>>> text_calendar.pryear(2024)
                                  2024

      January                   February                   March
Mo Tu We Th Fr Sa Su      Mo Tu We Th Fr Sa Su      Mo Tu We Th Fr Sa Su
 1  2  3  4  5  6  7                1  2  3  4                   1  2  3
 8  9 10 11 12 13 14       5  6  7  8  9 10 11       4  5  6  7  8  9 10
15 16 17 18 19 20 21      12 13 14 15 16 17 18      11 12 13 14 15 16 17
22 23 24 25 26 27 28      19 20 21 22 23 24 25      18 19 20 21 22 23 24
29 30 31                  26 27 28 29               25 26 27 28 29 30 31

       April                      May                       June
Mo Tu We Th Fr Sa Su      Mo Tu We Th Fr Sa Su      Mo Tu We Th Fr Sa Su
 1  2  3  4  5  6  7             1  2  3  4  5                      1  2
 8  9 10 11 12 13 14       6  7  8  9 10 11 12       3  4  5  6  7  8  9
15 16 17 18 19 20 21      13 14 15 16 17 18 19      10 11 12 13 14 15 16
22 23 24 25 26 27 28      20 21 22 23 24 25 26      17 18 19 20 21 22 23
29 30                     27 28 29 30 31            24 25 26 27 28 29 30

        July                     August                  September
Mo Tu We Th Fr Sa Su      Mo Tu We Th Fr Sa Su      Mo Tu We Th Fr Sa Su
 1  2  3  4  5  6  7                1  2  3  4                         1
 8  9 10 11 12 13 14       5  6  7  8  9 10 11       2  3  4  5  6  7  8
15 16 17 18 19 20 21      12 13 14 15 16 17 18       9 10 11 12 13 14 15
22 23 24 25 26 27 28      19 20 21 22 23 24 25      16 17 18 19 20 21 22
29 30 31                  26 27 28 29 30 31         23 24 25 26 27 28 29
                                                    30

      October                   November                  December
Mo Tu We Th Fr Sa Su      Mo Tu We Th Fr Sa Su      Mo Tu We Th Fr Sa Su
    1  2  3  4  5  6                   1  2  3                         1
 7  8  9 10 11 12 13       4  5  6  7  8  9 10       2  3  4  5  6  7  8
14 15 16 17 18 19 20      11 12 13 14 15 16 17       9 10 11 12 13 14 15
21 22 23 24 25 26 27      18 19 20 21 22 23 24      16 17 18 19 20 21 22
28 29 30 31               25 26 27 28 29 30         23 24 25 26 27 28 29
                                                    30 31
As you can see, .pryear() requires the year as its first argument. It also provides some optional parameters to format the calendar’s display properties that look like this: .pryear(theyear, w=2, l=1, c=6, m=3).
The w parameter sets the date column width, l is the number of lines per week, c sets the spacing between month columns, and m is the number of month columns.
To format and print a calendar for a single month as plain text, TextCalendar provides .formatmonth() and .prmonth(), which are similar to the yearly calendar methods. The .prmonth() method includes a second required parameter for the month as an integer, as well as two optional parameters: w for the width of the date columns, and l for the number of lines each week will use. Both of these optional parameters default to zero.
Working in the same console session as before, use TextCalendar.prmonth() to generate and print a plain text calendar for a single month like so:
>>> text_calendar.prmonth(2024, 1)
    January 2024
Mo Tu We Th Fr Sa Su
 1  2  3  4  5  6  7
 8  9 10 11 12 13 14
15 16 17 18 19 20 21
22 23 24 25 26 27 28
29 30 31
Now that you understand the basics of creating calendars in plain text, you can take it a step further and learn how to generate HTML calendars with Python to display on the web.
Generating and Styling HTML Calendars
If you need to create a calendar for a website, the calendar module can also output calendars in HTML with calendar.HTMLCalendar. Its methods .formatmonth() and .formatyear() work like their corresponding TextCalendar methods. But they replace the formatting parameters with the ability to generate CSS classes for styling HTML.
To use this class, create an html_calendar instance in your Python console and test it out by calling .formatyear():
>>> import calendar
>>> html_calendar = calendar.HTMLCalendar()
>>> html_calendar.formatyear(2024)
'<table border="0" cellpadding="0" cellspacing="0" class="year">\n<tr> (...)'
This will return a long Python string of HTML markup representing a calendar for the full year as an HTML table. To view this HTML calendar in a web browser, first use Python’s print() function to output the string as HTML in your console:
>>> print(html_calendar.formatyear(2024))
Now copy the output of that command and paste it into a new file called formatyear.html. Open that file with your computer’s web browser, and it should appear something like this:
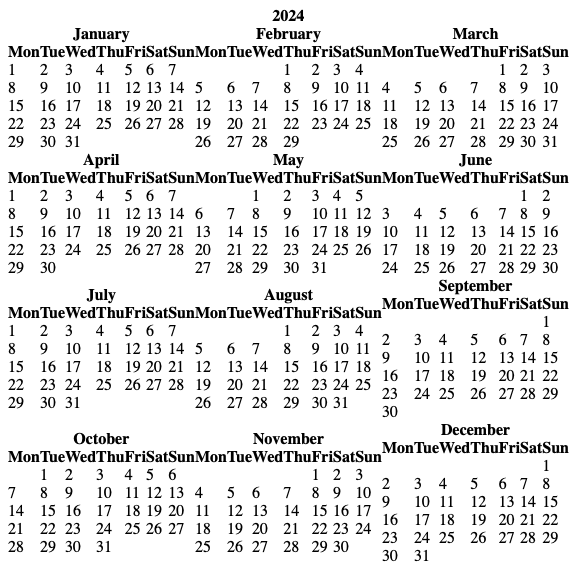
As you can see, unstyled HTML tables are not exactly the most user-friendly way to display and read a calendar. Thankfully, HTMLCalendar.formatyearpage() allows you to include a CSS stylesheet by generating a year’s calendar as a full HTML page. This method’s optional css parameter defaults to a value of 'calendar.css', referring to the name of the CSS file that will include the custom styles.
To create a new file containing a full HTML page generated by .formatyearpage(), use Python’s built-in open() function. Then pass in 'wb' as the second argument after the file name to write to the file in binary mode:
>>> with open("formatyearpage.html", mode="wb") as file:
...     file.write(html_calendar.formatyearpage(2024))
...
Here you use the Python with statement to open your file, creating a context manager object to ensure the file will always be closed even if an exception is thrown in the with block. It’s important to always close files opened by Python to preserve operating system resources and protect the files from data loss.
Now you should see a new file called formatyearpage.html in the folder where you opened your Python console. Open that file, and you’ll see the markup for a full HTML page including this <link> tag:
<link rel="stylesheet" type="text/css" href="calendar.css" />
Create a new file called calendar.css in the same directory as the formatyearpage.html file and add the following CSS code:
calendar.css
body {
    font: 16px "Helvetica Neue", Arial, Helvetica, Geneva, sans-serif;
}

table {
    margin: 10px;
}

th, td {
    padding: 5px;
}
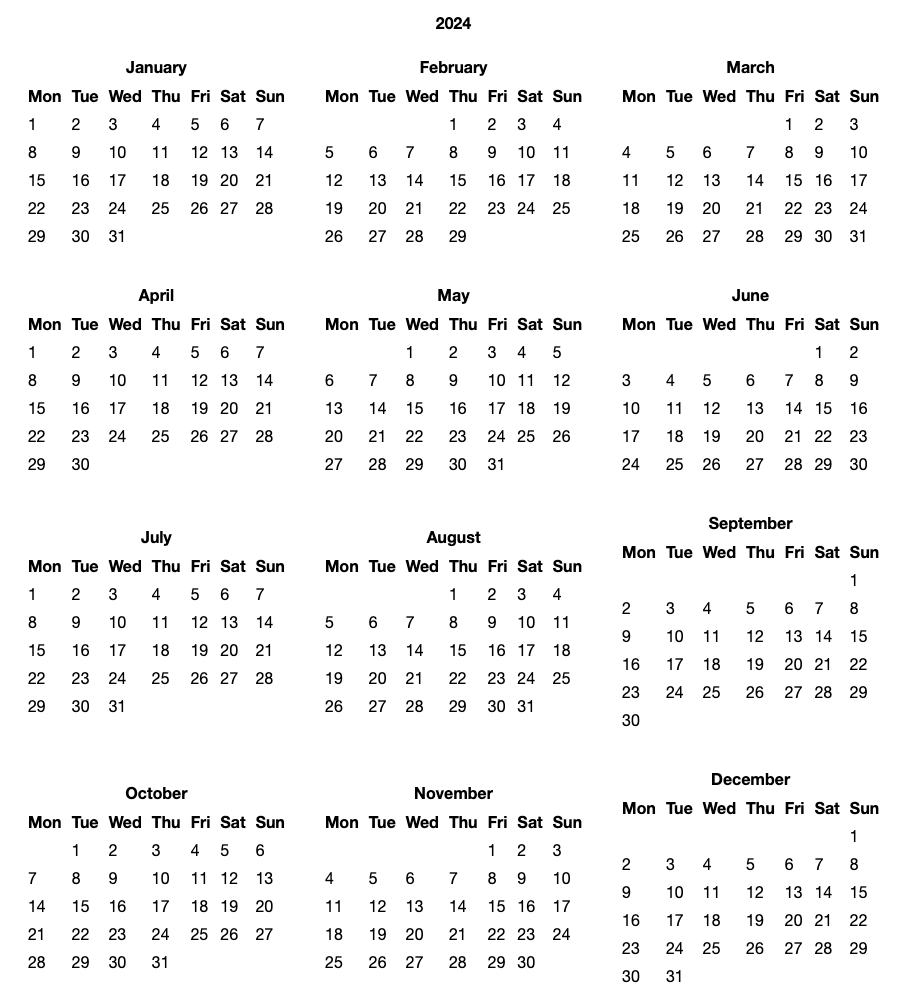
Now you can open formatyearpage.html with your web browser to see how you’ve made your calendar a bit more readable. You’ve added some padding around the date rows and columns, increased the margins of the month tables, and updated the HTML body’s font property:
In addition to the methods you’ve learned to create plain text and HTML calendars, the calendar module also allows you to create calendars for different global locations, which you’ll explore next.
Formatting Calendars for Specific Locations
By default, all calendars generated by the calendar module follow the European convention of using Monday as the first day of the week. You can change this with Calendar.setfirstweekday(), which is available as an instance method for TextCalendar and HTMLCalendar.
The calendar module uses integers to represent days of the week, where zero is Monday, and six is Sunday, or it uses constants such as calendar.MONDAY, which is defined for readability.
To change the first day of the week from Monday to Sunday for a plain text calendar, execute the following code in your Python console:
>>> import calendar
>>> text_calendar = calendar.TextCalendar()
>>> text_calendar.prmonth(2024, 1)
    January 2024
Mo Tu We Th Fr Sa Su
 1  2  3  4  5  6  7
 8  9 10 11 12 13 14
15 16 17 18 19 20 21
22 23 24 25 26 27 28
29 30 31
>>> text_calendar.setfirstweekday(calendar.SUNDAY)
>>> text_calendar.prmonth(2024, 1)
    January 2024
Su Mo Tu We Th Fr Sa
    1  2  3  4  5  6
 7  8  9 10 11 12 13
14 15 16 17 18 19 20
21 22 23 24 25 26 27
28 29 30 31
Additionally, the calendar module provides location-specific subclasses of TextCalendar and HTMLCalendar that display the month and weekday names for a specific locale. Below is an example of how it would look if you used calendar.LocaleTextCalendar to output a calendar for the locale of Germany using UTF-8 encoding:
>>> locale_calendar = calendar.LocaleTextCalendar(locale="de_DE.UTF-8")
>>> locale_calendar.prmonth(2024, 1)
    Januar 2024
Mo Di Mi Do Fr Sa So
 1  2  3  4  5  6  7
 8  9 10 11 12 13 14
15 16 17 18 19 20 21
22 23 24 25 26 27 28
29 30 31
Your calendar now displays the month and day of the week abbreviations based on their German spelling.
Note: Locale codes vary by operating system, as explained in the Python locale module’s documentation.
Working With Other Python Calendar Functions and Methods
There are several additional methods available on all Calendar and subclass instances that allow you to work with lower-level calendar data and prepare that data for formatting. For simplicity’s sake, you’ll explore a few of them here using TextCalendar.
TextCalendar.iterweekdays() returns an iterator of weekday number values for a calendar, beginning with the day set by .setfirstweekday() for the calendar:
>>> import calendar
>>> text_calendar = calendar.TextCalendar()
>>> for day_number in text_calendar.iterweekdays():
...     print(day_number)
...
0
1
2
3
4
5
6
In this code, the call to text_calendar.iterweekdays() returns a generator object that you can then loop through to display each of the weekday numerical values for your calendar. If you were to change the first weekday to Sunday, it would have the following effect on the output of this method:
>>> text_calendar.setfirstweekday(calendar.SUNDAY)
>>> for day_number in text_calendar.iterweekdays():
...     print(day_number)
...
6
0
1
2
3
4
5
TextCalendar.itermonthdates() returns an iterator for all the days in a given month as Python datetime.date objects, including the days before the start of the month, and the days after the end of the month that are needed to complete those weeks.
Here’s an example of how you loop through the iterator and use datetime.date.strftime() to print a readable version of each datetime.date object:
>>> for day in text_calendar.itermonthdates(2024, 1):
...     day.strftime("%m/%d/%Y")
...
'12/31/2023'
'01/01/2024'
'01/02/2024'
'01/03/2024'
'01/04/2024'
'01/05/2024'
'01/06/2024'
'01/07/2024'
'01/08/2024'
'01/09/2024'
'01/10/2024'
'01/11/2024'
'01/12/2024'
'01/13/2024'
'01/14/2024'
'01/15/2024'
'01/16/2024'
'01/17/2024'
'01/18/2024'
'01/19/2024'
'01/20/2024'
'01/21/2024'
'01/22/2024'
'01/23/2024'
'01/24/2024'
'01/25/2024'
'01/26/2024'
'01/27/2024'
'01/28/2024'
'01/29/2024'
'01/30/2024'
'01/31/2024'
'02/01/2024'
'02/02/2024'
'02/03/2024'
There are several methods similar to TextCalendar.itermonthdates() including .itermonthdays(), which return the days of the month as numbers, with zeros for the days needed to complete the first and last week of the month:
>>> for day in text_calendar.itermonthdays(2024, 1):
...     print(day)
...
0
1
2
3
4
5
6
7
8
9
10
11
12
13
14
15
16
17
18
19
20
21
22
23
24
25
26
27
28
29
30
31
0
0
0
In this output, the zeros at the beginning and end indicate the days in December and February that need to be included in the visual representation of the calendar to complete the first and last weeks of January.
Similarly, .itermonthdays2() returns a tuple for each day containing the day of the month and weekday number. Additional methods include the year, day of the week, and day of the month as tuples:
>>> for day in text_calendar.itermonthdays2(2024, 1):
...     print(day)
...
(0, 6)
(1, 0)
(2, 1)
(3, 2)
(4, 3)
(5, 4)
(6, 5)
(7, 6)
(8, 0)
(9, 1)
(10, 2)
(11, 3)
(12, 4)
(13, 5)
(14, 6)
(15, 0)
(16, 1)
(17, 2)
(18, 3)
(19, 4)
(20, 5)
(21, 6)
(22, 0)
(23, 1)
(24, 2)
(25, 3)
(26, 4)
(27, 5)
(28, 6)
(29, 0)
(30, 1)
(31, 2)
(0, 3)
(0, 4)
(0, 5)
Here you can see the zero dates for December and February along with the numbered days of the week that they represent in the calendar as the second item of the tuples.
The calendar module also includes a couple of module-level functions for working specifically with leap years. The .isleap() function
determines if the given year is a leap year, and .leapdays() accepts two years as arguments, identifying the number of leap years between the two years:
>>> calendar.isleap(2024)
True
>>> calendar.leapdays(1980, 2024)
11
These are just a few of the lower-level functions and methods that the calendar module provides for working with calendar-related data. In the next section, you’ll explore some ideas to go further in your learning and start using Python’s calendar-building capabilities in your own projects.
Next Steps
Now that you’ve got a sense of the core features of the Python calendar module, check out the official documentation to dig in a bit deeper into the additional features the module has to offer.
For example, calendar.HTMLCalendar provides several attributes for overriding and customizing the default CSS classes for more fine-grained control over your calendar’s appearance. And with the ability to subclass and extend HTMLCalendar itself, there’s a wide range of possibilities for building interactive web-based calendars with Python by overwriting its attributes and methods.
In addition to the variety of tools you’ve explored so far, the calendar.Calendar base class provides many other methods for working with calendar data. These methods don’t return fully formatted calendars. Rather, they provide the pieces of data that are necessary to compose those calendars. So you can use them to prepare data for formatting in more complex or interactive calendar applications.
To complement your mastery of the Python calendar module, take some time to dive into the details of the Python datetime and time modules that can be combined to build richly featured programs that work with dates and times.
Conclusion
Calendars are a key component of many software programs and websites. With the Python calendar module, there are a variety of options available for you to create, display, and customize calendars in your Python programs.
In this tutorial, you’ve learned:
- How to display calendars interactively by running the
calendarmodule as a command-line script in your terminal. - How to generate plain text and HTML calendars and use the various formatting and styling options for each type
- How to format calendars for specific locations and display conventions
- How to use lower-level functions and methods for working with calendar data
Now that you’re familiar with the range of functionality the calendar module provides, it’s time to put that knowledge to use as you build your own calendar applications with Python!
Get Your Code: Click here to download the free sample code you’ll use to learn about creating calendars with the calendar module in Python.
Take the Quiz: Test your knowledge with our interactive “The Python calendar Module” quiz. You’ll receive a score upon completion to help you track your learning progress:
Interactive Quiz
The Python calendar ModuleIn this quiz, you'll test your understanding of the calendar module in Python. It'll evaluate your proficiency in manipulating, customizing, and displaying calendars directly within your terminal. By working through this quiz, you'll revisit the fundamental functions and methods provided by the calendar module.