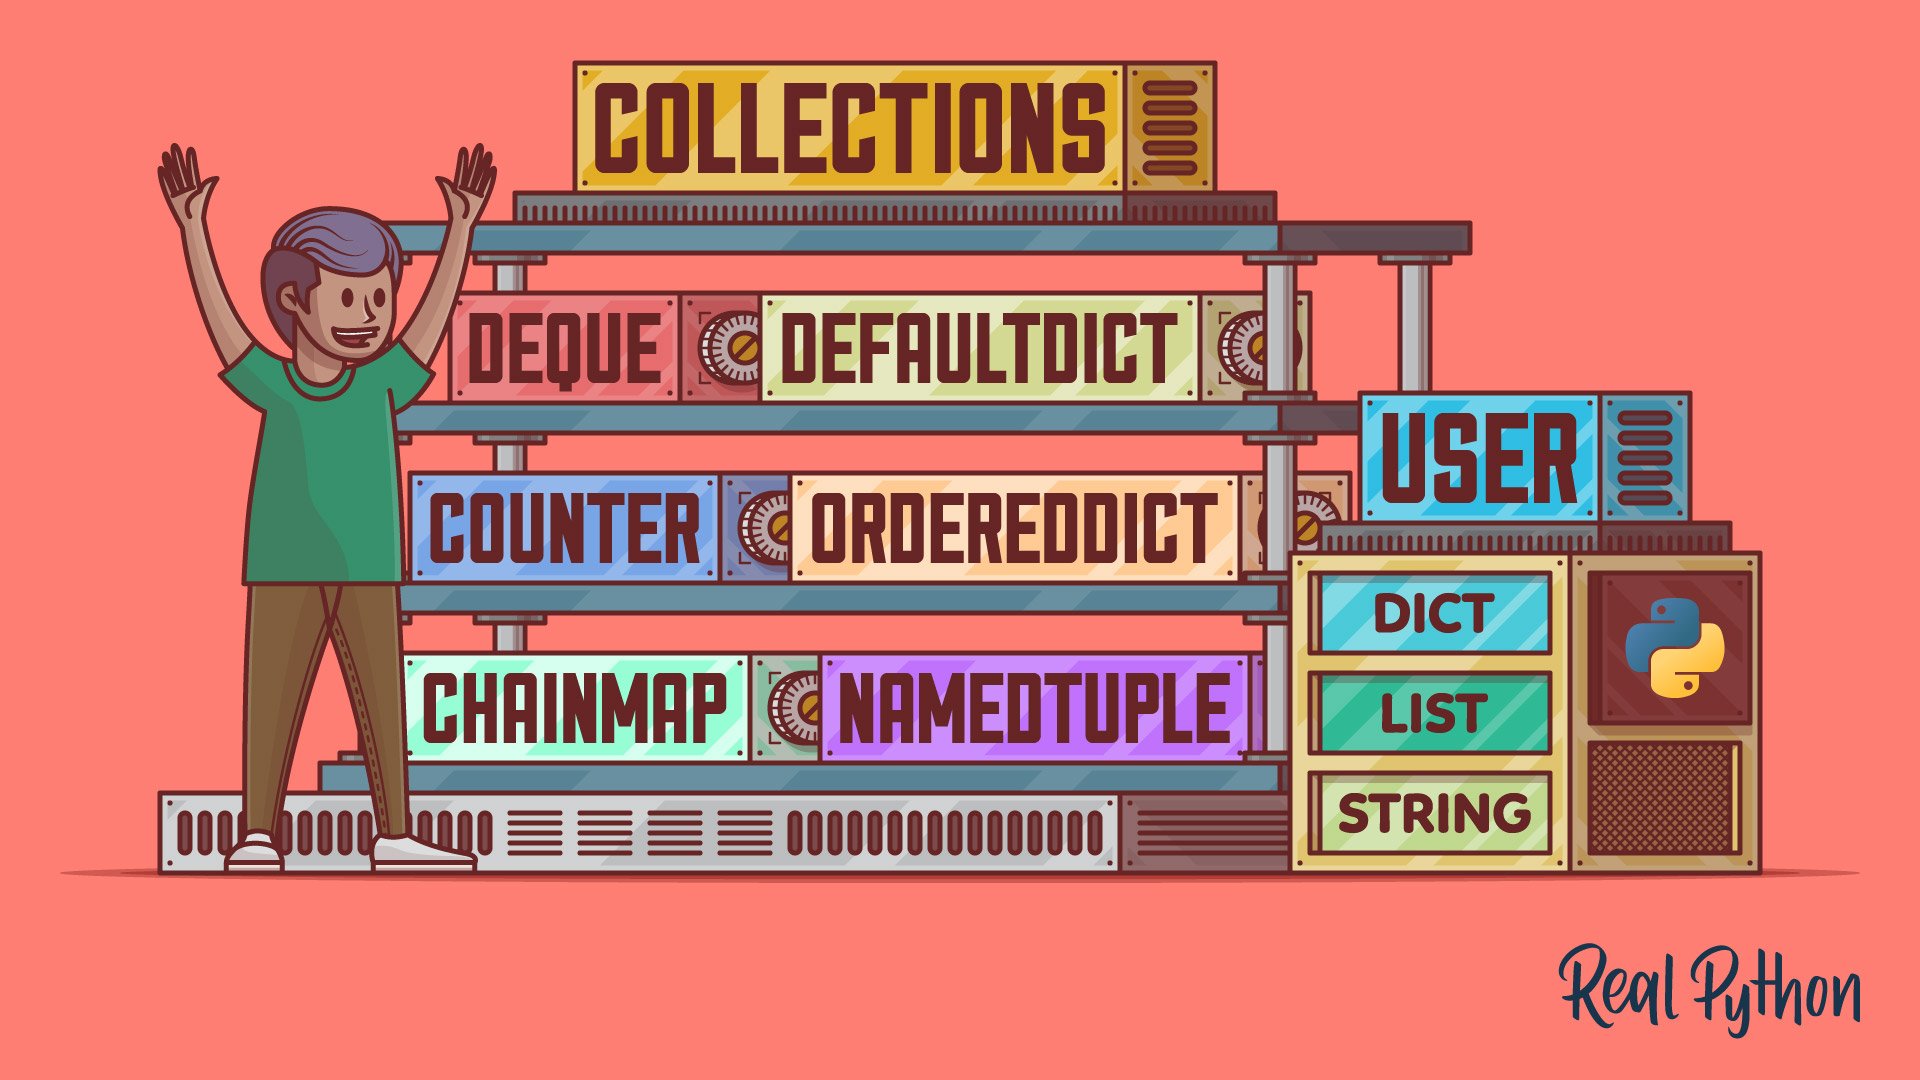
Python’s collections module provides a rich set of specialized container data types carefully designed to approach specific programming problems in a Pythonic and efficient way. The module also provides wrapper classes that make it safer to create custom classes that behave similar to the built-in types dict, list, and str.
Learning about the data types and classes in collections will allow you to grow your programming tool kit with a valuable set of reliable and efficient tools.
In this tutorial, you’ll learn how to:
- Write readable and explicit code with
namedtuple - Build efficient queues and stacks with
deque - Count objects quickly with
Counter - Handle missing dictionary keys with
defaultdict - Guarantee the insertion order of keys with
OrderedDict - Manage multiple dictionaries as a single unit with
ChainMap
To better understand the data types and classes in collections, you should know the basics of working with Python’s built-in data types, such as lists, tuples, and dictionaries. Additionally, the last part of the article requires some basic knowledge about object-oriented programming in Python.
Free Download: Get a sample chapter from Python Tricks: The Book that shows you Python’s best practices with simple examples you can apply instantly to write more beautiful + Pythonic code.
Getting Started With Python’s collections
Back in Python 2.4, Raymond Hettinger contributed a new module called collections to the standard library. The goal was to provide various specialized collection data types to approach specific programming problems.
At that time, collections only included one data structure, deque, which was specially designed as a double-ended queue that supports efficient append and pop operations on either end of the sequence. From this point on, several modules in the standard library took advantage of deque to improve the performance of their classes and structures. Some outstanding examples are queue and threading.
With time, a handful of specialized container data types populated the module:
| Data type | Python version | Description |
|---|---|---|
deque |
2.4 | A sequence-like collection that supports efficient addition and removal of items from either end of the sequence |
defaultdict |
2.5 | A dictionary subclass for constructing default values for missing keys and automatically adding them to the dictionary |
namedtuple() |
2.6 | A factory function for creating subclasses of tuple that provides named fields that allow accessing items by name while keeping the ability to access items by index |
OrderedDict |
2.7, 3.1 | A dictionary subclass that keeps the key-value pairs ordered according to when the keys are inserted |
Counter |
2.7, 3.1 | A dictionary subclass that supports convenient counting of unique items in a sequence or iterable |
ChainMap |
3.3 | A dictionary-like class that allows treating a number of mappings as a single dictionary object |
Besides these specialized data types, collections also provides three base classes that facilitate the creations of custom lists, dictionaries, and strings:
| Class | Description |
|---|---|
UserDict |
A wrapper class around a dictionary object that facilitates subclassing dict |
UserList |
A wrapper class around a list object that facilitates subclassing list |
UserString |
A wrapper class around a string object that facilitates subclassing string |
The need for these wrapper classes was partially eclipsed by the ability to subclass the corresponding standard built-in data types. However, sometimes using these classes is safer and less error-prone than using standard data types.
With this brief introduction to collections and the specific use cases that the data structures and classes in this module can solve, it’s time to take a closer look at them. Before that, it’s important to point out that this tutorial is an introduction to collections as a whole. In most of the following sections, you’ll find a blue alert box that’ll guide you to a dedicated article on the class or function at hand.
Improving Code Readability: namedtuple()
Python’s namedtuple() is a factory function that allows you to create tuple subclasses with named fields. These fields give you direct access to the values in a given named tuple using the dot notation, like in obj.attr.
The need for this feature arose because using indices to access the values in a regular tuple is annoying, difficult to read, and error-prone. This is especially true if the tuple you’re working with has several items and is constructed far away from where you’re using it.
Note: Check out Write Pythonic and Clean Code With namedtuple for a deeper dive into how to use namedtuple in Python.
A tuple subclass with named fields that developers can access with the dot notation seemed like a desirable feature back in Python 2.6. That’s the origin of namedtuple(). The tuple subclasses you can build with this function are a big win in code readability if you compare them with regular tuples.
To put the code readability problem in perspective, consider divmod(). This built-in function takes two (non-complex) numbers and returns a tuple with the quotient and remainder that result from the integer division of the input values:
>>> divmod(12, 5)
(2, 2)
It works nicely. However, is this result readable? Can you tell what the meaning of each number in the output is? Fortunately, Python offers a way to improve this. You can code a custom version of divmod() with an explicit result using namedtuple:
>>> from collections import namedtuple

>>> def custom_divmod(x, y):
...     DivMod = namedtuple("DivMod", "quotient remainder")
...     return DivMod(*divmod(x, y))
...

>>> result = custom_divmod(12, 5)
>>> result
DivMod(quotient=2, remainder=2)

>>> result.quotient
2
>>> result.remainder
2
Now you know the meaning of each value in the result. You can also access each independent value using the dot notation and a descriptive field name.
To create new tuple subclass using namedtuple(), you need two required arguments:
typenameis the name of the class you’re creating. It must be a string with a valid Python identifier.field_namesis the list of field names you’ll use to access the items in the resulting tuple. It can be:- An iterable of strings, such as
["field1", "field2", ..., "fieldN"] - A string with whitespace-separated field names, such as
"field1 field2 ... fieldN" - A string with comma-separated field names, such as
"field1, field2, ..., fieldN"
- An iterable of strings, such as
For example, here are different ways to create a sample 2D Point with two coordinates (x and y) using namedtuple():
>>> from collections import namedtuple

>>> # Use a list of strings as field names
>>> Point = namedtuple("Point", ["x", "y"])
>>> point = Point(2, 4)
>>> point
Point(x=2, y=4)

>>> # Access the coordinates
>>> point.x
2
>>> point.y
4
>>> point[0]
2

>>> # Use a generator expression as field names
>>> Point = namedtuple("Point", (field for field in "xy"))
>>> Point(2, 4)
Point(x=2, y=4)

>>> # Use a string with comma-separated field names
>>> Point = namedtuple("Point", "x, y")
>>> Point(2, 4)
Point(x=2, y=4)

>>> # Use a string with space-separated field names
>>> Point = namedtuple("Point", "x y")
>>> Point(2, 4)
Point(x=2, y=4)
In these examples, you first create Point using a list of field names. Then you instantiate Point to make a point object. Note that you can access x and y by field name and also by index.
The remaining examples show how to create an equivalent named tuple with a string of comma-separated field names, a generator expression, and a string of space-separated field names.
Named tuples also provide a bunch of cool features that allow you to define default values for your fields, create a dictionary from a given named tuple, replace the value of a given field, and more:
>>> from collections import namedtuple

>>> # Define default values for fields
>>> Person = namedtuple("Person", "name job", defaults=["Python Developer"])
>>> person = Person("Jane")
>>> person
Person(name='Jane', job='Python Developer')

>>> # Create a dictionary from a named tuple
>>> person._asdict()
{'name': 'Jane', 'job': 'Python Developer'}

>>> # Replace the value of a field
>>> person = person._replace(job="Web Developer")
>>> person
Person(name='Jane', job='Web Developer')
Here, you first create a Person class using namedtuple(). This time, you use an optional argument called defaults that accepts a sequence of default values for the tuple’s fields. Note that namedtuple() applies the default values to the rightmost fields.
In the second example, you create a dictionary from an existing named tuple using ._asdict(). This method returns a new dictionary that uses the field names as keys.
Finally, you use ._replace() to replace the original value of job. This method doesn’t update the tuple in place but returns a new named tuple with the new value stored in the corresponding field. Do you have an idea of why ._replace() returns a new named tuple?
Building Efficient Queues and Stacks: deque
Python’s deque was the first data structure in collections. This sequence-like data type is a generalization of stacks and queues designed to support memory-efficient and fast append and pop operations on both ends of the data structure.
Note: The word deque is pronounced “deck” and stands for double-ended queue.
In Python, append and pop operations on the beginning or left side of list objects are inefficient, with O(n) time complexity. These operations are especially expensive if you’re working with large lists because Python has to move all the items to the right to insert new items at the beginning of the list.
On the other hand, append and pop operations on the right side of a list are normally efficient (O(1)) except for those cases in which Python needs to reallocate memory to grow the underlying list for accepting new items.
Python’s deque was created to overcome this problem. Append and pop operations on both sides of a deque object are stable and equally efficient because deques are implemented as a doubly linked list. That’s why deques are particularly useful for creating stacks and queues.
Take a queue as an example. It manages items in a First-In/First-Out (FIFO) fashion. It works as a pipe, where you push in new items at one end of the pipe and pop old items out from the other end. Adding an item to the end of a queue is known as an enqueue operation. Removing an item from the front or beginning of a queue is called dequeue.
Note: Check out Python’s deque: Implement Efficient Queues and Stacks for a thorough exploration into using deque in your Python code.
Now say you’re modeling a queue of people waiting to buy tickets to a movie. You can do that with a deque. Every time a new person arrives, you enqueue them. When the person at the front of the queue gets their tickets, you dequeue them.
Here’s how you can emulate the process using a deque object:
>>> from collections import deque

>>> ticket_queue = deque()
>>> ticket_queue
deque([])

>>> # People arrive to the queue
>>> ticket_queue.append("Jane")
>>> ticket_queue.append("John")
>>> ticket_queue.append("Linda")

>>> ticket_queue
deque(['Jane', 'John', 'Linda'])

>>> # People bought their tickets
>>> ticket_queue.popleft()
'Jane'
>>> ticket_queue.popleft()
'John'
>>> ticket_queue.popleft()
'Linda'

>>> # No people on the queue
>>> ticket_queue.popleft()
Traceback (most recent call last):
  File "<stdin>", line 1, in <module>
IndexError: pop from an empty deque
Here, you first create an empty deque object to represent the queue of people. To enqueue a person, you can use .append(), which adds items to the right end of a deque. To dequeue a person, you use .popleft(), which removes and returns items on the left end of a deque.
Note: In the Python standard library, you’ll find queue. This module implements multi-producer, multi-consumer queues useful for exchanging information between multiple threads safely.
The deque initializer takes two optional arguments:
iterableholds an iterable that serves as an initializer.maxlenholds an integer number that specifies the maximum length of thedeque.
If you don’t provide an iterable, then you get an empty deque. If you supply a value to maxlen, then your deque will only store up to maxlen items.
Having a maxlen is a handy feature. For example, say you need to implement a list of recent files in one of your applications. In that case, you can do the following:
>>> from collections import deque

>>> recent_files = deque(["core.py", "README.md", "__init__.py"], maxlen=3)

>>> recent_files.appendleft("database.py")
>>> recent_files
deque(['database.py', 'core.py', 'README.md'], maxlen=3)

>>> recent_files.appendleft("requirements.txt")
>>> recent_files
deque(['requirements.txt', 'database.py', 'core.py'], maxlen=3)
Once the deque reaches its maximum size (three files in this case), adding a new file on an end of the deque automatically discards the file at the opposite end. If you don’t supply a value to maxlen, then the deque can grow to an arbitrary number of items.
So far, you’ve learned the basics of deques, including how to create them and how to append and pop items from both ends of a given deque. Deques provide some additional features with a list-like interface. Here are some of them:
>>> from collections import deque

>>> # Use different iterables to create deques
>>> deque((1, 2, 3, 4))
deque([1, 2, 3, 4])

>>> deque([1, 2, 3, 4])
deque([1, 2, 3, 4])

>>> deque("abcd")
deque(['a', 'b', 'c', 'd'])

>>> # Unlike lists, deque doesn't support .pop() with arbitrary indices
>>> deque("abcd").pop(2)
Traceback (most recent call last):
  File "<stdin>", line 1, in <module>
TypeError: pop() takes no arguments (1 given)

>>> # Extend an existing deque
>>> numbers = deque([1, 2])
>>> numbers.extend([3, 4, 5])
>>> numbers
deque([1, 2, 3, 4, 5])

>>> numbers.extendleft([-1, -2, -3, -4, -5])
>>> numbers
deque([-5, -4, -3, -2, -1, 1, 2, 3, 4, 5])

>>> # Insert an item at a given position
>>> numbers.insert(5, 0)
>>> numbers
deque([-5, -4, -3, -2, -1, 0, 1, 2, 3, 4, 5])
In these examples, you first create deques using different types of iterables to initialize them. One difference between deque and list is that deque.pop() doesn’t support popping the item at a given index.
Note that deque provides sister methods for .append(), .pop(), and .extend() with the suffix left to indicate that they perform the corresponding operation on the left end of the underlying deque.
Deques also support sequence operations:
| Method | Description |
|---|---|
.clear() |
Remove all the elements from a deque |
.copy() |
Create a shallow copy of a deque |
.count(x) |
Count the number of deque elements equal to x |
.remove(value) |
Remove the first occurrence of value |
Another interesting feature of deques is the ability to rotate their elements using .rotate():
>>> from collections import deque

>>> ordinals = deque(["first", "second", "third"])
>>> ordinals.rotate()
>>> ordinals
deque(['third', 'first', 'second'])

>>> ordinals.rotate(2)
>>> ordinals
deque(['first', 'second', 'third'])

>>> ordinals.rotate(-2)
>>> ordinals
deque(['third', 'first', 'second'])

>>> ordinals.rotate(-1)
>>> ordinals
deque(['first', 'second', 'third'])
This method rotates the deque n steps to the right. The default value of n is 1. If you provide a negative value to n, then the rotation is to the left.
Finally, you can use indices to access the elements in a deque, but you can’t slice a deque:
>>> from collections import deque

>>> ordinals = deque(["first", "second", "third"])
>>> ordinals[1]
'second'

>>> ordinals[0:2]
Traceback (most recent call last):
  File "<stdin>", line 1, in <module>
TypeError: sequence index must be integer, not 'slice'
Deques support indexing but, interestingly, they don’t support slicing. When you try to retrieve a slice from an existing deque, you get a TypeError. This is because performing a slice operation on a linked list would be inefficient, so the operation isn’t available.
Handling Missing Keys: defaultdict
A common problem you’ll face when you’re working with dictionaries in Python is how to handle missing keys. If you try to access a key that doesn’t exist in a given dictionary, then you get a KeyError:
>>> favorites = {"pet": "dog", "color": "blue", "language": "Python"}

>>> favorites["fruit"]
Traceback (most recent call last):
  File "<stdin>", line 1, in <module>
KeyError: 'fruit'
There are a few approaches to work around this issue. For example, you can use .setdefault(). This method takes a key as an argument. If the key exists in the dictionary, then it returns the corresponding value. Otherwise, the method inserts the key, assigns it a default value, and returns that value:
>>> favorites = {"pet": "dog", "color": "blue", "language": "Python"}

>>> favorites.setdefault("fruit", "apple")
'apple'

>>> favorites
{'pet': 'dog', 'color': 'blue', 'language': 'Python', 'fruit': 'apple'}

>>> favorites.setdefault("pet", "cat")
'dog'

>>> favorites
{'pet': 'dog', 'color': 'blue', 'language': 'Python', 'fruit': 'apple'}
In this example, you use .setdefault() to generate a default value for fruit. Since this key doesn’t exist in favorites, .setdefault() creates it and assigns it the value of apple. If you call .setdefault() with an existent key, then the call won’t affect the dictionary and your key will hold the original value instead of the default value.
You can also use .get() to return a suitable default value if a given key is missing:
>>> favorites = {"pet": "dog", "color": "blue", "language": "Python"}

>>> favorites.get("fruit", "apple")
'apple'

>>> favorites
{'pet': 'dog', 'color': 'blue', 'language': 'Python'}
Here, .get() returns apple because the key is missing in the underlying dictionary. However, .get() doesn’t create the new key for you.
Since handling missing keys in dictionaries is a common need, Python’s collections also provides a tool for that. The defaultdict type is a subclass of dict designed to help you out with missing keys.
Note: Check out Using the Python defaultdict Type for Handling Missing Keys for a deeper dive into how to use Python’s defaultdict.
The constructor of defaultdict takes a function object as its first argument. When you access a key that doesn’t exist, defaultdict automatically calls that function without arguments to create a suitable default value for the key at hand.
To provide its functionality, defaultdict stores the input function in .default_factory and then overrides .__missing__() to automatically call the function and generate a default value when you access any missing keys.
You can use any callable to initialize your defaultdict objects. For example, with int() you can create a suitable counter to count different objects:
>>> from collections import defaultdict

>>> counter = defaultdict(int)
>>> counter
defaultdict(<class 'int'>, {})
>>> counter["dogs"]
0
>>> counter
defaultdict(<class 'int'>, {'dogs': 0})

>>> counter["dogs"] += 1
>>> counter["dogs"] += 1
>>> counter["dogs"] += 1
>>> counter["cats"] += 1
>>> counter["cats"] += 1
>>> counter
defaultdict(<class 'int'>, {'dogs': 3, 'cats': 2})
In this example, you create an empty defaultdict with int() as its first argument. When you access a key that doesn’t exist, the dictionary automatically calls int(), which returns 0 as the default value for the key at hand. This kind of defaultdict object is quite useful when it comes to counting things in Python.
Another common use case of defaultdict is to group things. In this case, the handy factory function is list():
>>> from collections import defaultdict

>>> pets = [
...     ("dog", "Affenpinscher"),
...     ("dog", "Terrier"),
...     ("dog", "Boxer"),
...     ("cat", "Abyssinian"),
...     ("cat", "Birman"),
... ]

>>> group_pets = defaultdict(list)

>>> for pet, breed in pets:
...     group_pets[pet].append(breed)
...

>>> for pet, breeds in group_pets.items():
...     print(pet, "->", breeds)
...
dog -> ['Affenpinscher', 'Terrier', 'Boxer']
cat -> ['Abyssinian', 'Birman']
In this example, you have raw data about pets and their breed, and you need to group them by pet. To do this, you use list() as .default_factory when you create the defaultdict instance. This enables your dictionary to automatically create an empty list ([]) as the default value for every missing key you access. Then you use that list to store the breeds of your pets.
Finally, you should note that since defaultdict is a subclass of dict, it provides the same interface. This means that you can use your defaultdict objects as you would use a regular dictionary.
Keeping Your Dictionaries Ordered: OrderedDict
Sometimes you need your dictionaries to remember the order in which key-value pairs are inserted. Python’s regular dictionaries were unordered data structures for years. So, back in 2008, PEP 372 introduced the idea of adding a new dictionary class to collections.
The new class would remember the order of items based on the moment in which keys were inserted. That was the origin of OrderedDict.
OrderedDict was introduced in Python 3.1. Its application programming interface (API) is substantially the same as dict. However, OrderedDict iterates over keys and values in the same order keys were first inserted into the dictionary. If you assign a new value to an existing key, then the order of the key-value pair remains unchanged. If an entry is deleted and reinserted, then it’ll be moved to the end of the dictionary.
Note: Check out OrderedDict vs dict in Python: The Right Tool for the Job for a deeper dive into Python’s OrderedDict and why you should consider using it.
There are several ways to create OrderedDict objects. Most of them are identical to how you create a regular dictionary. For example, you can create an empty ordered dictionary by instantiating the class without arguments and then insert key-value pairs as needed:
>>> from collections import OrderedDict

>>> life_stages = OrderedDict()

>>> life_stages["childhood"] = "0-9"
>>> life_stages["adolescence"] = "9-18"
>>> life_stages["adulthood"] = "18-65"
>>> life_stages["old"] = "+65"

>>> for stage, years in life_stages.items():
...     print(stage, "->", years)
...
childhood -> 0-9
adolescence -> 9-18
adulthood -> 18-65
old -> +65
In this example, you create an empty ordered dictionary by instantiating OrderedDict without arguments. Next, you add key-value pairs to the dictionary as you would with a regular dictionary.
When you iterate through the dictionary, life_stages, you get the key-value pairs in the same order you inserted them into the dictionary. Guaranteeing the order of items is the main problem that OrderedDict solves.
Python 3.6 introduced a new implementation of dict. This implementation provides an unexpected new feature: now regular dictionaries keep their items in the same order they’re first inserted.
Initially, the feature was considered an implementation detail, and the documentation advised not to rely on it. However, since Python 3.7, the feature is officially part of the language specification. So, what’s the point of using OrderedDict?
There are some features of OrderedDict that still make it valuable:
- Intent communication: With
OrderedDict, your code will make it clear that the order of items in the dictionary is important. You’re clearly communicating that your code needs or relies on the order of items in the underlying dictionary. - Control over the order of items: With
OrderedDict, you have access to.move_to_end(), which is a method that allows you to manipulate the order of items in your dictionary. You’ll also have an enhanced variation of.popitem()that allows removing items from either end of the underlying dictionary. - Equality test behavior: With
OrderedDict, equality tests between dictionaries take the order of items into account. So, if you have two ordered dictionaries with the same group of items but in a different order, then your dictionaries will be considered non-equal.
There is at least one more reason for using OrderedDict: backward compatibility. Relying on regular dict objects to preserve the order of items will break your code in environments that run versions of Python older than 3.6.
Okay, now it’s time to see some of these cool features of OrderedDict in action:
>>> from collections import OrderedDict

>>> letters = OrderedDict(b=2, d=4, a=1, c=3)
>>> letters
OrderedDict([('b', 2), ('d', 4), ('a', 1), ('c', 3)])

>>> # Move b to the right end
>>> letters.move_to_end("b")
>>> letters
OrderedDict([('d', 4), ('a', 1), ('c', 3), ('b', 2)])

>>> # Move b to the left end
>>> letters.move_to_end("b", last=False)
>>> letters
OrderedDict([('b', 2), ('d', 4), ('a', 1), ('c', 3)])

>>> # Sort letters by key
>>> for key in sorted(letters):
...     letters.move_to_end(key)
...

>>> letters
OrderedDict([('a', 1), ('b', 2), ('c', 3), ('d', 4)])
In these examples, you use .move_to_end() to move items around and reorder letters. Note that .move_to_end() accepts an optional argument called last that allows you to control which end of the dictionary you want to move the items to. This method is quite handy when you need to sort the items in your dictionaries or when you need to manipulate their order in any way.
Another important difference between OrderedDict and a regular dictionary is how they compare for equality:
>>> from collections import OrderedDict

>>> # Regular dictionaries compare the content only
>>> letters_0 = dict(a=1, b=2, c=3, d=4)
>>> letters_1 = dict(b=2, a=1, d=4, c=3)
>>> letters_0 == letters_1
True

>>> # Ordered dictionaries compare content and order
>>> letters_0 = OrderedDict(a=1, b=2, c=3, d=4)
>>> letters_1 = OrderedDict(b=2, a=1, d=4, c=3)
>>> letters_0 == letters_1
False

>>> letters_2 = OrderedDict(a=1, b=2, c=3, d=4)
>>> letters_0 == letters_2
True
Here, letters_1 has a different item order from letters_0. When you use regular dictionaries, this difference doesn’t matter and both dictionaries compare equal. On the other hand, when you use ordered dictionaries, letters_0 and letters_1 aren’t equal. This is because equality tests between ordered dictionaries consider the content and also the order of items.
Counting Objects in One Go: Counter
Counting objects is a common operation in programming. Say you need to count how many times a given item appears in a list or iterable. If your list is short, then counting its items can be straightforward and quick. If you have a long list, then counting the items will be more challenging.
To count objects, you typically use a counter, or an integer variable with an initial value of zero. Then you increment the counter to reflect the number of times a given object occurs.
In Python, you can use a dictionary to count several different objects at once. In this case, the keys will store individual objects, and the values will hold the number of repetitions of a given object, or the object’s count.
Here’s an example that counts the letters in the word "mississippi" with a regular dictionary and a for loop:
>>> word = "mississippi"
>>> counter = {}

>>> for letter in word:
...     if letter not in counter:
...         counter[letter] = 0
...     counter[letter] += 1
...

>>> counter
{'m': 1, 'i': 4, 's': 4, 'p': 2}
The loop iterates over the letters in word. The conditional statement checks if the letters aren’t already in the dictionary and initializes the letter’s count to zero accordingly. The final step is to increment the letter’s count as the loop goes.
As you already know, defaultdict objects are convenient when it comes to counting things because you don’t need to check if the key exists. The dictionary guarantees appropriate default values for any missing keys:
>>> from collections import defaultdict

>>> counter = defaultdict(int)

>>> for letter in "mississippi":
...     counter[letter] += 1
...

>>> counter
defaultdict(<class 'int'>, {'m': 1, 'i': 4, 's': 4, 'p': 2})
In this example, you create a defaultdict object and initialize it using int(). With int() as a factory function, the underlying default dictionary automatically creates missing keys and conveniently initializes them to zero. Then you increment the value of the current key to compute the final count of the letter in "mississippi".
Just like with other common programming problems, Python also has an efficient tool for approaching the counting problem. In collections, you’ll find Counter, which is a dict subclass specially designed for counting objects.
Here’s how you can write the "mississippi" example using Counter:
>>> from collections import Counter

>>> Counter("mississippi")
Counter({'i': 4, 's': 4, 'p': 2, 'm': 1})
Wow! That was quick! A single line of code and you’re done. In this example, Counter iterates over "mississippi", producing a dictionary with the letters as keys and their frequency as values.
Note: Check out Python’s Counter: The Pythonic Way to Count Objects for a deeper dive into Counter and how to use it for counting objects efficiently.
There are a few different ways to instantiate Counter. You can use lists, tuples, or any iterables with repeated objects. The only restriction is that your objects need to be hashable:
>>> from collections import Counter

>>> Counter([1, 1, 2, 3, 3, 3, 4])
Counter({3: 3, 1: 2, 2: 1, 4: 1})

>>> Counter(([1], [1]))
Traceback (most recent call last):
  ...
TypeError: unhashable type: 'list'
Integer numbers are hashable, so Counter works correctly. On the other hand, lists aren’t hashable, so Counter fails with a TypeError.
Being hashable means that your objects must have a hash value that never changes during their lifetime. This is a requirement because these objects will work as dictionary keys. In Python, immutable objects are also hashable.
Note: In Counter, a highly optimized C function provides the counting functionality. If this function isn’t available for some reason, then the class uses an equivalent but less efficient Python function.
Since Counter is a subclass of dict, their interfaces are mostly the same. However, there are some subtle differences. The first difference is that Counter doesn’t implement .fromkeys(). This avoids inconsistencies, such as Counter.fromkeys("abbbc", 2), in which every letter would have an initial count of 2 regardless of the real count it has in the input iterable.
The second difference is that .update() doesn’t replace the count (value) of an existing object (key) with a new count. It adds both counts together:
>>> from collections import Counter

>>> letters = Counter("mississippi")
>>> letters
Counter({'i': 4, 's': 4, 'p': 2, 'm': 1})

>>> # Update the counts of m and i
>>> letters.update(m=3, i=4)
>>> letters
Counter({'i': 8, 'm': 4, 's': 4, 'p': 2})

>>> # Add a new key-count pair
>>> letters.update({"a": 2})
>>> letters
Counter({'i': 8, 'm': 4, 's': 4, 'p': 2, 'a': 2})

>>> # Update with another counter
>>> letters.update(Counter(["s", "s", "p"]))
>>> letters
Counter({'i': 8, 's': 6, 'm': 4, 'p': 3, 'a': 2})
Here, you update the count for m and i. Now those letters hold the sum of their initial count plus the value you passed to them through .update(). If you use a key that isn’t present in the original counter, then .update() creates the new key with the corresponding value. Finally, .update() accepts iterables, mappings, keyword arguments, and also other counters.
Note: Since Counter is a subclass of dict, there are no restrictions on the objects you can store in the keys and values of your counters. The keys can store any hashable objects, whereas the values can store any objects. However, to logically work as counters, the values should be integer numbers representing counts.
Another difference between Counter and dict is that accessing a missing key returns 0 instead of raising a KeyError:
>>> from collections import Counter

>>> letters = Counter("mississippi")
>>> letters["a"]
0
This behavior signals that the count of an object that doesn’t exist in the counter is zero. In this example, the letter "a" isn’t in the original word, so its count is 0.
In Python, Counter is also useful to emulate a multiset or bag. Multisets are similar to sets, but they allow multiple instances of a given element. The number of instances of an element is known as its multiplicity. For example, you can have a multiset like {1, 1, 2, 3, 3, 3, 4, 4}.
When you use Counter to emulate multisets, the keys represent the elements, and the values represent their respective multiplicity:
>>> from collections import Counter

>>> multiset = Counter([1, 1, 2, 3, 3, 3, 4, 4])
>>> multiset
Counter({1: 2, 2: 1, 3: 3, 4: 2})

>>> multiset.keys() == {1, 2, 3, 4}
True
Here, the keys of multiset are equivalent to a Python set. The values hold the multiplicity of each element in the set.
Python’ Counter provides a few additional features that help you work with them as multisets. For example, you can initialize your counters with a mapping of elements and their multiplicity. You can also perform math operations on the elements’ multiplicity and more.
Say you’re working at the local pet shelter. You have a given number of pets, and you need to have a record of how many pets are adopted each day and how many pets enter and leave the shelter. In this case, you can use Counter:
>>> from collections import Counter

>>> inventory = Counter(dogs=23, cats=14, pythons=7)

>>> adopted = Counter(dogs=2, cats=5, pythons=1)
>>> inventory.subtract(adopted)
>>> inventory
Counter({'dogs': 21, 'cats': 9, 'pythons': 6})

>>> new_pets = {"dogs": 4, "cats": 1}
>>> inventory.update(new_pets)
>>> inventory
Counter({'dogs': 25, 'cats': 10, 'pythons': 6})

>>> inventory = inventory - Counter(dogs=2, cats=3, pythons=1)
>>> inventory
Counter({'dogs': 23, 'cats': 7, 'pythons': 5})

>>> new_pets = {"dogs": 4, "pythons": 2}
>>> inventory += new_pets
>>> inventory
Counter({'dogs': 27, 'cats': 7, 'pythons': 7})
That’s neat! Now you can keep a record of your pets using Counter. Note that you can use .subtract() and .update() to subtract and add counts or multiplicities. You can also use the addition (+) and subtraction (-) operators.
There’s a lot more you can do with Counter objects as multisets in Python, so go ahead and give it a try!
Chaining Dictionaries Together: ChainMap
Python’s ChainMap groups multiple dictionaries and other mappings together to create a single object that works pretty much like a regular dictionary. In other words, it takes several mappings and makes them logically appear as one.
ChainMap objects are updateable views, which means that changes in any of the chained mappings affect the ChainMap object as a whole. This is because ChainMap doesn’t merge the input mappings together. It keeps a list of mappings and reimplements common dictionary operations on top of that list. For example, a key lookup searches the list of mappings successively until it finds the key.
Note: Check out Python’s ChainMap: Manage Multiple Contexts Effectively for a deeper dive into using ChainMap in your Python code.
When you’re working with ChainMap objects, you can have several dictionaries with either unique or repeated keys.
In either case, ChainMap allows you to treat all your dictionaries as one. If you have unique keys across your dictionaries, you can access and update the keys as if you were working with a single dictionary.
If you have repeated keys across your dictionaries, besides managing your dictionaries as one, you can also take advantage of the internal list of mappings to define some sort of access priority. Because of this feature, ChainMap objects are great for handling multiple contexts.
For example, say you’re working on a command-line interface (CLI) application. The application allows the user to use a proxy service for connecting to the Internet. The settings priorities are:
- Command-line options (
--proxy,-p) - Local configuration files in the user’s home directory
- Global proxy configuration
If the user supplies a proxy at the command line, then the application must use that proxy. Otherwise, the application should use the proxy provided in the next configuration object, and so on. This is one of the most common use cases of ChainMap. In this situation, you can do the following:
>>> from collections import ChainMap

>>> cmd_proxy = {}  # The user doesn't provide a proxy
>>> local_proxy = {"proxy": "proxy.local.com"}
>>> global_proxy = {"proxy": "proxy.global.com"}

>>> config = ChainMap(cmd_proxy, local_proxy, global_proxy)
>>> config["proxy"]
'proxy.local.com'
ChainMap allows you to define the appropriate priority for the application’s proxy configuration. A key lookup searches cmd_proxy, then local_proxy, and finally global_proxy, returning the first instance of the key at hand. In this example, the user doesn’t provide a proxy at the command line, so your application uses the proxy in local_proxy.
In general, ChainMap objects behave similarly to regular dict objects. However, they have some additional features. For example, they have a .maps public attribute that holds the internal list of mappings:
>>> from collections import ChainMap

>>> numbers = {"one": 1, "two": 2}
>>> letters = {"a": "A", "b": "B"}

>>> alpha_nums = ChainMap(numbers, letters)
>>> alpha_nums.maps
[{'one': 1, 'two': 2}, {'a': 'A', 'b': 'B'}]
The instance attribute .maps gives you access to the internal list of mappings. This list is updatable. You can add and remove mappings manually, iterate through the list, and more.
Additionally, ChainMap provides a .new_child() method and a .parents property:
>>> from collections import ChainMap

>>> dad = {"name": "John", "age": 35}
>>> mom = {"name": "Jane", "age": 31}
>>> family = ChainMap(mom, dad)
>>> family
ChainMap({'name': 'Jane', 'age': 31}, {'name': 'John', 'age': 35})

>>> son = {"name": "Mike", "age": 0}
>>> family = family.new_child(son)

>>> for person in family.maps:
...     print(person)
...
{'name': 'Mike', 'age': 0}
{'name': 'Jane', 'age': 31}
{'name': 'John', 'age': 35}

>>> family.parents
ChainMap({'name': 'Jane', 'age': 31}, {'name': 'John', 'age': 35})
With .new_child(), you create a new ChainMap object containing a new map (son) followed by all the maps in the current instance. The map passed as a first argument becomes the first map in the list of maps. If you don’t pass a map, then the method uses an empty dictionary.
The parents property returns a new ChainMap objects containing all the maps in the current instance except for the first one. This is useful when you need to skip the first map in a key lookup.
A final feature to highlight in ChainMap is that mutating operations, such as updating keys, adding new keys, deleting existing keys, popping keys, and clearing the dictionary, act on the first mapping in the internal list of mappings:
>>> from collections import ChainMap

>>> numbers = {"one": 1, "two": 2}
>>> letters = {"a": "A", "b": "B"}

>>> alpha_nums = ChainMap(numbers, letters)
>>> alpha_nums
ChainMap({'one': 1, 'two': 2}, {'a': 'A', 'b': 'B'})

>>> # Add a new key-value pair
>>> alpha_nums["c"] = "C"
>>> alpha_nums
ChainMap({'one': 1, 'two': 2, 'c': 'C'}, {'a': 'A', 'b': 'B'})

>>> # Pop a key that exists in the first dictionary
>>> alpha_nums.pop("two")
2
>>> alpha_nums
ChainMap({'one': 1, 'c': 'C'}, {'a': 'A', 'b': 'B'})

>>> # Delete keys that don't exist in the first dict but do in others
>>> del alpha_nums["a"]
Traceback (most recent call last):
  ...
KeyError: "Key not found in the first mapping: 'a'"

>>> # Clear the dictionary
>>> alpha_nums.clear()
>>> alpha_nums
ChainMap({}, {'a': 'A', 'b': 'B'})
These examples show that mutating operations on a ChainMap object only affect the first mapping in the internal list. This is an important detail to consider when you’re working with ChainMap.
The tricky part is that, at first glance, it could look like it’s possible to mutate any existing key-value pair in a given ChainMap. However, you can only mutate the key-value pairs in the first mapping unless you use .maps to access and mutate other mappings in the list directly.
Customizing Built-Ins: UserString, UserList, and UserDict
Sometimes you need to customize built-in types, such as strings, lists, and dictionaries to add and modify certain behavior. Since Python 2.2, you can do that by subclassing those types directly. However, you could face some issues with this approach, as you’ll see in a minute.
Python’s collections provides three convenient wrapper classes that mimic the behavior of the built-in data types:
UserStringUserListUserDict
With a combination of regular and special methods, you can use these classes to mimic and customize the behavior of strings, lists, and dictionaries.
Nowadays, developers often ask themselves if there’s a reason to use UserString, UserList, and UserDict when they need to customize the behavior of built-in types. The answer is yes.
Built-in types were designed and implemented with the open-closed principle in mind. This means that they’re open for extension but closed for modification. Allowing modifications on the core features of these classes can potentially break their invariants. So, Python core developers decided to protect them from modifications.
For example, say you need a dictionary that automatically lowercases the keys when you insert them. You could subclass dict and override .__setitem__() so every time you insert a key, the dictionary lowercases the key name:
>>> class LowerDict(dict):
...     def __setitem__(self, key, value):
...         key = key.lower()
...         super().__setitem__(key, value)
...

>>> ordinals = LowerDict({"FIRST": 1, "SECOND": 2})
>>> ordinals["THIRD"] = 3
>>> ordinals.update({"FOURTH": 4})

>>> ordinals
{'FIRST': 1, 'SECOND': 2, 'third': 3, 'FOURTH': 4}

>>> isinstance(ordinals, dict)
True
This dictionary works correctly when you insert new keys using dictionary-style assignment with square brackets ([]). However, it doesn’t work when you pass an initial dictionary to the class constructor or when you use .update(). This means that you would need to override .__init__(), .update(), and probably some other methods for your custom dictionary to work correctly.
Now take a look at the same dictionary but using UserDict as a base class:
>>> from collections import UserDict

>>> class LowerDict(UserDict):
...     def __setitem__(self, key, value):
...         key = key.lower()
...         super().__setitem__(key, value)
...

>>> ordinals = LowerDict({"FIRST": 1, "SECOND": 2})
>>> ordinals["THIRD"] = 3
>>> ordinals.update({"FOURTH": 4})

>>> ordinals
{'first': 1, 'second': 2, 'third': 3, 'fourth': 4}

>>> isinstance(ordinals, dict)
False
It works! Your custom dictionary now converts all the new keys into lowercase letters before inserting them into the dictionary. Note that since you don’t inherit from dict directly, your class doesn’t return instances of dict as in the example above.
UserDict stores a regular dictionary in an instance attribute called .data. Then it implements all its methods around that dictionary. UserList and UserString work the same way, but their .data attribute holds a list and a str object, respectively.
If you need to customize either of these classes, then you just need to override the appropriate methods and change what they do as required.
In general, you should use UserDict, UserList, and UserString when you need a class that acts almost identically to the underlying wrapped built-in class and you want to customize some part of its standard functionalities.
Another reason to use these classes rather than the built-in equivalent classes is to access the underlying .data attribute to manipulate it directly.
The ability to inherit from built-in types directly has largely superseded the use of UserDict, UserList, and UserString. However, the internal implementation of built-in types makes it hard to safely inherit from them without rewriting a significant amount of code. In most cases, it’s safer to use the appropriate class from collections. It’ll save you from several issues and weird behaviors.
Conclusion
In Python’s collections module, you have several specialized container data types that you can use to approach common programming problems, such as counting objects, creating queues and stacks, handling missing keys in dictionaries, and more.
The data types and classes in collections were designed to be efficient and Pythonic. They can be tremendously helpful in your Python programming journey, so learning about them is well worth your time and effort.
In this tutorial, you learned how to:
- Write readable and explicit code using
namedtuple - Build efficient queues and stacks using
deque - Count objects efficiently using
Counter - Handle missing dictionary keys with
defaultdict - Remember the insertion order of keys with
OrderedDict - Chain multiple dictionaries in a single view with
ChainMap
You also learned about three convenient wrapper classes: UserDict, UserList, and UserString. These classes are handy when you need to create custom classes that mimic the behavior of the built-in types dict, list, and str.