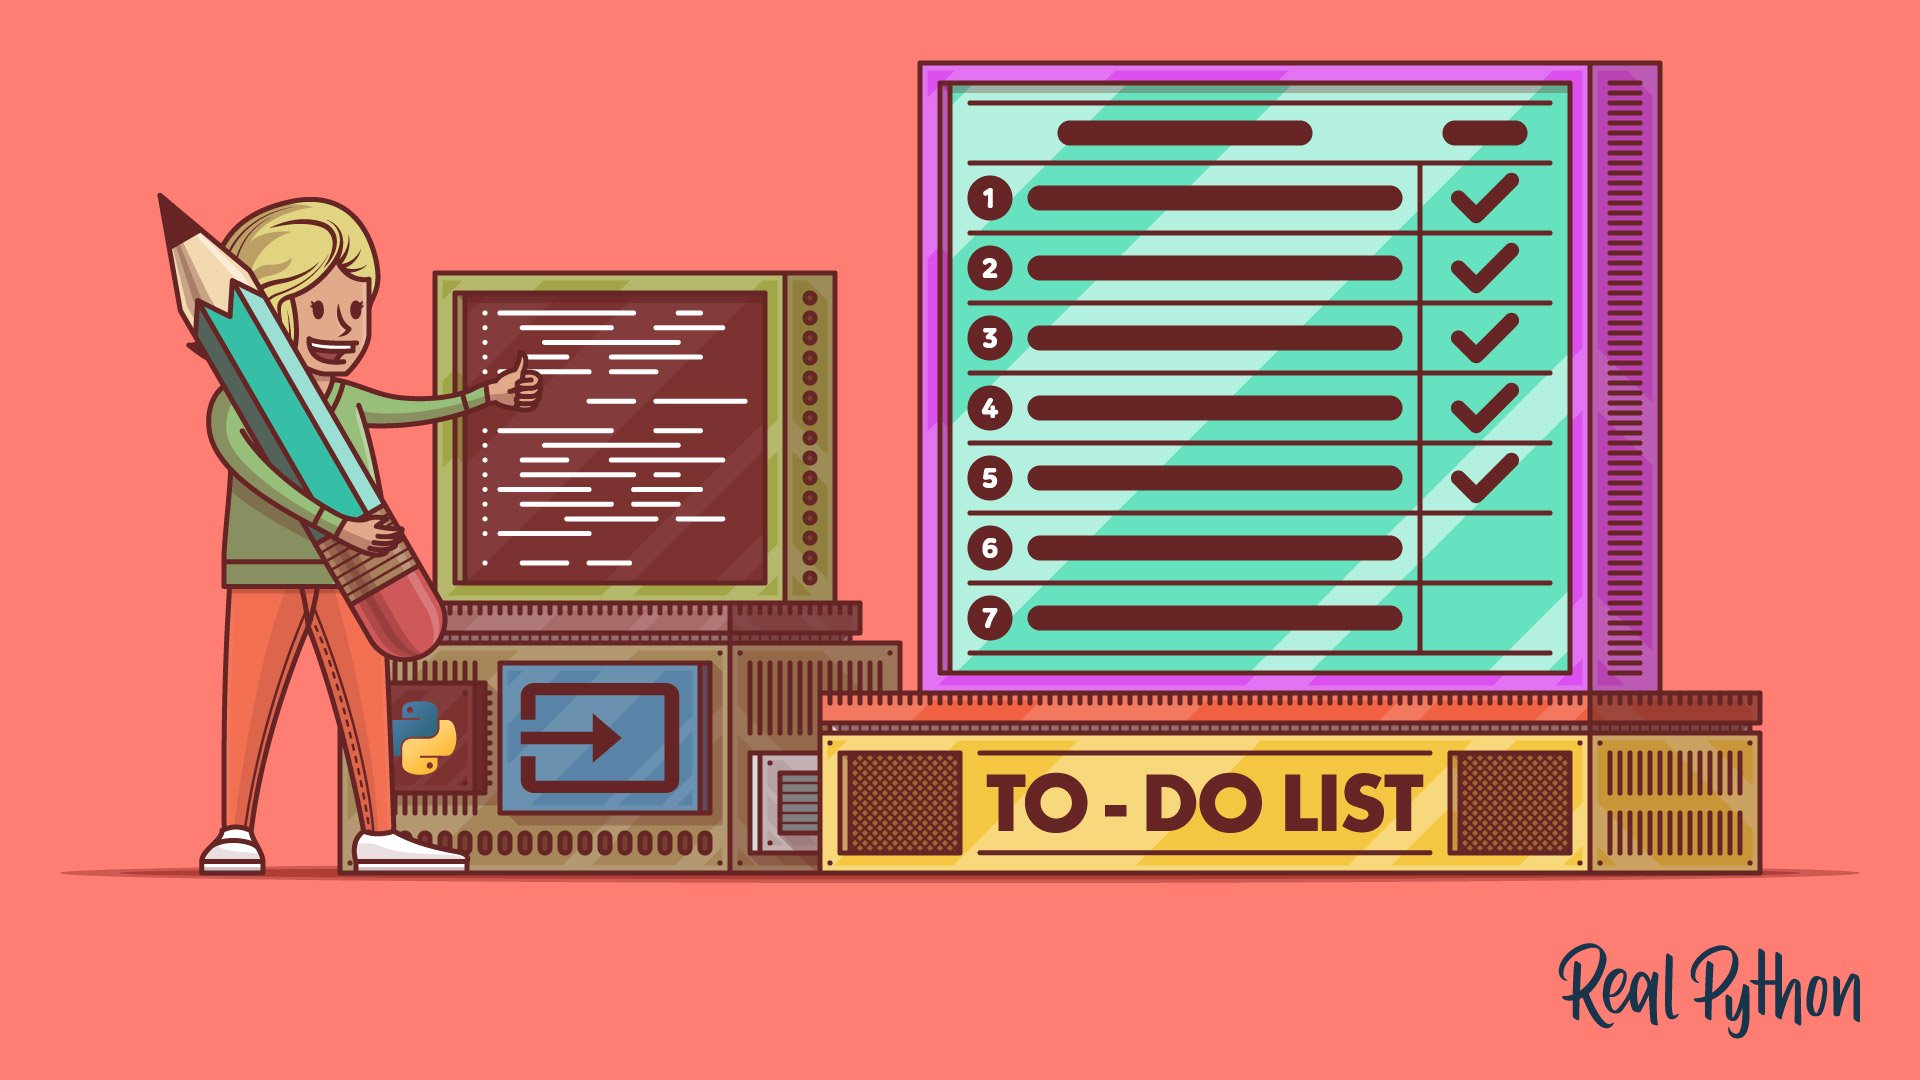
Building an application to manage your to-do list can be an interesting project when you’re learning a new programming language or trying to take your skills to the next level. In this tutorial, you’ll build a functional to-do application for the command line using Python and Typer, which is a relatively young library for creating powerful command-line interface (CLI) applications in almost no time.
With a project like this, you’ll apply a wide set of core programming skills while building a real-world application with real features and requirements.
In this tutorial, you’ll learn how to:
- Build a functional to-do application with a Typer CLI in Python
- Use Typer to add commands, arguments, and options to your to-do app
- Test your Python to-do application with Typer’s
CliRunnerand pytest
Additionally, you’ll practice your skills related to processing JSON files by using Python’s json module and managing configuration files with Python’s configparser module. With this knowledge, you’ll be ready to start creating CLI applications right away.
You can download the entire code and all the additional resources for this to-do CLI application by clicking the link below and going to the source_code_final/ directory:
Get Source Code: Click here to get the source code you’ll use to build a to-do app for your command line using Python and Typer.
Demo
In this step-by-step project, you’ll build a command-line interface (CLI) application to manage a to-do list. Your application will provide a CLI based on Typer, a modern and versatile library for creating CLI applications.
Before you get started, check out this demo of how your to-do application will look and work once you get to the end of this tutorial. The first part of the demo shows how to get help on working with the app. It also shows how to initialize and configure the app. The rest of the video demonstrates how to interact with the essential features, such as adding, removing, and listing to-dos:
Nice! The application has a user-friendly CLI that allows you to set up the to-do database. Once there, you can add, remove, and complete to-dos using appropriate commands, arguments, and options. If you ever get stuck, then you can ask for help using the --help option with proper arguments.
Do you feel like kicking off this to-do app project? Cool! In the next section, you’ll plan out how to structure the layout of the project and what tools you’ll use to build it.
Project Overview
When you want to start a new application, you typically start by thinking about how you want the app to work. In this tutorial, you’ll build a to-do app for the command line. You’ll call that application rptodo.
You want your application to have a user-friendly command-line interface that allows your users to interact with the app and manage their to-do lists.
To start off, you want your CLI to provide the following global options:
-vor--versionshows the current version and exits the application.--helpshows the global help message for the entire application.
You’ll see these same options in many other CLI applications out there. It’s a nice idea to provide them because most users who work with the command line expect to find them in every app.
Regarding managing a to-do list, your application will provide commands to initialize the app, add and remove to-dos, and manage the to-do completion status:
| Command | Description |
|---|---|
init |
Initializes the application’s to-do database |
add DESCRIPTION |
Adds a new to-do to the database with a description |
list |
Lists all the to-dos in the database |
complete TODO_ID |
Completes a to-do by setting it as done using its ID |
remove TODO_ID |
Removes a to-do from the database using its ID |
clear |
Removes all the to-dos by clearing the database |
These commands provide all the functionality you need to turn your to-do application into a minimum viable product (MVP) so that you can publish it to PyPI or the platform of your choice and start getting feedback from your users.
To provide all these features in your to-do application, you’ll need to complete a few tasks:
- Build a command-line interface capable of taking and processing commands, options, and arguments
- Select an appropriate data type to represent your to-dos
- Implement a way to persistently store your to-do list
- Define a way to connect that user interface with the to-do data
These tasks relate well to what is known as the Model-View-Controller design, which is an architectural pattern. In this pattern, the model takes care of the data, the view deals with the user interface, and the controller connects both ends to make the application work.
The main reason for using this pattern in your applications and projects is to provide separation of concerns (SoC), making different parts of your code deal with specific concepts independently.
The next decision you need to make is about the tools and libraries you’ll use to tackle each of the tasks you defined further up. In other words, you need to decide your software stack. In this tutorial, you’ll use the following stack:
- Typer to build the to-do application’s CLI
- Named tuples and dictionaries to handle the to-do data
- Python’s
jsonmodule to manage persistent data storage
You’ll also use the configparser module from the Python standard library to handle the application’s initial settings in a configuration file. Within the configuration file, you’ll store the path to the to-do database in your file system. Finally, you’ll use pytest as a tool for testing your CLI application.
Prerequisites
To complete this tutorial and get the most out of it, you should be comfortable with the following topics:
- The Model-View-Controller pattern
- Command-line interfaces (CLI)
- Python type hints, also known as type annotations
- Unit tests with pytest
- Object-oriented programming in Python
- Configuration files with
configparser - JSON files with Python’s
json - File system path manipulation with
pathlib
That’s it! If you’re ready to get your hands dirty and start creating your to-do app, then you can begin with setting up your working environment and project layout.
Step 1: Set Up the To-Do Project
To start coding your to-do application, you need to set up a working Python environment with all the tools, libraries, and dependencies you’ll use in the process. Then you need to give the project a coherent Python application layout. That’s what you’ll do in the following subsections.
To download all the files and the project structure you’ll be creating in this section, click the link below and go to the source_code_step_1/ directory:
Get Source Code: Click here to get the source code you’ll use to build a to-do app for your command line using Python and Typer.
Set Up the Working Environment
In this section, you’ll create a Python virtual environment to work on your to-do project. Using a virtual environment for each independent project is a best practice in Python programming. It allows you to isolate your project’s dependencies without cluttering your system Python installation or breaking other projects that use different versions of the same tools and libraries.
Note: This project was built and tested with Python 3.9.5, and the code should work on Python versions greater than or equal to 3.6.
To create a Python virtual environment, move to your favorite working directory and create a folder called rptodo_project/. Then fire up a terminal or command line and run the following commands:
$ cd rptodo_project/
$ python -m venv ./venv
$ source venv/bin/activate
(venv) $
Here, you first enter the rptodo_project/ directory using cd. This directory will be your project’s root directory. Then you create a Python virtual environment using venv from the standard library. The argument to venv is the path to the directory hosting your virtual environment. A common practice is to call that directory venv, .venv, or env, depending on your preferences.
The third command activates the virtual environment you just created. You know that the environment is active because your prompt changes to something like (venv) $.
Note: To create and activate a virtual environment on Windows, you’ll follow a similar process.
Go ahead and run the following commands:
c:\> python -m venv venv
c:\> venv\Scripts\activate.bat
If you’re on a different platform, then you may need to check out the Python official documentation on creating virtual environments.
Now that you have a working virtual environment, you need to install Typer to create the CLI application and pytest to test your application’s code. To install Typer with all its current optional dependencies, run the following command:
(venv) $ python -m pip install typer==0.3.2 colorama==0.4.4 shellingham==1.4.0
This command installs Typer and all its recommended dependencies, such as Colorama, which ensures that colors work correctly on your command line window.
To install pytest, which you’ll use later to test your to-do application, run the following command:
(venv) $ python -m pip install pytest==6.2.4
With this last command, you successfully installed all the tools you need to start developing your to-do application. The rest of the libraries and tools you’ll use are part of the Python standard library, so you don’t have to install anything to use them.
Define the Project Layout
The last step you’ll run to finish setting up your to-do app project is to create the packages, modules, and files that will frame the application layout. The app’s core package will live in the rptodo/ directory inside rptodo_project/.
Here’s a description of the package’s contents:
| File | Description |
|---|---|
__init__.py |
Enables rptodo/ to be a Python package |
__main__.py |
Provides an entry-point script to run the app from the package using the python -m rptodo command |
cli.py |
Provides the Typer command-line interface for the application |
config.py |
Contains code to handle the application’s configuration file |
database.py |
Contains code to handle the application’s to-do database |
rptodo.py |
Provides code to connect the CLI with the to-do database |
You’ll also need a tests/ directory containing a __init__.py file to turn the directory into a package and a test_rptodo.py file to hold unit tests for the application.
Go ahead and create the project’s layout with the following structure:
rptodo_project/
│
├── rptodo/
│   ├── __init__.py
│   ├── __main__.py
│   ├── cli.py
│   ├── config.py
│   ├── database.py
│   └── rptodo.py
│
├── tests/
│   ├── __init__.py
│   └── test_rptodo.py
│
├── README.md
└── requirements.txt
The README.md file will provide the project’s description and instructions for installing and running the application. Adding a descriptive and detailed README.md file to your project is a best practice in programming, especially if you plan to release the project as open source.
The requirements.txt file will provide the list of dependencies for your to-do application. Go ahead and fill it with the following contents:
typer==0.3.2
colorama==0.4.4
shellingham==1.4.0
pytest==6.2.4
Now your users can automatically install the listed dependencies by running the following command:
(venv) $ python -m pip install -r requirements.txt
Providing a requirements.txt like this ensures that your user will install the exact versions of dependencies you used to build the project, avoiding unexpected issues and behaviors.
Except for requirements.txt, all your project’s files should be empty at this point. You’ll fill each file with the necessary content moving forward through this tutorial. In the following section, you’ll code the application’s CLI with Python and Typer.
Step 2: Set Up the To-Do CLI App With Python and Typer
At this point, you should have a complete project layout for your to-do application. You should also have a working Python virtual environment with all the required tools and libraries. At the end of this step, you’ll have a functional Typer CLI application. Then you’ll be able to build on top of its minimal functionality.
You can download the code, unit tests, and resources you’ll add in this section by clicking the link below and going to the source_code_step_2/ directory:
Get Source Code: Click here to get the source code you’ll use to build a to-do app for your command line using Python and Typer.
Fire up your code editor and open the __init__.py file from the rptodo/ directory. Then add the following code to it:
"""Top-level package for RP To-Do."""
# rptodo/__init__.py

__app_name__ = "rptodo"
__version__ = "0.1.0"

(
    SUCCESS,
    DIR_ERROR,
    FILE_ERROR,
    DB_READ_ERROR,
    DB_WRITE_ERROR,
    JSON_ERROR,
    ID_ERROR,
) = range(7)

ERRORS = {
    DIR_ERROR: "config directory error",
    FILE_ERROR: "config file error",
    DB_READ_ERROR: "database read error",
    DB_WRITE_ERROR: "database write error",
    ID_ERROR: "to-do id error",
}
Here, you start by defining two module-level names to hold the application’s name and version. Then you define a series of return and error codes and assign integer numbers to them using range(). ERROR is a dictionary that maps error codes to human-readable error messages. You’ll use these messages to tell the user what’s happening with the application.
With this code in place, you’re ready to create the skeleton of your Typer CLI application. That’s what you’ll do in the following section.
Create the Typer CLI Application
In this section, you’ll create a minimal Typer CLI application with support for --help, -v, and --version options. To do so, you’ll use an explicit Typer application. This type of application is suitable for large projects that include multiple commands with several options and arguments.
Go ahead and open rptodo/cli.py in your text editor and type in the following code:
 1"""This module provides the RP To-Do CLI."""
 2# rptodo/cli.py
 3
 4from typing import Optional
 5
 6import typer
 7
 8from rptodo import __app_name__, __version__
 9
10app = typer.Typer()
11
12def _version_callback(value: bool) -> None:
13    if value:
14        typer.echo(f"{__app_name__} v{__version__}")
15        raise typer.Exit()
16
17@app.callback()
18def main(
19    version: Optional[bool] = typer.Option(
20        None,
21        "--version",
22        "-v",
23        help="Show the application's version and exit.",
24        callback=_version_callback,
25        is_eager=True,
26    )
27) -> None:
28    return
Typer uses Python type hints extensively, so in this tutorial, you’ll use them as well. That’s why you start by importing Optional from typing. Next, you import typer. Finally, you import __app_name__ and __version__ from your rptodo package.
Here’s how the rest of the code works:
-
Line 10 creates an explicit Typer application,
app. -
Lines 12 to 15 define
_version_callback(). This function takes a Boolean argument calledvalue. IfvalueisTrue, then the function prints the application’s name and version usingecho(). After that, it raises atyper.Exitexception to exit the application cleanly. -
Lines 17 and 18 define
main()as a Typer callback using the@app.callback()decorator. -
Line 19 defines
version, which is of typeOptional[bool]. This means it can be either ofboolorNonetype. Theversionargument defaults to atyper.Optionobject, which allows you to create command-line options in Typer. -
Line 20 passes
Noneas the first argument to the initializer ofOption. This argument is required and supplies the option’s default value. -
Lines 21 and 22 set the command-line names for the
versionoption:-vand--version. -
Line 23 provides a
helpmessage for theversionoption. -
Line 24 attaches a callback function,
_version_callback(), to theversionoption, which means that running the option automatically calls the function. -
Line 25 sets the
is_eagerargument toTrue. This argument tells Typer that theversioncommand-line option has precedence over other commands in the current application.
With this code in place, you’re ready to create the application’s entry-point script. That’s what you’ll do in the following section.
Create an Entry-Point Script
You’re almost ready to run your to-do application for the first time. Before doing that, you should create an entry-point script for the app. You can create this script in a few different ways. In this tutorial, you’ll do it using a __main__.py module inside the rptodo package. Including a __main__.py module in a Python package enables you to run the package as an executable program using the command python -m rptodo.
Go back to your code editor and open __main__.py from the rptodo/ directory. Then add the following code:
"""RP To-Do entry point script."""
# rptodo/__main__.py

from rptodo import cli, __app_name__

def main():
    cli.app(prog_name=__app_name__)

if __name__ == "__main__":
    main()
In __main__.py, you first import cli and __app_name__ from rptodo. Then you define main(). In this function, you call the Typer app with cli.app(), passing the application’s name to the prog_name argument. Providing a value to prog_name ensures that your users get the correct app name when running the --help option on their command line.
With this final addition, you’re ready to run your to-do application for the first time. Move to your terminal window and execute the following commands:
(venv) $ python -m rptodo -v
rptodo v0.1.0

(venv) $ python -m rptodo --help
Usage: rptodo [OPTIONS] COMMAND [ARGS]...

Options:
  -v, --version         Show the application's version and exit.
  --install-completion  Install completion for the current shell.
  --show-completion     Show completion for the current shell, to copy it
                        or customize the installation.

  --help                Show this message and exit.
The first command runs the -v option, which displays the app’s version. The second command runs the --help option to show a user-friendly help message for the entire application. Typer automatically generates and displays this help message for you.
Set Up Initial CLI Tests With pytest
The final action you’ll run in this section is to set up an initial test suite for your to-do application. To this end, you’ve created the tests package with a module called test_rptodo.py. As you learned earlier, you’ll use pytest for writing and running your unit tests.
Testing a Typer application is straightforward because the library integrates pretty well with pytest. You can use a Typer class called CliRunner to test the application’s CLI. CliRunner allows you to create a runner that you can use to test how your application’s CLI responds to real-world commands.
Go back to your code editor and open test_rptodo.py from the tests/ directory. Type in the following code:
 1# tests/test_rptodo.py
 2
 3from typer.testing import CliRunner
 4
 5from rptodo import __app_name__, __version__, cli
 6
 7runner = CliRunner()
 8
 9def test_version():
10    result = runner.invoke(cli.app, ["--version"])
11    assert result.exit_code == 0
12    assert f"{__app_name__} v{__version__}\n" in result.stdout
Here’s what this code does:
- Line 3 imports
CliRunnerfromtyper.testing. - Line 5 imports a few required objects from your
rptodopackage. - Line 7 creates a CLI runner by instantiating
CliRunner. - Line 9 defines your first unit test for testing the application’s version.
- Line 10 calls
.invoke()onrunnerto run the application with the--versionoption. You store the result of this call inresult. - Line 11 asserts that the application’s exit code (
result.exit_code) is equal to0to check that the application ran successfully. - Line 12 asserts that the application’s version is present in the standard output, which is available through
result.stdout.
Typer’s CliRunner is a subclass of Click’s CliRunner. Therefore, its .invoke() method returns a Result object, which holds the result of running the CLI application with the target arguments and options. Result objects provide several useful attributes and properties, including the application’s exit code and standard output. Take a look at the class documentation for more details.
Now that you’ve set up the first unit test for your Typer CLI application, you can run the test with pytest. Go back to your command line and execute python -m pytest tests/ from your project’s root directory:
========================= test session starts =========================
platform linux -- Python 3.9.5, pytest-6.2.4, py-1.10.0, pluggy-0.13.1
rootdir: .../rptodo
plugins: Faker-8.1.1, cov-2.12.0, celery-4.4.7
collected 1 item

tests/test_rptodo.py .                                          [100%]
========================== 1 passed in 0.07s ==========================
That’s it! You’ve successfully run your test suite for the first time! Yes, you only have one test so far. However, you’ll be adding more of them in upcoming sections. You can also add your own test if you want to challenge your testing skills.
With the skeleton to-do application in place, now you can think about setting up the to-do database to get it ready for use. That’s what you’ll do in the following section.
Step 3: Prepare the To-Do Database for Use
Up to this point, you’ve put together a CLI for your to-do application, created an entry-point script, and run the application for the first time. You’ve also set up and run a minimal test suite for the app. The next step is to define how your application will initialize and connect to the to-do database.
You’ll use a JSON file to store the data about your to-dos. JSON is a lightweight data-interchange format that’s human-readable and writable. Python’s standard library includes json, which is a module that provides support for the JSON file format out of the box. That’s what you’ll use to manage your to-do database.
You can download the entire code for this section by clicking the link below and going to the source_code_step_3/ directory:
Get Source Code: Click here to get the source code you’ll use to build a to-do app for your command line using Python and Typer.
At the end of this section, you’ll have written the code for creating, connecting, and initializing your to-do database so that it’s ready for use. The first step, however, is to define how your application will find the to-do database in your file system.
Set Up the Application’s Configurations
You can use different techniques to define how an application connects and opens a file on your file system. You can provide the file path dynamically, create an environment variable to hold the file path, create a configuration file in which you store the file path, and so on.
Note: A configuration file, also known as a config file, is a type of file that programmers use to provide initial parameters and settings for a given program or application.
In this tutorial, you’ll provide your to-do app with a configuration file in your home directory to store the path to the database. To that end, you’ll use pathlib to work with file system paths and configparser to handle configuration files. Both packages are available for you in the Python standard library.
Now go back to your code editor and open config.py from rptodo/. Type in the following code:
 1"""This module provides the RP To-Do config functionality."""
 2# rptodo/config.py
 3
 4import configparser
 5from pathlib import Path
 6
 7import typer
 8
 9from rptodo import (
10    DB_WRITE_ERROR, DIR_ERROR, FILE_ERROR, SUCCESS, __app_name_
11)
12
13CONFIG_DIR_PATH = Path(typer.get_app_dir(__app_name__))
14CONFIG_FILE_PATH = CONFIG_DIR_PATH / "config.ini"
15
16def init_app(db_path: str) -> int:
17    """Initialize the application."""
18    config_code = _init_config_file()
19    if config_code != SUCCESS:
20        return config_code
21    database_code = _create_database(db_path)
22    if database_code != SUCCESS:
23        return database_code
24    return SUCCESS
25
26def _init_config_file() -> int:
27    try:
28        CONFIG_DIR_PATH.mkdir(exist_ok=True)
29    except OSError:
30        return DIR_ERROR
31    try:
32        CONFIG_FILE_PATH.touch(exist_ok=True)
33    except OSError:
34        return FILE_ERROR
35    return SUCCESS
36
37def _create_database(db_path: str) -> int:
38    config_parser = configparser.ConfigParser()
39    config_parser["General"] = {"database": db_path}
40    try:
41        with CONFIG_FILE_PATH.open("w") as file:
42            config_parser.write(file)
43    except OSError:
44        return DB_WRITE_ERROR
45    return SUCCESS
Here’s a breakdown of what this code does:
-
Line 4 imports
configparser. This module provides theConfigParserclass, which allows you to handle config files with a structure similar to INI files. -
Line 5 imports
Pathfrompathlib. This class provides a cross-platform way to handle system paths. -
Line 7 imports
typer. -
Lines 9 to 11 import a bunch of required objects from
rptodo. -
Line 13 creates
CONFIG_DIR_PATHto hold the path to the app’s directory. To get this path, you callget_app_dir()with the application’s name as an argument. This function returns a string representing the path to a directory where you can store configurations. -
Line 14 defines
CONFIG_FILE_PATHto hold the path to the configuration file itself. -
Line 16 defines
init_app(). This function initializes the application’s configuration file and database. -
Line 18 calls the
_init_config_file()helper function, which you define in lines 26 to 35. Calling this function creates the configuration directory usingPath.mkdir(). It also creates the configuration file usingPath.touch(). Finally,_init_config_file()returns the proper error codes if something wrong happens during the creation of the directory and file. It returnsSUCCESSif everything goes okay. -
Line 19 checks if an error occurs during the creation of the directory and configuration file, and line 20 returns the error code accordingly.
-
Line 21 calls the
_create_database()helper function, which creates the to-do database. This function returns the appropriate error codes if something happens while creating the database. It returnsSUCCESSif the process succeeds. -
Line 22 checks if an error occurs during the creation of the database. If so, then line 23 returns the corresponding error code.
-
Line 24 returns
SUCCESSif everything runs okay.
With this code, you’ve finished setting up the application’s configuration file to store the path to the to-do database. You’ve also added code to create the to-do database as a JSON file. Now you can write code for initializing the database and getting it ready for use. That’s what you’ll do in the following section.
Get the To-Do Database Ready for Use
To get the to-do database ready for use, you need to perform two actions. First, you need a way to retrieve the database file path from the application’s configuration file. Second, you need to initialize the database to hold JSON content.
Open database.py from rptodo/ in your code editor and write the following code:
 1"""This module provides the RP To-Do database functionality."""
 2# rptodo/database.py
 3
 4import configparser
 5from pathlib import Path
 6
 7from rptodo import DB_WRITE_ERROR, SUCCESS
 8
 9DEFAULT_DB_FILE_PATH = Path.home().joinpath(
10    "." + Path.home().stem + "_todo.json"
11)
12
13def get_database_path(config_file: Path) -> Path:
14    """Return the current path to the to-do database."""
15    config_parser = configparser.ConfigParser()
16    config_parser.read(config_file)
17    return Path(config_parser["General"]["database"])
18
19def init_database(db_path: Path) -> int:
20    """Create the to-do database."""
21    try:
22        db_path.write_text("[]")  # Empty to-do list
23        return SUCCESS
24    except OSError:
25        return DB_WRITE_ERROR
In this file, lines 4 to 7 perform the required imports. Here’s what the rest of the code does:
-
Lines 9 to 11 define
DEFAULT_DB_FILE_PATHto hold the default database file path. The application will use this path if the user doesn’t provide a custom one. -
Lines 13 to 17 define
get_database_path(). This function takes the path to the app’s config file as an argument, reads the input file usingConfigParser.read(), and returns aPathobject representing the path to the to-do database on your file system. TheConfigParserinstance stores the data in a dictionary. The"General"key represents the file section that stores the required information. The"database"key retrieves the database path. -
Lines 19 to 25 define
init_database(). This function takes a database path and writes a string representing an empty list. You call.write_text()on the database path, and the list initializes the JSON database with an empty to-do list. If the process runs successfully, theninit_database()returnsSUCCESS. Otherwise, it returns the appropriate error code.
Cool! Now you have a way to retrieve the database file path from the application’s configuration file. You also have a way to initialize the database with an empty to-do list in JSON format. It’s time to implement the init command with Typer so that your users can initialize their to-do database from the CLI.
Implement the init CLI Command
The final step to put together all the code you’ve written in this section is to add the init command to your application’s CLI. This command will take an optional database file path. It’ll then create the application’s configuration file and to-do database.
Go ahead and add init() to your cli.py file:
 1"""This module provides the RP To-Do CLI."""
 2# rptodo/cli.py
 3
 4from pathlib import Path
 5from typing import Optional
 6
 7import typer
 8
 9from rptodo import ERRORS, __app_name__, __version__, config, database
10
11app = typer.Typer()
12
13@app.command()
14def init(
15    db_path: str = typer.Option(
16        str(database.DEFAULT_DB_FILE_PATH),
17        "--db-path",
18        "-db",
19        prompt="to-do database location?",
20    ),
21) -> None:
22    """Initialize the to-do database."""
23    app_init_error = config.init_app(db_path)
24    if app_init_error:
25        typer.secho(
26            f'Creating config file failed with "{ERRORS[app_init_error]}"',
27            fg=typer.colors.RED,
28        )
29        raise typer.Exit(1)
30    db_init_error = database.init_database(Path(db_path))
31    if db_init_error:
32        typer.secho(
33            f'Creating database failed with "{ERRORS[db_init_error]}"',
34            fg=typer.colors.RED,
35        )
36        raise typer.Exit(1)
37    else:
38        typer.secho(f"The to-do database is {db_path}", fg=typer.colors.GREEN)
39
40def _version_callback(value: bool) -> None:
41    # ...
Here’s how this new code works:
-
Lines 4 and 9 update the required imports.
-
Lines 13 and 14 define
init()as a Typer command using the@app.command()decorator. -
Lines 15 to 20 define a Typer
Optioninstance and assign it as a default value todb_path. To provide a value for this option, your users need to use--db-pathor-dbfollowed by a database path. Thepromptargument displays a prompt asking for a database location. It also allows you to accept the default path by pressing Enter. -
Line 23 calls
init_app()to create the application’s configuration file and to-do database. -
Lines 24 to 29 check if the call to
init_app()returns an error. If so, lines 25 to 28 print an error message. Line 29 exits the app with atyper.Exitexception and an exit code of1to signal that the application terminated with an error. -
Line 30 calls
init_database()to initialize the database with an empty to-do list. -
Lines 31 to 38 check if the call to
init_database()returns an error. If so, then lines 32 to 35 display an error message, and line 36 exits the application. Otherwise, line 38 prints a success message in green text.
To print the messages in this code, you use typer.secho(). This function takes a foreground argument, fg, that allows you to use different colors when printing text to the screen. Typer provides several built-in colors in typer.colors. There you’ll find RED, BLUE, GREEN, and more. You can use those colors with secho() as you did here.
Note: The line numbers in the code samples in this tutorial are for explanatory purposes. Most of the time, they won’t match the line numbers that you’ll have in your final module or script.
Nice! With all this code in place, you can now give the init command a try. Go back to your terminal and run the following:
(venv) $ python -m rptodo init
to-do database location? [/home/user/.user_todo.json]:
The to-do database is /home/user/.user_todo.json
This command presents you with a prompt for entering a database location. You can press Enter to accept the default path in square brackets, or you can type in a custom path and then press Enter. The application creates the to-do database and tells you where it’ll reside from this point on.
Alternatively, you can provide a custom database path directly by using init with the -db or --db-path options followed by the desired path. In all cases, your custom path should include the database file name.
Once you’ve run the above command, take a look at your home directory. You’ll have a JSON file named after the filename you used with init. You’ll also have a rptodo/ directory containing a config.ini file somewhere in your home folder. The specific path to this file will depend on your current operating system. On Ubuntu, for example, the file will be at /home/user/.config/rptodo/.
Step 4: Set Up the To-Do App Back End
Up to this point, you’ve made a way to create, initialize, and connect to the to-do database. Now you can start thinking of your data model. In other words, you need to think about how to represent and store data about your to-dos. You also need to define how your application will handle communication between the CLI and database.
You can download the code and all the additional resources you’ll use in this section by clicking the link below and going to the source_code_step_4/ directory:
Get Source Code: Click here to get the source code you’ll use to build a to-do app for your command line using Python and Typer.
Define a Single To-Do
First, think about the data you need for defining a single to-do. In this project, a to-do will consist of the following pieces of information:
- Description: How do you describe this to-do?
- Priority: What priority does this to-do have over the rest of your to-dos?
- Done: Is this to-do done?
To store this information, you can use a regular Python dictionary:
todo = {
    "Description": "Get some milk.",
    "Priority": 2,
    "Done": True,
}
The "Description" key stores a string describing the current to-do. The "Priority" key can take three possible values: 1 for high, 2 for medium, and 3 for low priority. The "Done" key holds True when you’ve completed the to-do and False otherwise.
Communicate With the CLI
To communicate with the CLI, you’ll use two pieces of data holding the required information:
todo: The dictionary holding the information for the current to-doerror: The return or error code confirming if the current operation was successful or not
To store this data, you’ll use a named tuple with appropriately named fields. Open up the rptodo.py module from rptodo to create the required named tuple:
 1"""This module provides the RP To-Do model-controller."""
 2# rptodo/rptodo.py
 3
 4from typing import Any, Dict, NamedTuple
 5
 6class CurrentTodo(NamedTuple):
 7    todo: Dict[str, Any]
 8    error: int
In rptodo.py, you first import some required objects from typing. On line 6, you create a subclass of typing.NamedTuple called CurrentTodo with two fields todo and error.
Subclassing NamedTuple allows you to create named tuples with type hints for their named fields. For example, the todo field above holds a dictionary with keys of type str and values of type Any. The error field holds an int value.
Communicate With the Database
Now you need another data container that allows you to send data to and retrieve data from the to-do database. In this case, you’ll use another named tuple with the following fields:
todo_list: The to-do list you’ll write to and read from the databaseerror: An integer number representing a return code related to the current database operation
Finally, you’ll create a class called DatabaseHandler to read and write data to the to-do database. Go ahead and open database.py. Once you’re there, type in the following code:
 1# rptodo/database.py
 2
 3import configparser
 4import json
 5from pathlib import Path
 6from typing import Any, Dict, List, NamedTuple
 7
 8from rptodo import DB_READ_ERROR, DB_WRITE_ERROR, JSON_ERROR, SUCCESS
 9
10# ...
11
12class DBResponse(NamedTuple):
13    todo_list: List[Dict[str, Any]]
14    error: int
15
16class DatabaseHandler:
17    def __init__(self, db_path: Path) -> None:
18        self._db_path = db_path
19
20    def read_todos(self) -> DBResponse:
21        try:
22            with self._db_path.open("r") as db:
23                try:
24                    return DBResponse(json.load(db), SUCCESS)
25                except json.JSONDecodeError:  # Catch wrong JSON format
26                    return DBResponse([], JSON_ERROR)
27        except OSError:  # Catch file IO problems
28            return DBResponse([], DB_READ_ERROR)
29
30    def write_todos(self, todo_list: List[Dict[str, Any]]) -> DBResponse:
31        try:
32            with self._db_path.open("w") as db:
33                json.dump(todo_list, db, indent=4)
34            return DBResponse(todo_list, SUCCESS)
35        except OSError:  # Catch file IO problems
36            return DBResponse(todo_list, DB_WRITE_ERROR)
Here’s what this code does:
-
Lines 4, 6, and 8 add some required imports.
-
Lines 12 to 14 define
DBResponseas aNamedTuplesubclass. Thetodo_listfield is a list of dictionaries representing individual to-dos, while theerrorfield holds an integer return code. -
Line 16 defines
DatabaseHandler, which allows you to read and write data to the to-do database using thejsonmodule from the standard library. -
Lines 17 and 18 define the class initializer, which takes a single argument representing the path to the database on your file system.
-
Line 20 defines
.read_todos(). This method reads the to-do list from the database and deserializes it. -
Line 21 starts a
try…exceptstatement to catch any errors that occur while you’re opening the database. If an error occurs, then line 28 returns aDBResponseinstance with an empty to-do list and aDB_READ_ERROR. -
Line 22 opens the database for reading using a
withstatement. -
Line 23 starts another
try…exceptstatement to catch any errors that occur while you’re loading and deserializing the JSON content from the to-do database. -
Line 24 returns a
DBResponseinstance holding the result of callingjson.load()with the to-do database object as an argument. This result consists of a list of dictionaries. Every dictionary represents a to-do. Theerrorfield ofDBResponseholdsSUCCESSto signal that the operation was successful. -
Line 25 catches any
JSONDecodeErrorwhile loading the JSON content from the database, and line 26 returns with an empty list and aJSON_ERROR. -
Line 27 catches any file IO problems while loading the JSON file, and line 28 returns a
DBResponseinstance with an empty to-do list and aDB_READ_ERROR. -
Line 30 defines
.write_todos(), which takes a list of to-do dictionaries and writes it to the database. -
Line 31 starts a
try…exceptstatement to catch any errors that occur while you’re opening the database. If an error occurs, then line 36 returns aDBResponseinstance with the original to-do list and aDB_READ_ERROR. -
Line 32 uses a
withstatement to open the database for writing. -
Line 33 dumps the to-do list as a JSON payload into the database.
-
Line 34 returns a
DBResponseinstance holding the to-do list and theSUCCESScode.
Wow! That was a lot! Now that you finished coding DatabaseHandler and setting up the data exchange mechanism, you can think about how to connect them to the application’s CLI.
Write the Controller Class, Todoer
To connect the DatabaseHandler logic with your application’s CLI, you’ll write a class called Todoer. This class will work similarly to a controller in the Model-View-Controller pattern.
Now go back to rptodo.py and add the following code:
# rptodo/rptodo.py
from pathlib import Path
from typing import Any, Dict, NamedTuple

from rptodo.database import DatabaseHandler

# ...

class Todoer:
    def __init__(self, db_path: Path) -> None:
        self._db_handler = DatabaseHandler(db_path)
This code includes some imports and the definition of Todoer. This class uses composition, so it has a DatabaseHandler component to facilitate direct communication with the to-do database. You’ll add more code to this class in upcoming sections.
In this section, you’ve put together a lot of setups that shape how your to-do application’s back end will work. You’ve decided what data structures to use for storing the to-do data. You’ve also defined what kind of database you’ll use to save the to-do information and how to operate on it.
With all those setups in place, you’re now ready to start providing value to your users by allowing them to populate their to-do lists. You’ll also implement a way to display the to-dos on the screen.
Step 5: Code the Adding and Listing To-Dos Functionalities
In this section, you’ll code one of the main features of your to-do application. You’ll provide your users with a command to add new to-dos to their current list. You’ll also allow the users to list their to-dos on the screen in a tabular format.
Before working on these features, you’ll set up a minimal test suite for your code. Writing a test suite before writing the code will help you understand what test-driven development (TDD) is about.
To download the code, unit tests, and all the additional resources you’ll add in this section, just click the link below and go to the source_code_step_5/ directory:
Get Source Code: Click here to get the source code you’ll use to build a to-do app for your command line using Python and Typer.
Define Unit Tests for Todoer.add()
In this section, you’ll use pytest to write and run a minimal test suite for Todoer.add(). This method will take care of adding new to-dos to the database. With the test suite in place, you’ll write the required code to pass the tests, which is a fundamental idea behind TDD.
Note: If you download the source code and resources for each section of this tutorial, then you’ll find additional unit tests for this and the upcoming sections.
Take a look at them and try to understand their logic. Run them to make sure the app works correctly. Extend them to add new test cases. You’ll learn a lot in the process.
Before writing tests for .add(), think of what this method needs to do:
- Get a to-do description and priority
- Create a dictionary to hold the to-do information
- Read the to-do list from the database
- Append the new to-do to the current to-do list
- Write the updated to-do list back to the database
- Return the newly added to-do along with a return code back to the caller
A common practice in code testing is to start with the main functionality of a given method or function. You’ll start by creating test cases to check if .add() properly adds new to-dos to the database.
To test .add(), you must create a Todoer instance with a proper JSON file as the target database. To provide that file, you’ll use a pytest fixture.
Go back to your code editor and open test_rptodo.py from the tests/ directory. Add the following code to it:
# tests/test_rptodo.py
import json

import pytest
from typer.testing import CliRunner

from rptodo import (
    DB_READ_ERROR,
    SUCCESS,
    __app_name__,
    __version__,
    cli,
    rptodo,
)

# ...

@pytest.fixture
def mock_json_file(tmp_path):
    todo = [{"Description": "Get some milk.", "Priority": 2, "Done": False}]
    db_file = tmp_path / "todo.json"
    with db_file.open("w") as db:
        json.dump(todo, db, indent=4)
    return db_file
Here, you first update your imports to complete some requirements. The fixture, mock_json_file(), creates and returns a temporary JSON file, db_file, with a single-item to-do list in it. In this fixture, you use tmp_path, which is a pathlib.Path object that pytest uses to provide a temporary directory for testing purposes.
You already have a temporary to-do database to use. Now you need some data to create your test cases:
# tests/test_rptodo.py
# ...

test_data1 = {
    "description": ["Clean", "the", "house"],
    "priority": 1,
    "todo": {
        "Description": "Clean the house.",
        "Priority": 1,
        "Done": False,
    },
}
test_data2 = {
    "description": ["Wash the car"],
    "priority": 2,
    "todo": {
        "Description": "Wash the car.",
        "Priority": 2,
        "Done": False,
    },
}
These two dictionaries provide data to test Todoer.add(). The first two keys represent the data you’ll use as arguments to .add(), while the third key holds the expected return value of the method.
Now it’s time to write your first test function for .add(). With pytest, you can use parametrization to provide multiple sets of arguments and expected results to a single test function. This is a pretty neat feature. It makes a single test function behave like several test functions that run different test cases.
Here’s how you can create your test function using parametrization in pytest:
 1# tests/test_rptodo.py
 2# ...
 3
 4@pytest.mark.parametrize(
 5    "description, priority, expected",
 6    [
 7        pytest.param(
 8            test_data1["description"],
 9            test_data1["priority"],
10            (test_data1["todo"], SUCCESS),
11        ),
12        pytest.param(
13            test_data2["description"],
14            test_data2["priority"],
15            (test_data2["todo"], SUCCESS),
16        ),
17    ],
18)
19def test_add(mock_json_file, description, priority, expected):
20    todoer = rptodo.Todoer(mock_json_file)
21    assert todoer.add(description, priority) == expected
22    read = todoer._db_handler.read_todos()
23    assert len(read.todo_list) == 2
The @pytest.mark.parametrize() decorator marks test_add() for parametrization. When pytest runs this test, it calls test_add() two times. Each call uses one of the parameter sets from lines 7 to 11 and lines 12 to 16.
The string on line 5 holds descriptive names for the two required parameters and also a descriptive return value name. Note that test_add() has those same parameters. Additionally, the first parameter of test_add() has the same name as the fixture you just defined.
Inside test_add(), the code does the following actions:
-
Line 20 creates an instance of
Todoerwithmock_json_fileas an argument. -
Line 21 asserts that a call to
.add()usingdescriptionandpriorityas arguments should returnexpected. -
Line 22 reads the to-do list from the temporary database and stores it in
read. -
Line 23 asserts that the length of the to-do list is
2. Why2? Becausemock_json_file()returns a list with one to-do, and now you’re adding a second one.
Cool! You have a test that covers the main functionality of .add(). Now it’s time to run your test suite again. Go back to your command line and run python -m pytest tests/. You’ll get an output similar to the following:
======================== test session starts ==========================
platform linux -- Python 3.8.5, pytest-6.2.4, py-1.10.0, pluggy-0.13.1
rootdir: .../rptodo
plugins: Faker-8.1.1, cov-2.12.0, celery-4.4.7
collected 3 items

tests/test_rptodo.py .FF                                        [100%]
============================== FAILURES ===============================

# Output cropped
The F letters in the highlighted line mean that two of your test cases have failed. Having failing tests is the first step for TDD. The second step is to write code for passing those tests. That’s what you’re going to do next.
Implement the add CLI Command
In this section, you’ll code .add() in the Todoer class. You’ll also code the add command in your Typer CLI. With these two pieces of code in place, your users will be able to add new items to their to-dos lists.
Every time the to-do application runs, it needs to access the Todoer class and connect the CLI with the database. To satisfy this requirement, you’ll implement a function called get_todoer().
Go back to your code editor and open cli.py. Type in the following code:
 1# rptodo/cli.py
 2
 3from pathlib import Path
 4from typing import List, Optional
 5
 6import typer
 7
 8from rptodo import (
 9    ERRORS, __app_name__, __version__, config, database, rptodo
10)
11
12app = typer.Typer()
13
14@app.command()
15def init(
16    # ...
17
18def get_todoer() -> rptodo.Todoer:
19    if config.CONFIG_FILE_PATH.exists():
20        db_path = database.get_database_path(config.CONFIG_FILE_PATH)
21    else:
22        typer.secho(
23            'Config file not found. Please, run "rptodo init"',
24            fg=typer.colors.RED,
25        )
26        raise typer.Exit(1)
27    if db_path.exists():
28        return rptodo.Todoer(db_path)
29    else:
30        typer.secho(
31            'Database not found. Please, run "rptodo init"',
32            fg=typer.colors.RED,
33        )
34        raise typer.Exit(1)
35
36def _version_callback(value: bool) -> None:
37    # ...
After updating the imports, you define get_todoer() on line 18. Line 19 defines a conditional that checks if the application’s configuration file exists. To do so, it uses Path.exists().
If the configuration file exists, then line 20 gets the path to the database from it. The else clause runs if the file doesn’t exist. This clause prints an error message to the screen and exits the application with an exit code of 1 to signal an error.
Line 27 checks if the path to the database exists. If so, then line 28 creates an instance of Todoer with the path as an argument. Otherwise, the else clause that starts on line 29 prints an error message and exits the application.
Now that you have an instance of Todoer with a valid database path, you can write .add(). Go back to the rptodo.py module and update Todoer:
 1# rptodo/rptodo.py
 2from pathlib import Path
 3from typing import Any, Dict, List, NamedTuple
 4
 5from rptodo import DB_READ_ERROR
 6from rptodo.database import DatabaseHandler
 7
 8# ...
 9
10class Todoer:
11    def __init__(self, db_path: Path) -> None:
12        self._db_handler = DatabaseHandler(db_path)
13
14    def add(self, description: List[str], priority: int = 2) -> CurrentTodo:
15        """Add a new to-do to the database."""
16        description_text = " ".join(description)
17        if not description_text.endswith("."):
18            description_text += "."
19        todo = {
20            "Description": description_text,
21            "Priority": priority,
22            "Done": False,
23        }
24        read = self._db_handler.read_todos()
25        if read.error == DB_READ_ERROR:
26            return CurrentTodo(todo, read.error)
27        read.todo_list.append(todo)
28        write = self._db_handler.write_todos(read.todo_list)
29        return CurrentTodo(todo, write.error)
Here’s how .add() works line by line:
-
Line 14 defines
.add(), which takesdescriptionandpriorityas arguments. The description is a list of strings. Typer builds this list from the words you enter at the command line to describe the current to-do. In the case ofpriority, it’s an integer value representing the to-do’s priority. The default is2, indicating a medium priority. -
Line 16 concatenates the description components into a single string using
.join(). -
Lines 17 and 18 add a period (
".") to the end of the description if the user doesn’t add it. -
Lines 19 to 23 build a new to-do from the user’s input.
-
Line 24 reads the to-do list from the database by calling
.read_todos()on the database handler. -
Line 25 checks if
.read_todos()returned aDB_READ_ERROR. If so, then line 26 returns a named tuple,CurrentTodo, containing the current to-do and the error code. -
Line 27 appends the new to-do to the list.
-
Line 28 writes the updated to-do list back to the database by calling
.write_todos()on the database handler. -
Line 29 returns an instance of
CurrentTodowith the current to-do and an appropriate return code.
Now you can run your test suite again to check if .add() works correctly. Go ahead and run python -m pytest tests/. You’ll get an output similar to the following:
========================= test session starts =========================
platform linux -- Python 3.9.5, pytest-6.2.4, py-1.10.0, pluggy-0.13.1
plugins: Faker-8.1.1, cov-2.12.0, celery-4.4.7
rootdir: .../rptodo
collected 2 items

tests/test_rptodo.py ...                                        [100%]
========================== 3 passed in 0.09s ==========================
The three green dots mean that you have three passing tests. If you downloaded the code from the project’s repo on GitHub, then you get an output with a few more successful tests.
Once you’ve finished writing .add(), you can head to cli.py and write the add command for your application’s CLI:
 1# rptodo/cli.py
 2# ...
 3
 4def get_todoer() -> rptodo.Todoer:
 5    # ...
 6
 7@app.command()
 8def add(
 9    description: List[str] = typer.Argument(...),
10    priority: int = typer.Option(2, "--priority", "-p", min=1, max=3),
11) -> None:
12    """Add a new to-do with a DESCRIPTION."""
13    todoer = get_todoer()
14    todo, error = todoer.add(description, priority)
15    if error:
16        typer.secho(
17            f'Adding to-do failed with "{ERRORS[error]}"', fg=typer.colors.RED
18        )
19        raise typer.Exit(1)
20    else:
21        typer.secho(
22            f"""to-do: "{todo['Description']}" was added """
23            f"""with priority: {priority}""",
24            fg=typer.colors.GREEN,
25        )
26
27def _version_callback(value: bool) -> None:
28    # ...
Here’s a breakdown of what the add command does:
-
Lines 7 and 8 define
add()as a Typer command using the@app.command()Python decorator. -
Line 9 defines
descriptionas an argument toadd(). This argument holds a list of strings representing a to-do description. To build the argument, you usetyper.Argument. When you pass an ellipsis (...) as the first argument to the constructor ofArgument, you’re telling Typer thatdescriptionis required. The fact that this argument is required means that the user must provide a to-do description at the command line. -
Line 10 defines
priorityas a Typer option with a default value of2. The option names are--priorityand-p. As you decided earlier,priorityonly accepts three possible values:1,2, or3. To guarantee this condition, you setminto1andmaxto3. This way, Typer automatically validates the user’s input and only accepts numbers within the specified interval. -
Line 13 gets a
Todoerinstance to use. -
Line 14 calls
.add()ontodoerand unpacks the result intotodoanderror. -
Lines 15 to 25 define a conditional statement that prints an error message and exits the application if an error occurs while adding the new to-do to the database. If no error happens, then the
elseclause on line 20 displays a success message on the screen.
Now you can go back to your terminal and give your add command a try:
(venv) $ python -m rptodo add Get some milk -p 1
to-do: "Get some milk." was added with priority: 1

(venv) $ python -m rptodo add Clean the house --priority 3
to-do: "Clean the house." was added with priority: 3

(venv) $ python -m rptodo add Wash the car
to-do: "Wash the car." was added with priority: 2

(venv) $ python -m rptodo add Go for a walk -p 5
Usage: rptodo add [OPTIONS] DESCRIPTION...
Try 'rptodo add --help' for help.

Error: Invalid value for '--priority' / '-p': 5 is not in the valid range...
In the first example, you execute the add command with the description "Get some milk" and a priority of 1. To set the priority, you use the -p option. Once you press Enter, the application adds the to-do and informs you about the successful addition. The second example works pretty similarly. This time you use --priority to set the to-do priority to 3.
In the third example, you provide a to-do description without supplying a priority. In this situation, the app uses the default priority value, which is 2.
In the fourth example, you try to add a new to-do with a priority of 5. Since this priority value is out of the allowed range, Typer displays a usage message along with an error message. Note that Typer automatically displays these messages for you. You don’t need to add extra code for this to happen.
Great! Your to-do application already has some cool functionality. Now you need a way to list all your to-dos to get an idea of how much work you have on your plate. In the following section, you’ll implement the list command to help you out with this task.
Implement the list Command
In this section, you’ll add the list command to your application’s CLI. This command will allow your users to list all their current to-dos. Before adding any code to your CLI, you need a way to retrieve the entire to-do list from the database. To accomplish this task, you’ll add .get_todo_list() to the Todoer class.
Open up rptodo.py in your code editor or IDE and add the following code:
# rptodo/rptodo.py
# ...

class Todoer:
    # ...
    def get_todo_list(self) -> List[Dict[str, Any]]:
        """Return the current to-do list."""
        read = self._db_handler.read_todos()
        return read.todo_list
Inside .get_todo_list(), you first get the entire to-do list from the database by calling .read_todos() on the database handler. The call to .read_todos() returns a named tuple, DBResponse, containing the to-do list and a return code. However, you just need the to-do list, so .get_todo_list() returns the .todo_list field only.
With .get_todo_list() in place, you can now implement the list command in the application’s CLI. Go ahead and add list_all() to cli.py:
 1# rptodo/cli.py
 2# ...
 3
 4@app.command()
 5def add(
 6    # ...
 7
 8@app.command(name="list")
 9def list_all() -> None:
10    """List all to-dos."""
11    todoer = get_todoer()
12    todo_list = todoer.get_todo_list()
13    if len(todo_list) == 0:
14        typer.secho(
15            "There are no tasks in the to-do list yet", fg=typer.colors.RED
16        )
17        raise typer.Exit()
18    typer.secho("\nto-do list:\n", fg=typer.colors.BLUE, bold=True)
19    columns = (
20        "ID.  ",
21        "| Priority  ",
22        "| Done  ",
23        "| Description  ",
24    )
25    headers = "".join(columns)
26    typer.secho(headers, fg=typer.colors.BLUE, bold=True)
27    typer.secho("-" * len(headers), fg=typer.colors.BLUE)
28    for id, todo in enumerate(todo_list, 1):
29        desc, priority, done = todo.values()
30        typer.secho(
31            f"{id}{(len(columns[0]) - len(str(id))) * ' '}"
32            f"| ({priority}){(len(columns[1]) - len(str(priority)) - 4) * ' '}"
33            f"| {done}{(len(columns[2]) - len(str(done)) - 2) * ' '}"
34            f"| {desc}",
35            fg=typer.colors.BLUE,
36        )
37    typer.secho("-" * len(headers) + "\n", fg=typer.colors.BLUE)
38
39def _version_callback(value: bool) -> None:
40    # ...
Here’s how list_all() works:
-
Lines 8 and 9 define
list_all()as a Typer command using the@app.command()decorator. Thenameargument to this decorator sets a custom name for the command, which islisthere. Note thatlist_all()doesn’t take any argument or option. It just lists the to-dos when the user runslistfrom the command line. -
Line 11 gets the
Todoerinstance that you’ll use. -
Line 12 gets the to-do list from the database by calling
.get_todo_list()ontodoer. -
Lines 13 to 17 define a conditional statement to check if there’s at least one to-do in the list. If not, then the
ifcode block prints an error message to the screen and exits the application. -
Line 18 prints a top-level header to present the to-do list. In this case,
secho()takes an additional Boolean argument calledbold, which enables you to display text in a bolded font format. -
Lines 19 to 27 define and print the required columns to display the to-do list in a tabular format.
-
Lines 28 to 36 run a
forloop to print every single to-do on its own row with appropriate padding and separators. -
Line 37 prints a line of dashes with a final line feed character (
\n) to visually separate the to-do list from the next command-line prompt.
If you run the application with the list command, then you get the following output:
(venv) $ python -m rptodo list

to-do list:

ID.  | Priority  | Done  | Description
----------------------------------------
1    | (1)       | False | Get some milk.
2    | (3)       | False | Clean the house.
3    | (2)       | False | Wash the car.
----------------------------------------
This output shows all the current to-dos in a nicely formatted table. This way, your user can track the state of their list of tasks. Note that the output should display in blue font on your terminal window.
Step 6: Code the To-Do Completion Functionality
The next feature you’ll add to your to-do application is a Typer command that allows your users to set a given to-do as complete. This way, your users can track their progress and know how much work is left.
Again, you can download the code and all the resources for this section, including additional unit tests, by clicking the link below and going to the source_code_step_6/ directory:
Get Source Code: Click here to get the source code you’ll use to build a to-do app for your command line using Python and Typer.
As usual, you’ll start by coding the required functionality back in Todoer. In this case, you need a method that takes a to-do ID and marks the corresponding to-do as done. Go back to rptodo.py in your code editor and add the following code:
 1# rptodo/rptodo.py
 2# ...
 3from rptodo import DB_READ_ERROR, ID_ERROR
 4from rptodo.database import DatabaseHandler
 5
 6# ...
 7
 8class Todoer:
 9    # ...
10    def set_done(self, todo_id: int) -> CurrentTodo:
11        """Set a to-do as done."""
12        read = self._db_handler.read_todos()
13        if read.error:
14            return CurrentTodo({}, read.error)
15        try:
16            todo = read.todo_list[todo_id - 1]
17        except IndexError:
18            return CurrentTodo({}, ID_ERROR)
19        todo["Done"] = True
20        write = self._db_handler.write_todos(read.todo_list)
21        return CurrentTodo(todo, write.error)
Your new .set_done() method does the required job. Here’s how:
-
Line 10 defines
.set_done(). The method takes an argument calledtodo_id, which holds an integer representing the ID of the to-do you want to mark as done. The to-do ID is the number associated with a given to-do when you list your to-dos using thelistcommand. Since you’re using a Python list to store the to-dos, you can turn this ID into a zero-based index and use it to retrieve the required to-do from the list. -
Line 12 reads all the to-dos by calling
.read_todos()on the database handler. -
Line 13 checks if any error occurs during the reading. If so, then line 14 returns a named tuple,
CurrentTodo, with an empty to-do and the error. -
Line 15 starts a
try…exceptstatement to catch invalid to-do IDs that translate to invalid indices in the underlying to-do list. If anIndexErroroccurs, then line 18 returns aCurrentTodoinstance with an empty to-do and the corresponding error code. -
Line 19 assigns
Trueto the"Done"key in the target to-do dictionary. This way, you’re setting the to-do as done. -
Line 20 writes the update back to the database by calling
.write_todos()on the database handler. -
Line 21 returns a
CurrentTodoinstance with the target to-do and a return code indicating how the operation went.
With .set_done() in place, you can move to cli.py and write the complete command. Here’s the required code:
 1# rptodo/cli.py
 2# ...
 3
 4@app.command(name="list")
 5def list_all() -> None:
 6    # ...
 7
 8@app.command(name="complete")
 9def set_done(todo_id: int = typer.Argument(...)) -> None:
10    """Complete a to-do by setting it as done using its TODO_ID."""
11    todoer = get_todoer()
12    todo, error = todoer.set_done(todo_id)
13    if error:
14        typer.secho(
15            f'Completing to-do # "{todo_id}" failed with "{ERRORS[error]}"',
16            fg=typer.colors.RED,
17        )
18        raise typer.Exit(1)
19    else:
20        typer.secho(
21            f"""to-do # {todo_id} "{todo['Description']}" completed!""",
22            fg=typer.colors.GREEN,
23        )
24
25def _version_callback(value: bool) -> None:
26    # ...
Take a look at how this code works line by line:
-
Lines 8 and 9 define
set_done()as a Typer command with the usual@app.command()decorator. In this case, you usecompletefor the command name. Theset_done()function takes an argument calledtodo_id, which defaults to an instance oftyper.Argument. This instance will work as a required command-line argument. -
Line 11 gets the usual
Todoerinstance. -
Line 12 sets the to-do with the specific
todo_idas done by calling.set_done()ontodoer. -
Line 13 checks if any error occurs during the process. If so, then lines 14 to 18 print an appropriate error message and exit the application with an exit code of
1. If no error occurs, then lines 20 to 23 print a success message in green font.
That’s it! Now you can give your new complete command a try. Back in your terminal window, run the following commands:
(venv) $ python -m rptodo list

to-do list:

ID.  | Priority  | Done  | Description
----------------------------------------
1    | (1)       | False | Get some milk.
2    | (3)       | False | Clean the house.
3    | (2)       | False | Wash the car.
----------------------------------------

(venv) $ python -m rptodo complete 1
to-do # 1 "Get some milk." completed!

(venv) $ python -m rptodo list

to-do list:

ID.  | Priority  | Done  | Description
----------------------------------------
1    | (1)       | True  | Get some milk.
2    | (3)       | False | Clean the house.
3    | (2)       | False | Wash the car.
----------------------------------------
First, you list all your to-dos to visualize the ID that corresponds to each of them. Then you use complete to set the to-do with an ID of 1 as done. When you list the to-dos again, you see that the first to-do is now marked as True in the Done column.
An important detail to note about the complete command and the underlying Todoer.set_done() method is that the to-do ID is not a fixed value. If you remove one or more to-dos from the list, then the IDs of some remaining to-dos will change. Speaking of removing to-dos, that’s what you’ll do in the following section.
Step 7: Code the Remove To-Dos Functionality
Removing to-dos from the list is another useful feature you can add to your to-do application. In this section, you’ll add two new Typer commands to the app’s CLI using Python. The first command will be remove. It’ll allow your users to remove a to-do by its ID. The second command will be clear and will enable the users to remove all the current to-dos from the database.
You can download the code, unit tests, and other additional resources for this section by clicking the link below and going to the source_code_step_7/ directory:
Get Source Code: Click here to get the source code you’ll use to build a to-do app for your command line using Python and Typer.
Implement the remove CLI Command
To implement the remove command in your application’s CLI, you first need to code the underlying .remove() method in Todoer. This method will provide all the functionality to remove a single to-do from the list using the to-do ID. Remember that you set up the to-do ID to be an integer number associated with a specific to-do. To display the to-do IDs, run the list command.
Here’s how you can code .remove() in Todoer:
 1# rptodo/rptodo.py
 2# ...
 3
 4class Todoer:
 5    # ...
 6    def remove(self, todo_id: int) -> CurrentTodo:
 7        """Remove a to-do from the database using its id or index."""
 8        read = self._db_handler.read_todos()
 9        if read.error:
10            return CurrentTodo({}, read.error)
11        try:
12            todo = read.todo_list.pop(todo_id - 1)
13        except IndexError:
14            return CurrentTodo({}, ID_ERROR)
15        write = self._db_handler.write_todos(read.todo_list)
16        return CurrentTodo(todo, write.error)
Here, your code does the following:
-
Line 6 defines
.remove(). This method takes a to-do ID as an argument and removes the corresponding to-do from the database. -
Line 8 reads the to-do list from the database by calling
.read_todos()on the database handler. -
Line 9 checks if any error occurs during the reading process. If so, then line 10 returns a named tuple,
CurrentTodo, holding an empty to-do and the corresponding error code. -
Line 11 starts a
try…exceptstatement to catch any invalid ID coming from the user’s input. -
Line 12 removes the to-do at index
todo_id - 1from the to-do list. If anIndexErroroccurs during this operation, then line 14 returns aCurrentTodoinstance with an empty to-do and the corresponding error code. -
Line 15 writes the updated to-do list back to the database.
-
Line 16 returns a
CurrentTodotuple holding the removed to-do and a return code indicating a successful operation.
Now that you finished coding .remove() in Todoer, you can go to cli.py and add the remove command:
 1# rptodo/cli.py
 2# ...
 3
 4@app.command()
 5def set_done(todo_id: int = typer.Argument(...)) -> None:
 6    # ...
 7
 8@app.command()
 9def remove(
10    todo_id: int = typer.Argument(...),
11    force: bool = typer.Option(
12        False,
13        "--force",
14        "-f",
15        help="Force deletion without confirmation.",
16    ),
17) -> None:
18    """Remove a to-do using its TODO_ID."""
19    todoer = get_todoer()
20
21    def _remove():
22        todo, error = todoer.remove(todo_id)
23        if error:
24            typer.secho(
25                f'Removing to-do # {todo_id} failed with "{ERRORS[error]}"',
26                fg=typer.colors.RED,
27            )
28            raise typer.Exit(1)
29        else:
30            typer.secho(
31                f"""to-do # {todo_id}: '{todo["Description"]}' was removed""",
32                fg=typer.colors.GREEN,
33            )
34
35    if force:
36        _remove()
37    else:
38        todo_list = todoer.get_todo_list()
39        try:
40            todo = todo_list[todo_id - 1]
41        except IndexError:
42            typer.secho("Invalid TODO_ID", fg=typer.colors.RED)
43            raise typer.Exit(1)
44        delete = typer.confirm(
45            f"Delete to-do # {todo_id}: {todo['Description']}?"
46        )
47        if delete:
48            _remove()
49        else:
50            typer.echo("Operation canceled")
51
52def _version_callback(value: bool) -> None:
53    # ...
Wow! That’s a lot of code. Here’s how it works:
-
Lines 8 and 9 define
remove()as a Typer CLI command. -
Line 10 defines
todo_idas an argument of typeint. In this case,todo_idis a required instance oftyper.Argument. -
Line 11 defines
forceas an option for theremovecommand. It’s a Boolean option that allows you to delete a to-do without confirmation. This option defaults toFalse(line 12) and its flags are--forceand-f(lines 13 and 14). -
Line 15 defines a help message for the
forceoption. -
Line 19 creates the required
Todoerinstance. -
Lines 21 to 33 define an inner function called
_remove(). It’s a helper function that allows you to reuse the remove functionality. The function removes a to-do using its ID. To do that, it calls.remove()ontodoer. -
Line 35 checks the value of
force. ATruevalue means that the user wants to remove the to-do without confirmation. In this situation, line 36 calls_remove()to run the remove operation. -
Line 37 starts an
elseclause that runs ifforceisFalse. -
Line 38 gets the entire to-do list from the database.
-
Lines 39 to 43 define a
try…exceptstatement that retrieves the desired to-do from the list. If anIndexErroroccurs, then line 42 prints an error message, and line 43 exits the application. -
Lines 44 to 46 call Typer’s
confirm()and store the result indelete. This function provides an alternative way to ask for confirmation. It allows you to use a dynamically created confirmation prompt like the one on line 45. -
Line 47 checks if
deleteisTrue, in which case line 48 calls_remove(). Otherwise, line 50 communicates that the operation was canceled.
You can try out the remove command by running the following on your command line:
(venv) $ python -m rptodo list

to-do list:

ID.  | Priority  | Done  | Description
----------------------------------------
1    | (1)       | True  | Get some milk.
2    | (3)       | False | Clean the house.
3    | (2)       | False | Wash the car.
----------------------------------------

(venv) $ python -m rptodo remove 1
Delete to-do # 1: Get some milk.? [y/N]:
Operation canceled

(venv) $ python -m rptodo remove 1
Delete to-do # 1: Get some milk.? [y/N]: y
to-do # 1: 'Get some milk.' was removed

(venv) $ python -m rptodo list

to-do list:

ID.  | Priority  | Done  | Description
----------------------------------------
1    | (3)       | False | Clean the house.
2    | (2)       | False | Wash the car.
----------------------------------------
In this group of commands, you first list all the current to-dos with the list command. Then you try to remove the to-do with the ID number 1. This presents you with a yes (y) or no (N) confirmation prompt. If you press Enter, then the application runs the default option, N, and cancels the remove action.
Note: If you’re using a Typer version greater than 0.3.2, then the confirmation prompt in the example above may look and behave differently.
On macOS, for example, there’s no default answer to the confirmation prompt:
$ # Typer version 0.4.0 on macOS
$ python -m rptodo remove 1
Delete to-do # 1: Get some milk.? [y/n]:
Error: invalid input
If that’s what happens in your case, then you need to explicitly provide an answer at the command line and then press Enter.
In the third command, you explicitly supply a y answer, so the application removes the to-do with ID number 1. If you list all the to-dos again, then you see that the to-do "Get some milk." is no longer in the list. As an experiment, go ahead and try to use the --force or -f option or try to remove a to-do that’s not in the list.
Implement the clear CLI Command
In this section, you’ll implement the clear command. This command will allow your users to remove all the to-dos from the database. Underneath the clear command is the .remove_all() method from Todoer, which provides the back-end functionality.
Go back to rptodo.py and add .remove_all() at the end of Todoer:
# rptodo/rptodo.py
# ...

class Todoer:
    # ...
    def remove_all(self) -> CurrentTodo:
        """Remove all to-dos from the database."""
        write = self._db_handler.write_todos([])
        return CurrentTodo({}, write.error)
Inside .remove_all(), you remove all the to-dos from the database by replacing the current to-do list with an empty list. For consistency, the method returns a CurrentTodo tuple with an empty dictionary and an appropriate return or error code.
Now you can implement the clear command in the application’s CLI:
 1# rptodo/cli.py
 2# ...
 3
 4@app.command()
 5def remove(
 6    # ...
 7
 8@app.command(name="clear")
 9def remove_all(
10    force: bool = typer.Option(
11        ...,
12        prompt="Delete all to-dos?",
13        help="Force deletion without confirmation.",
14    ),
15) -> None:
16    """Remove all to-dos."""
17    todoer = get_todoer()
18    if force:
19        error = todoer.remove_all().error
20        if error:
21            typer.secho(
22                f'Removing to-dos failed with "{ERRORS[error]}"',
23                fg=typer.colors.RED,
24            )
25            raise typer.Exit(1)
26        else:
27            typer.secho("All to-dos were removed", fg=typer.colors.GREEN)
28    else:
29        typer.echo("Operation canceled")
30
31def _version_callback(value: bool) -> None:
32    # ...
Here’s how this code works:
-
Lines 8 and 9 define
remove_all()as a Typer command using the@app.command()decorator withclearas the command name. -
Lines 10 to 14 define
forceas a TyperOption. It’s a required option of the Boolean type. Thepromptargument asks the user to enter a proper value toforce, which can be eitheryorn. -
Line 13 provides a help message for the
forceoption. -
Line 17 gets the usual
Todoerinstance. -
Line 18 checks if
forceisTrue. If so, then theifcode block removes all the to-dos from the database using.remove_all(). If something goes wrong during this process, the application prints an error message and exits (lines 21 to 25). Otherwise, it prints a success message on line 27. -
Line 29 runs if the user cancels the remove operation by supplying a false value, indicating no, to
force.
To give this new clear command a try, go ahead and run the following on your terminal:
(venv) $ python -m rptodo clear
Delete all to-dos? [y/N]:
Operation canceled

(venv) $ python -m rptodo clear
Delete all to-dos? [y/N]: y
All to-dos were removed

(venv) $ python -m rptodo list
There are no tasks in the to-do list yet
In the first example, you run clear. Once you press Enter, you get a prompt asking for yes (y) or no (N) confirmation. The uppercase N means that no is the default answer, so if you press Enter, you effectively cancel the clear operation.
In the second example, you run clear again. This time, you explicitly enter y as the answer to the prompt. This answer makes the application remove the entire to-do list from the database. When you run the list command, you get a message communicating that there are no tasks in the current to-do list.
That’s it! Now you have a functional CLI to-do application built with Python and Typer. Your application provides commands and options to create new to-dos, list all your to-dos, manage the to-do completion, and remove to-dos as needed. Isn’t that cool?
Conclusion
Building user-friendly command-line interface (CLI) applications is a fundamental skill to have as a Python developer. In the Python ecosystem, you’ll find several tools for creating this kind of application. Libraries such as argparse, Click, and Typer are good examples of those tools in Python. Here, you built a CLI application to manage a list of to-dos using Python and Typer.
In this tutorial, you learned how to:
- Build a to-do application with Python and Typer
- Add commands, arguments, and options to your to-do application using Typer
- Test your to-do application using Typer’s
CliRunnerand pytest in Python
You also practiced some additional skills, such as working with JSON files using Python’s json module and managing configuration files with Python’s configparser module. Now you’re ready to build command-line applications.
You can download the entire code and all the resources for this project by clicking the link below and going to the source_code_final/ directory:
Get Source Code: Click here to get the source code you’ll use to build a to-do app for your command line using Python and Typer.
Next Steps
In this tutorial, you’ve built a functional to-do application for your command line using Python and Typer. Even though the application provides only a minimal set of features, it’s a good starting point for you to continue adding features and keep learning in the process. This will help you take your Python skills to the next level.
Here are a few ideas you can implement to continue extending your to-do application:
-
Add support for dates and deadlines: You can use the
datetimemodule to get this done. This feature will allow the users to have better control over their tasks. -
Write more unit tests: You can use pytest to write more tests for your code. This will increase the code coverage and help you improve your testing skills. You may discover some bugs in the process. If so, go ahead and post them in the comments.
-
Pack the application and publish it to PyPI: You can use Poetry or another similar tool to package your to-do application and publish it to PyPI.
These are just a few ideas. Take the challenge and build something cool on top of this project! You’ll learn a lot in the process.