In this part, we’ll set up Redis on Heroku and look at how to run both a web and worker process on a single dyno as we update the staging environment with the word count functionality.
Updates:
- 03/22/2016: Upgraded to Python version 3.5.1.
- 02/22/2015: Added Python 3 support.
Remember: Here’s what we’re building—A Flask app that calculates word-frequency pairs based on the text from a given URL.
- Part One: Set up a local development environment and then deploy both a staging and a production environment on Heroku.
- Part Two: Set up a PostgreSQL database along with SQLAlchemy and Alembic to handle migrations.
- Part Three: Add in the back-end logic to scrape and then process the word counts from a webpage using the requests, BeautifulSoup, and Natural Language Toolkit (NLTK) libraries.
- Part Four: Implement a Redis task queue to handle the text processing.
- Part Five: Set up Angular on the front-end to continuously poll the back-end to see if the request is done processing.
- Part Six: Push to the staging server on Heroku - setting up Redis and detailing how to run two processes (web and worker) on a single Dyno. (current)
- Part Seven: Update the front-end to make it more user-friendly.
- Part Eight: Create a custom Angular Directive to display a frequency distribution chart using JavaScript and D3.
Need the code? Grab it from the repo.
Test Push
Start by pushing up the code in its current state and see what needs to be fixed:
$ cd flask-by-example
$ git add -A
$ git commit -m "added angular and the backend worker process"
$ git push stage master
$ heroku open --app wordcount-stage
Make sure to replace
wordcount-stagewith the name of your app.
Try to run a quick test to see if the word counting feature works. Nothing should happen. Why?
Well, If you open the “Network” tab in “Chrome Developer Tools”, you’ll see that the post request to the /start endpoint returned a 500 (Internal Server Error) status code:
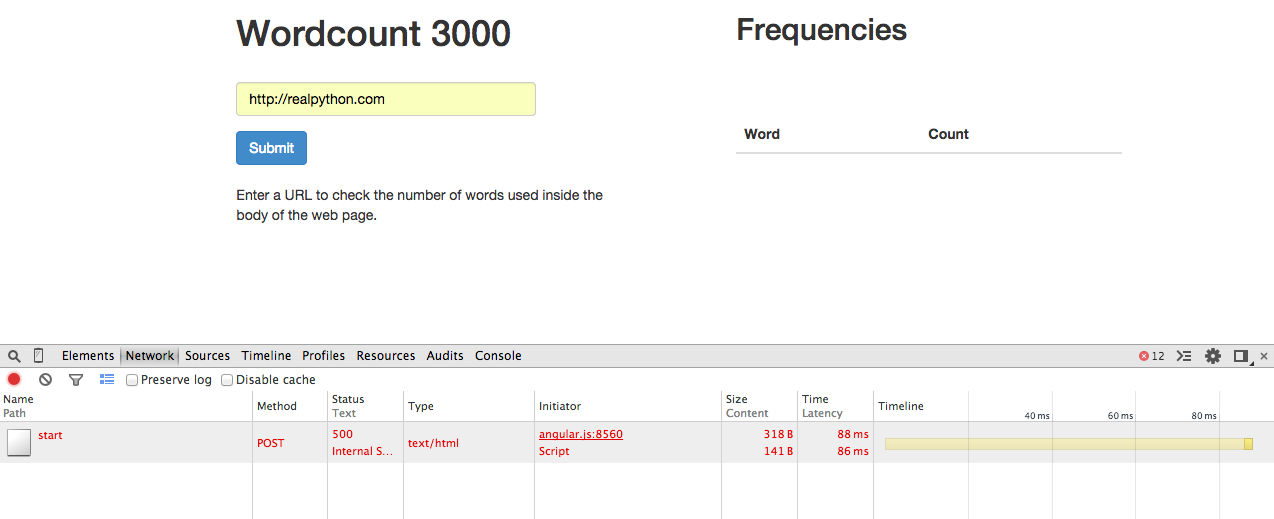
Think about how we ran this app locally: We ran a worker process and the Redis server along with the Flask development server. The same needs to happen on Heroku.
Redis
Start by adding Redis to the staging app:
$ heroku addons:create redistogo:nano --app wordcount-stage
You can test to make sure the REDISTOGO_URL has been set as an environment variable with the following command:
$ heroku config --app wordcount-stage | grep REDISTOGO_URL
We need to make sure we’re linking to the Redis URI in our code, which actually is already set up. Open up worker.py and find this code:
redis_url = os.getenv('REDISTOGO_URL', 'redis://localhost:6379')
Here we first tried to use the URI associated with the environment variable, REDISTOGO_URL. And if that variable does not exist (like in our local environment), then we used the redis://localhost:6379 URI. Perfect.
Be sure to check out the official Heroku documentation for more on working with Redis.
With Redis setup, we now just need to get our worker process up and running.
Worker
Heroku allows you to run one free dyno. And you should run one process per dyno. In our case, the web process should run in one dyno and the worker process should run in another. However, since we’re working on a small project, there is a workaround that we can employ to run both processes on one dyno. Keep in mind that this method is not recommended for larger projects, as the processes will not properly scale as traffic increases.
First, add a bash script called heroku.sh to the root directory:
#!/bin/bash
gunicorn app:app --daemon
python worker.py
Then, update the Procfile with the following:
web: sh heroku.sh
Now both the web (demonized, in the background) and worker (in the foreground) processes are ran under the web process in the Procfile.
Please note that there are other ways of running a web and worker for free on Heroku. We’ll look at an alternative method in a future post (if there’s interest).
Let’s test this out locally before pushing to the staging server. In a new terminal window, run the Redis server - redis-server. Then run heroku local:
$ heroku local
forego | starting web.1 on port 5000
web.1  | 18:17:00 RQ worker 'rq:worker:Michaels-MacBook-Air.9044' started, version 0.5.6
web.1  | 18:17:00
Navigate to http://localhost:5000/ and test the application out. It should work.
Commit your changes, and then push to Heroku. Test it out.
Conclusion
Homework! Although we have much more to do, the application does work - so let’s get an iteration out there for the world to see. Update the production environment, using the same workflow.
Links:
Leave questions and comments below.